Home
Welcome to the ispcfg3 wiki!

To install this module, add a folder to your WHMCS install under modules/servers/ called ispcfg3 and copy the ispcfg3.php to this folder.
The log in to your ISPConfig Hosting Control Panel server and add a Remote User under System, Remote Users.
Click Add new User and choose a username and password and tick all the options available on that page and click Save.

If you have not created any Templates in ISPConfig, then you will also need to create at least one template before you can start using this module. I will not go into details on how to add a template, as that is covered on the ISPConfig forum, wiki and manual.[ISPConfig Main Template](http://www.cwispy.com/gitimages/ispcfg3_template.png) (click link for full size image)

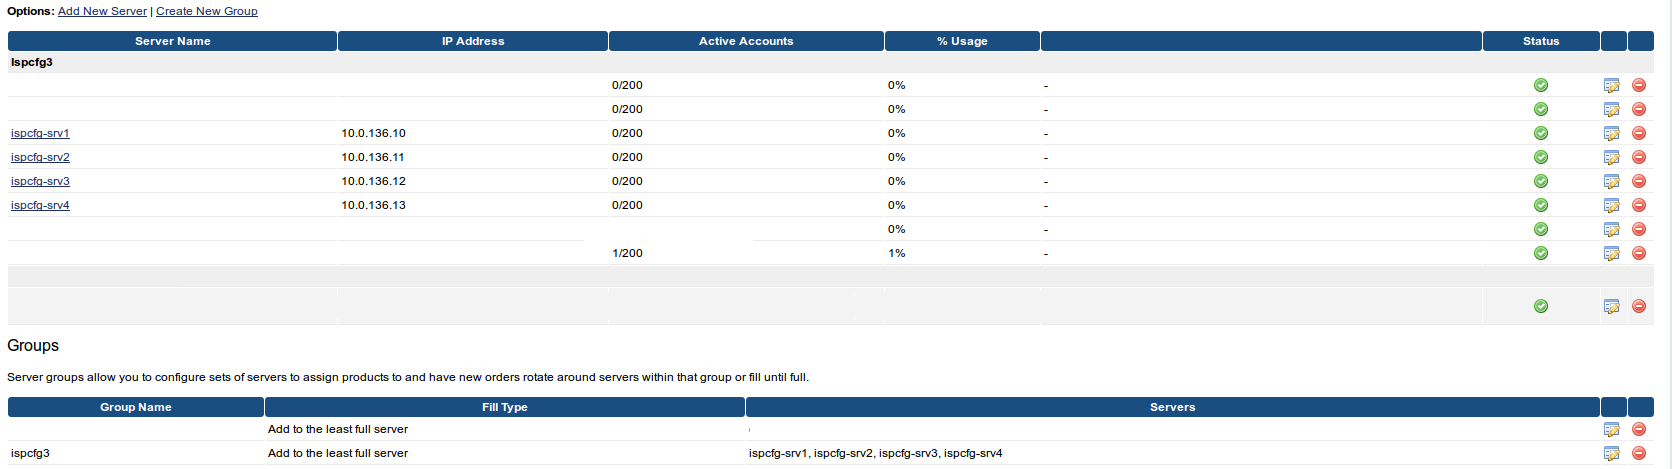
Now go back to your WHMCS server and go to Setup → Products/Services → Servers.
In here you need to add your ISPConfig Server or Servers if you have multiple servers. Click on Add new server and fill out the Name, Hostname and IP Address. Make sure that the Hostname and IP address are exactly the same as those you have in ISPConfig on the System page. At the bottom of the page, be sure to choose ispcfg3 as the Type. You can leave the username and password fields blank as they are not used.
[WHMCS Add Servers](http://www.cwispy.com/gitimages/whmcs_servers_add.png) (click link for full size image)
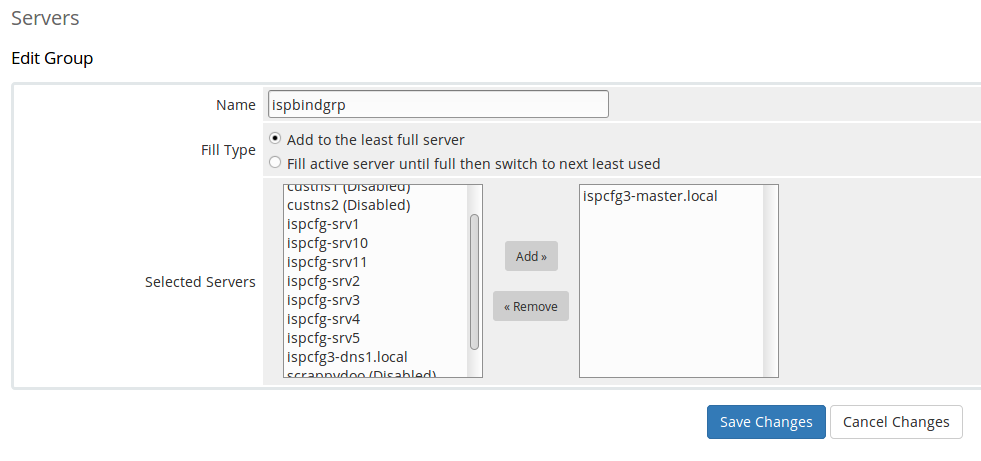
Once you have added the servers, you can create groups of servers that match your Templates in ISPConfig. Click Create New Group. Choose a name for the server group. It is not important what you name the group as it is only used by WHMCS. Then add the servers from the left box to the right box and click save changes.
[WHMCS Server Group](http://www.cwispy.com/gitimages/whmcs_server_group.png) (click link for full size image)
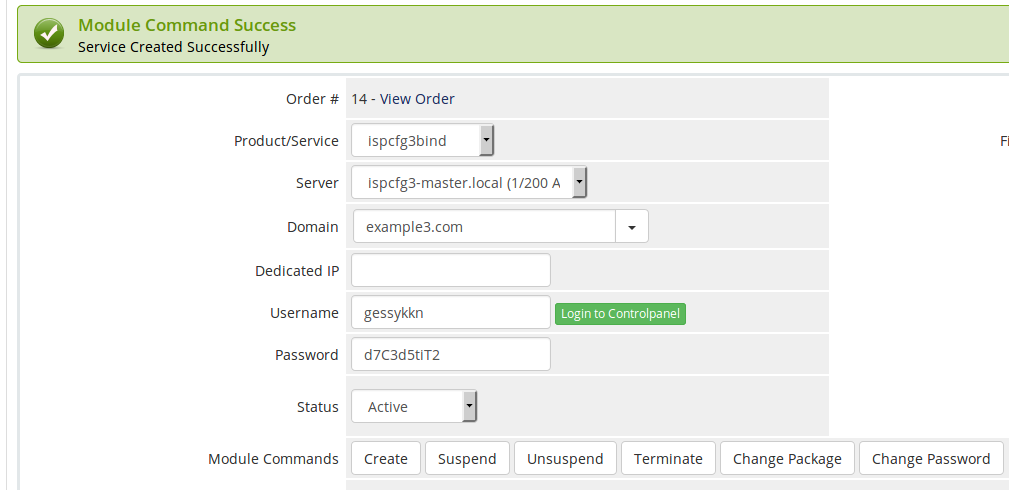
After you have added the server group, go to Setup → Products/Services → Products/Services.
Either create a new product, or select an existing product and click the Modules Settings tab.
[WHMCS Ispcfg3 product configuration](http://www.cwispy.com/gitimages/ispcfg3_product_config.png) (click link for full size image)

Choose Ispcfg3 as the Module Name and choose a server group with the ISPCfg servers you are going to use for this product. Fill in the fields on the module page and save changes.
You should now be able to automatically provision and unprovision services in ISPConfig from your WHMCS instance as well as suspend services for non payment etc.
Enjoy