This is a reference on how to setup a new ember app in our infrastructure.
If the ember app is going to exist in a subpath of https://emberjs.com, e.g., https://emberjs.com/api then the term api is going to be important for us in multiple aspects. Let us use this subpath in this guide to understand more,
-
Ensure there are no files/folders in the emberjs website source named
api. If it does exist, delete them in the branch that introduces the proxy changes for the new app. This is required since heroku static buildpack will serve the local files if they exist before considering the proxy routes. -
In the static.json add an entry under the
proxiessection as shown below. Its important not to hardcode the value here. This enables us to use staging urls of this app with the staging app of website on heroku. This variable is configured viasettingstab of the website app by clicking on theReveal Config Varsbutton. The key in this case would beEMBER_API_DOCS_URLand the value would be the fastly url of the ember app. You also need to configure this variable in theapp.json(see the link for reference).
//static.json
{
    "proxies": {
        "/api": {
          "origin": "${EMBER_API_DOCS_URL}"
        },
    }
}- Create a file with the name
Procfilewith the content below. This enables heroku to run purge on our fastly cache on post build but just before deployment during its release phase . In this scriptFASTLY_PURGE_KEYis the api token of any of the admins of our fastly account. If you're one of our fastly admin, you can create one under the personal API tokens page.FASTLY_SERVICE_IDis the service id of our app on fastly. You can find it by following these instructions
release: npm i -g fastly-cli && fastly purge-all -k $FASTLY_PURGE_KEY -s $FASTLY_SERVICE_ID- In the
config/environment.jsfile, afterrootURLadd two new fieldsrouterRootUrlwith value/andapiHostwith value''. Override their values for production as shown in this reference. - In
router.jschangerootURL: config.rootURLtorootURL: config.routerRootURL. This ensures internal links & redirection works as expected. - If your app fetches any static content from within the app then make sure you set the
hostfield of your ember data adapter with theapiHostfrom config. Follow the same if you have fetch/ajax calls with relative urls. In case the app uses prember then configure the host name as shown in deprecation app's application adapter. - In your
ember-cli-build.jsset thefingerprintprependvalue with the cdn url. Seedeprecation-app/ember-cli-build.jsfor reference. - Configure your
config/deploy.jsfile's production target as shown in this reference
-
Go to
https://manage.fastly.com/services/all, click onCREATE SERVICE. Fill in details as shown in the screenshot below. Note that there's a naming convention to follow depending on the app name in heroku. The url we enter in the domain field will be theFASTLY_DOMAINvariable's value in heroku.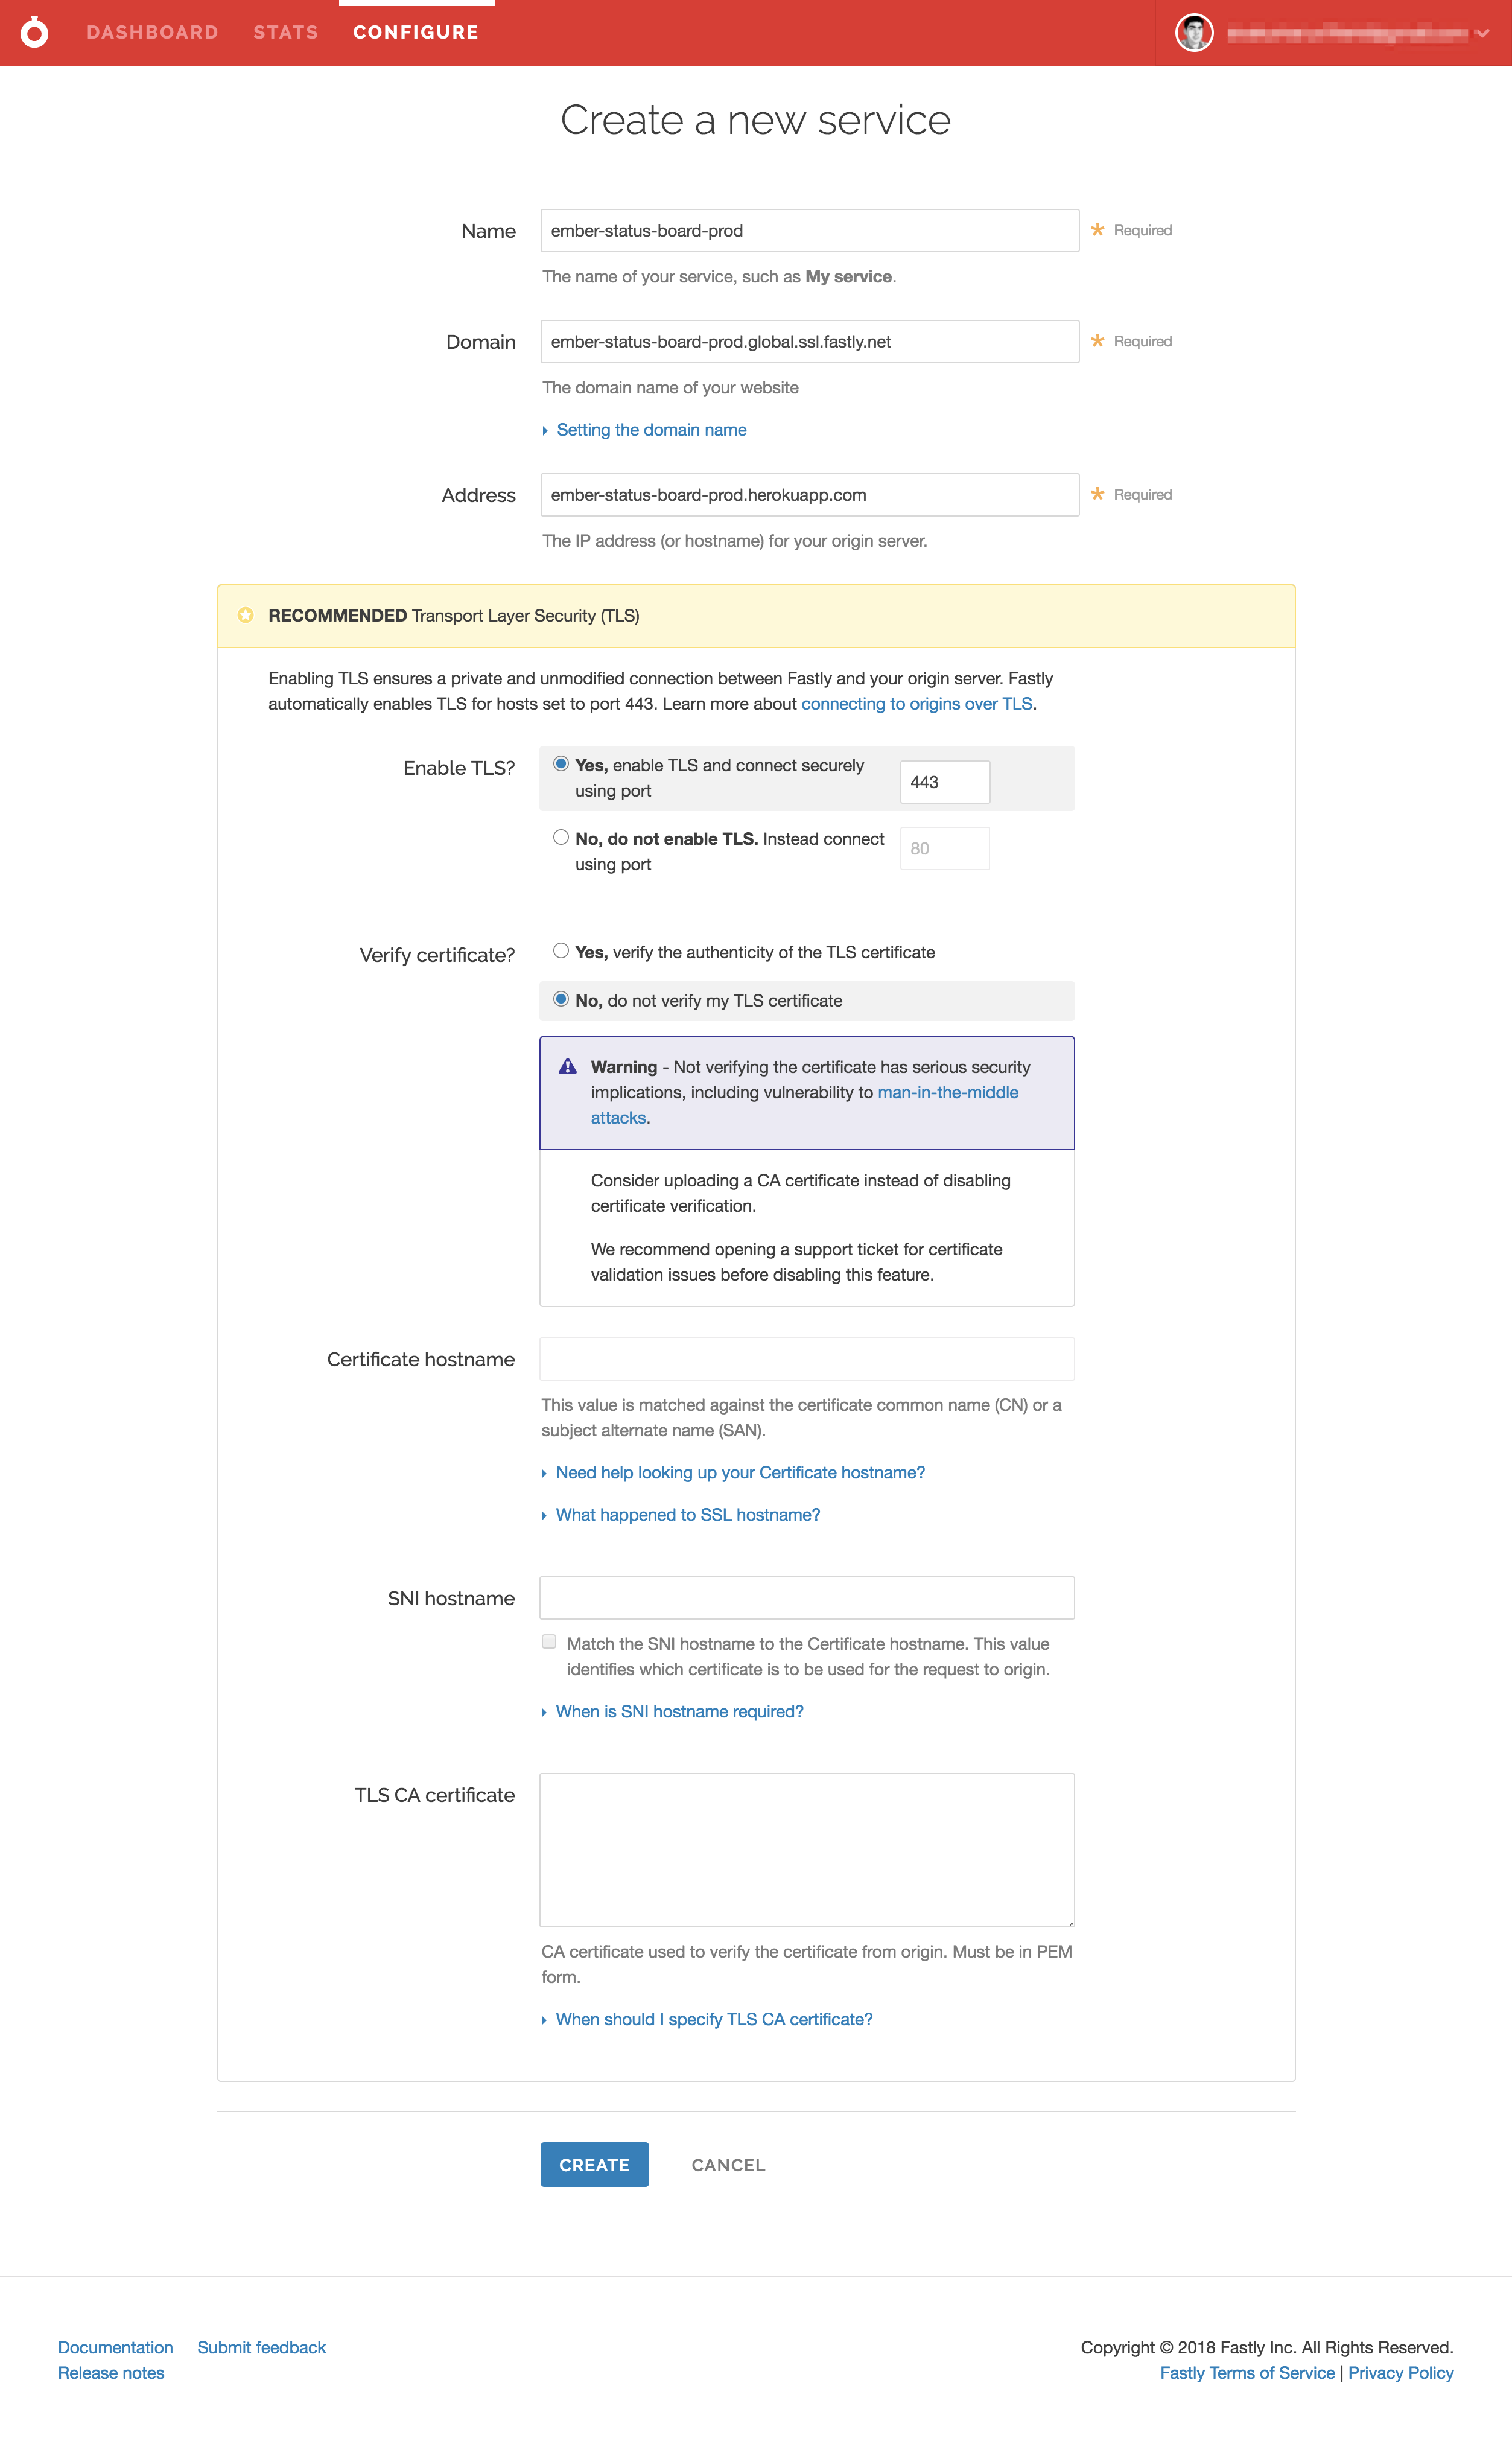
-
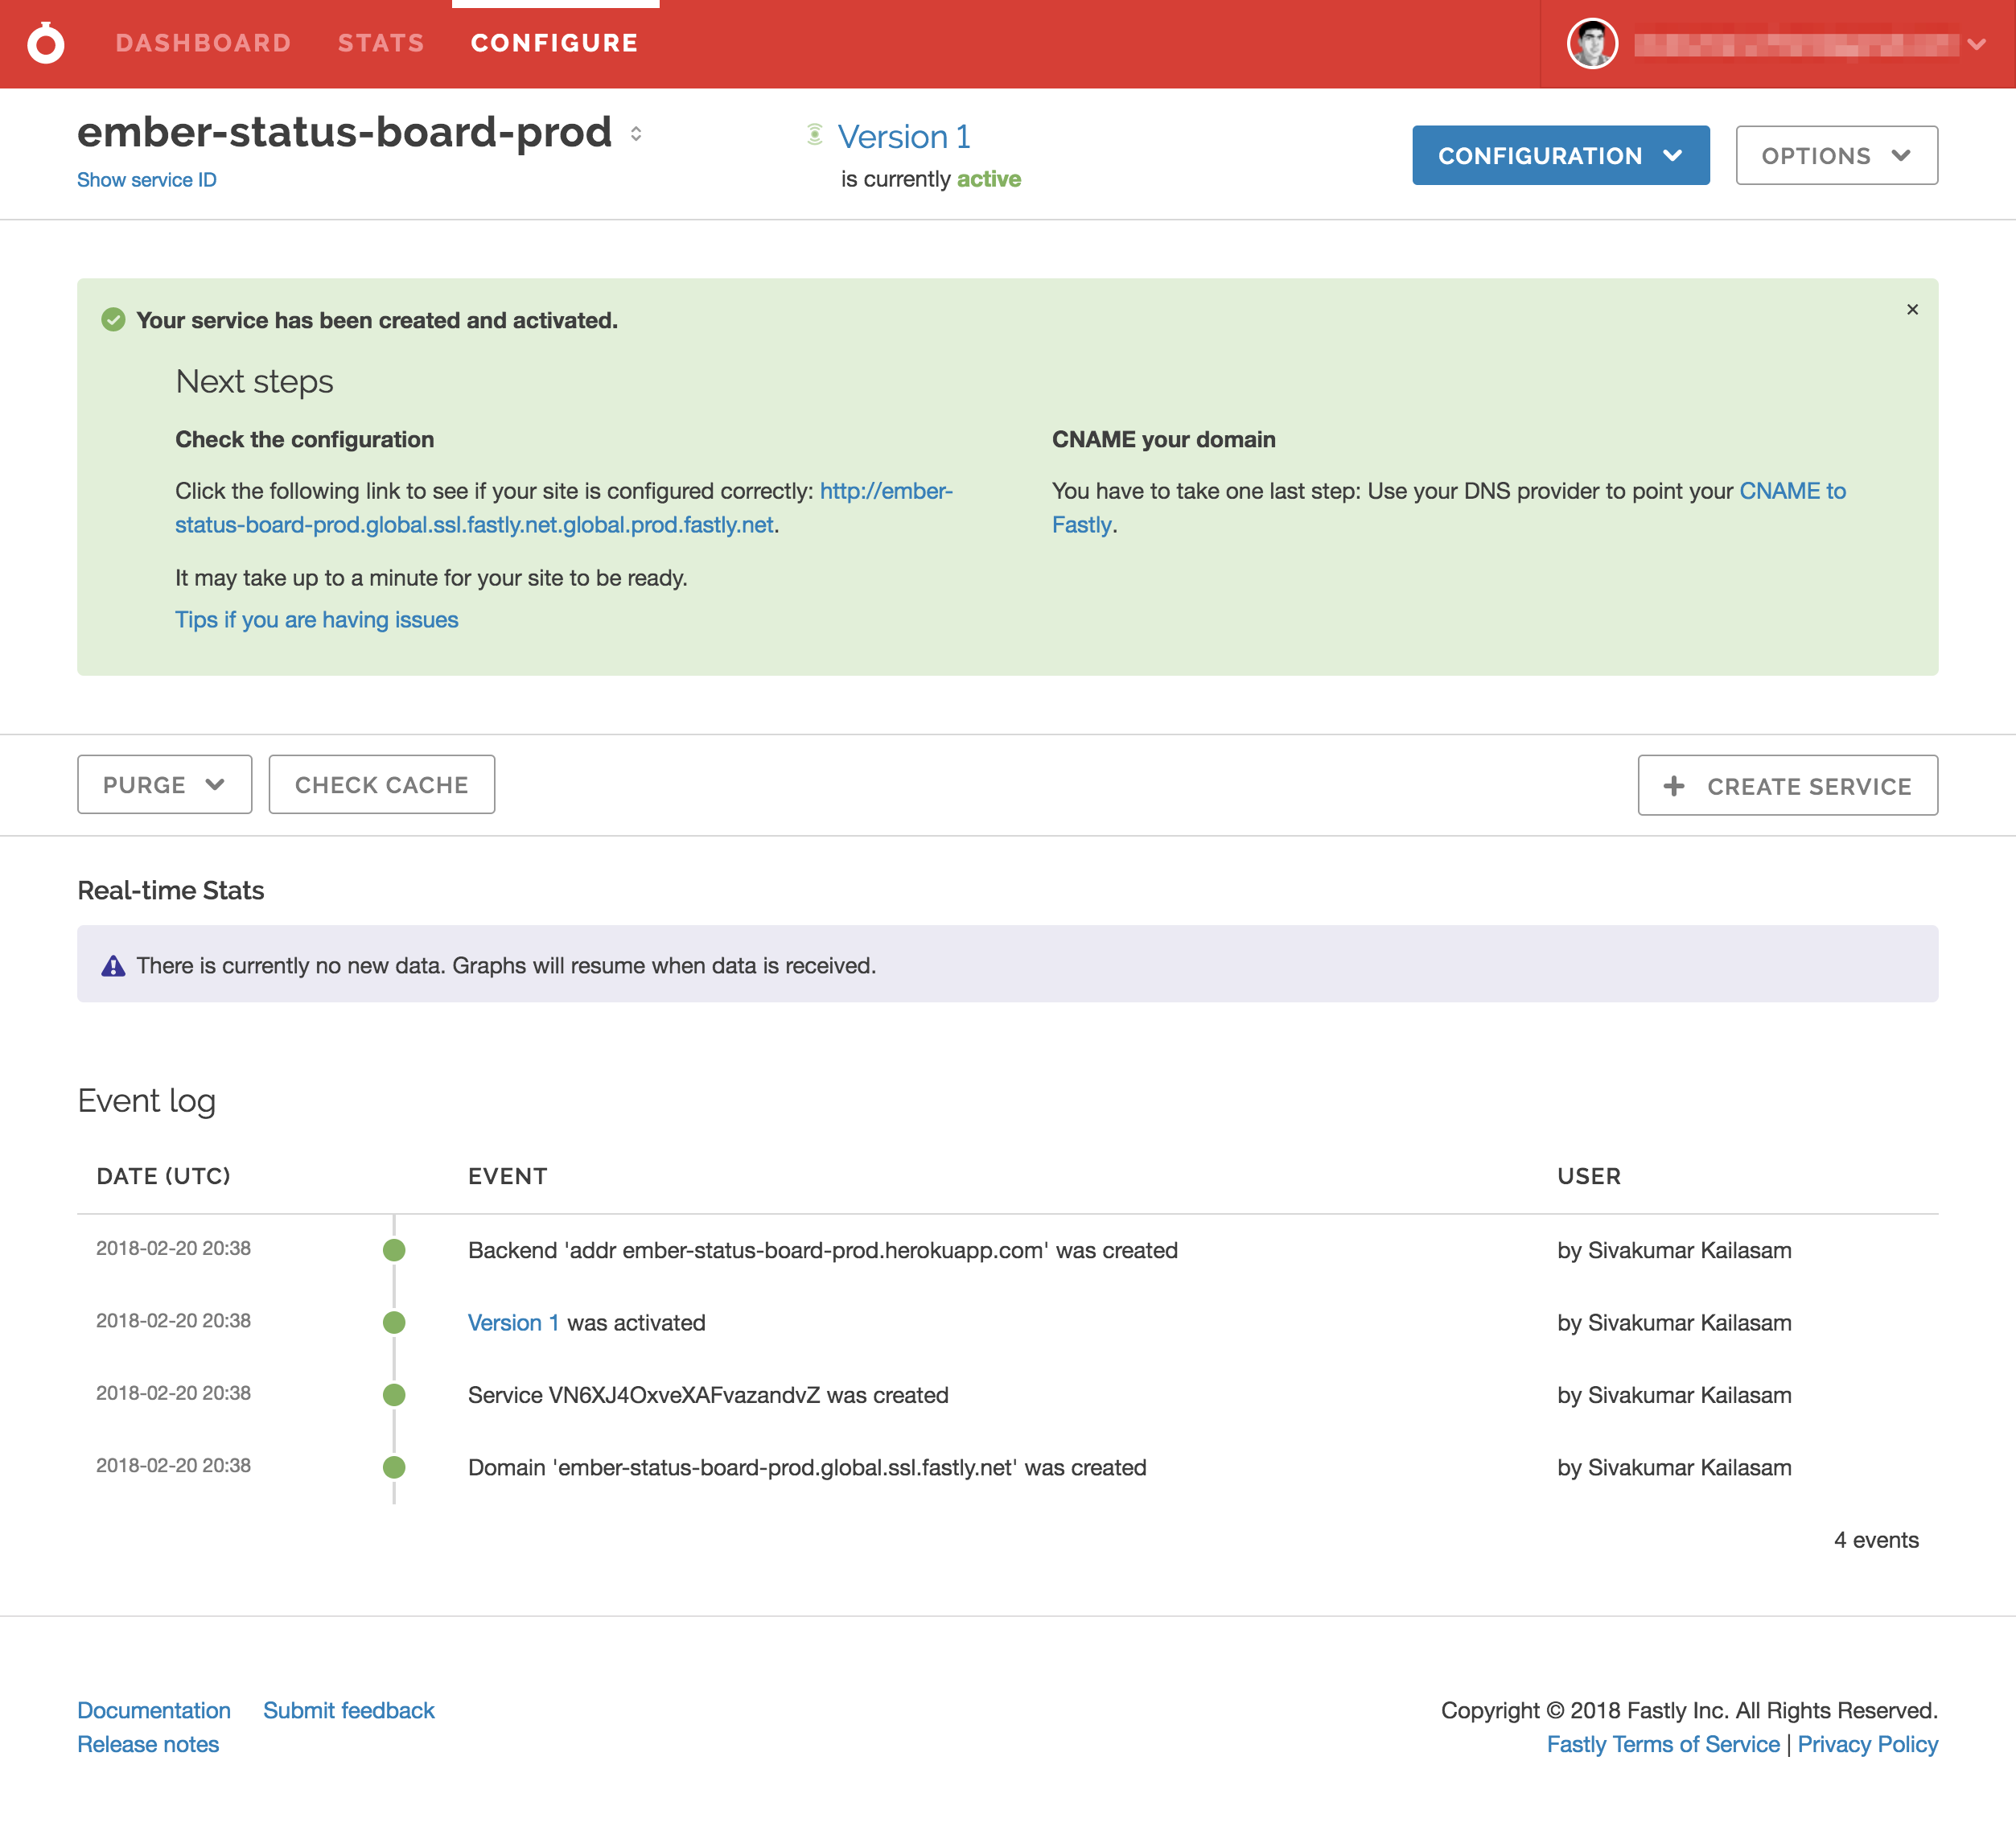
Once created, you'll see the following page.
-
Click on
CONFIGURATIONdropdown and click onclone active. On the left nav, clickContent. UnderHeaderssection click onCREATE YOUR FIRST HEADER. Set the exact content from the screenshot below & save it.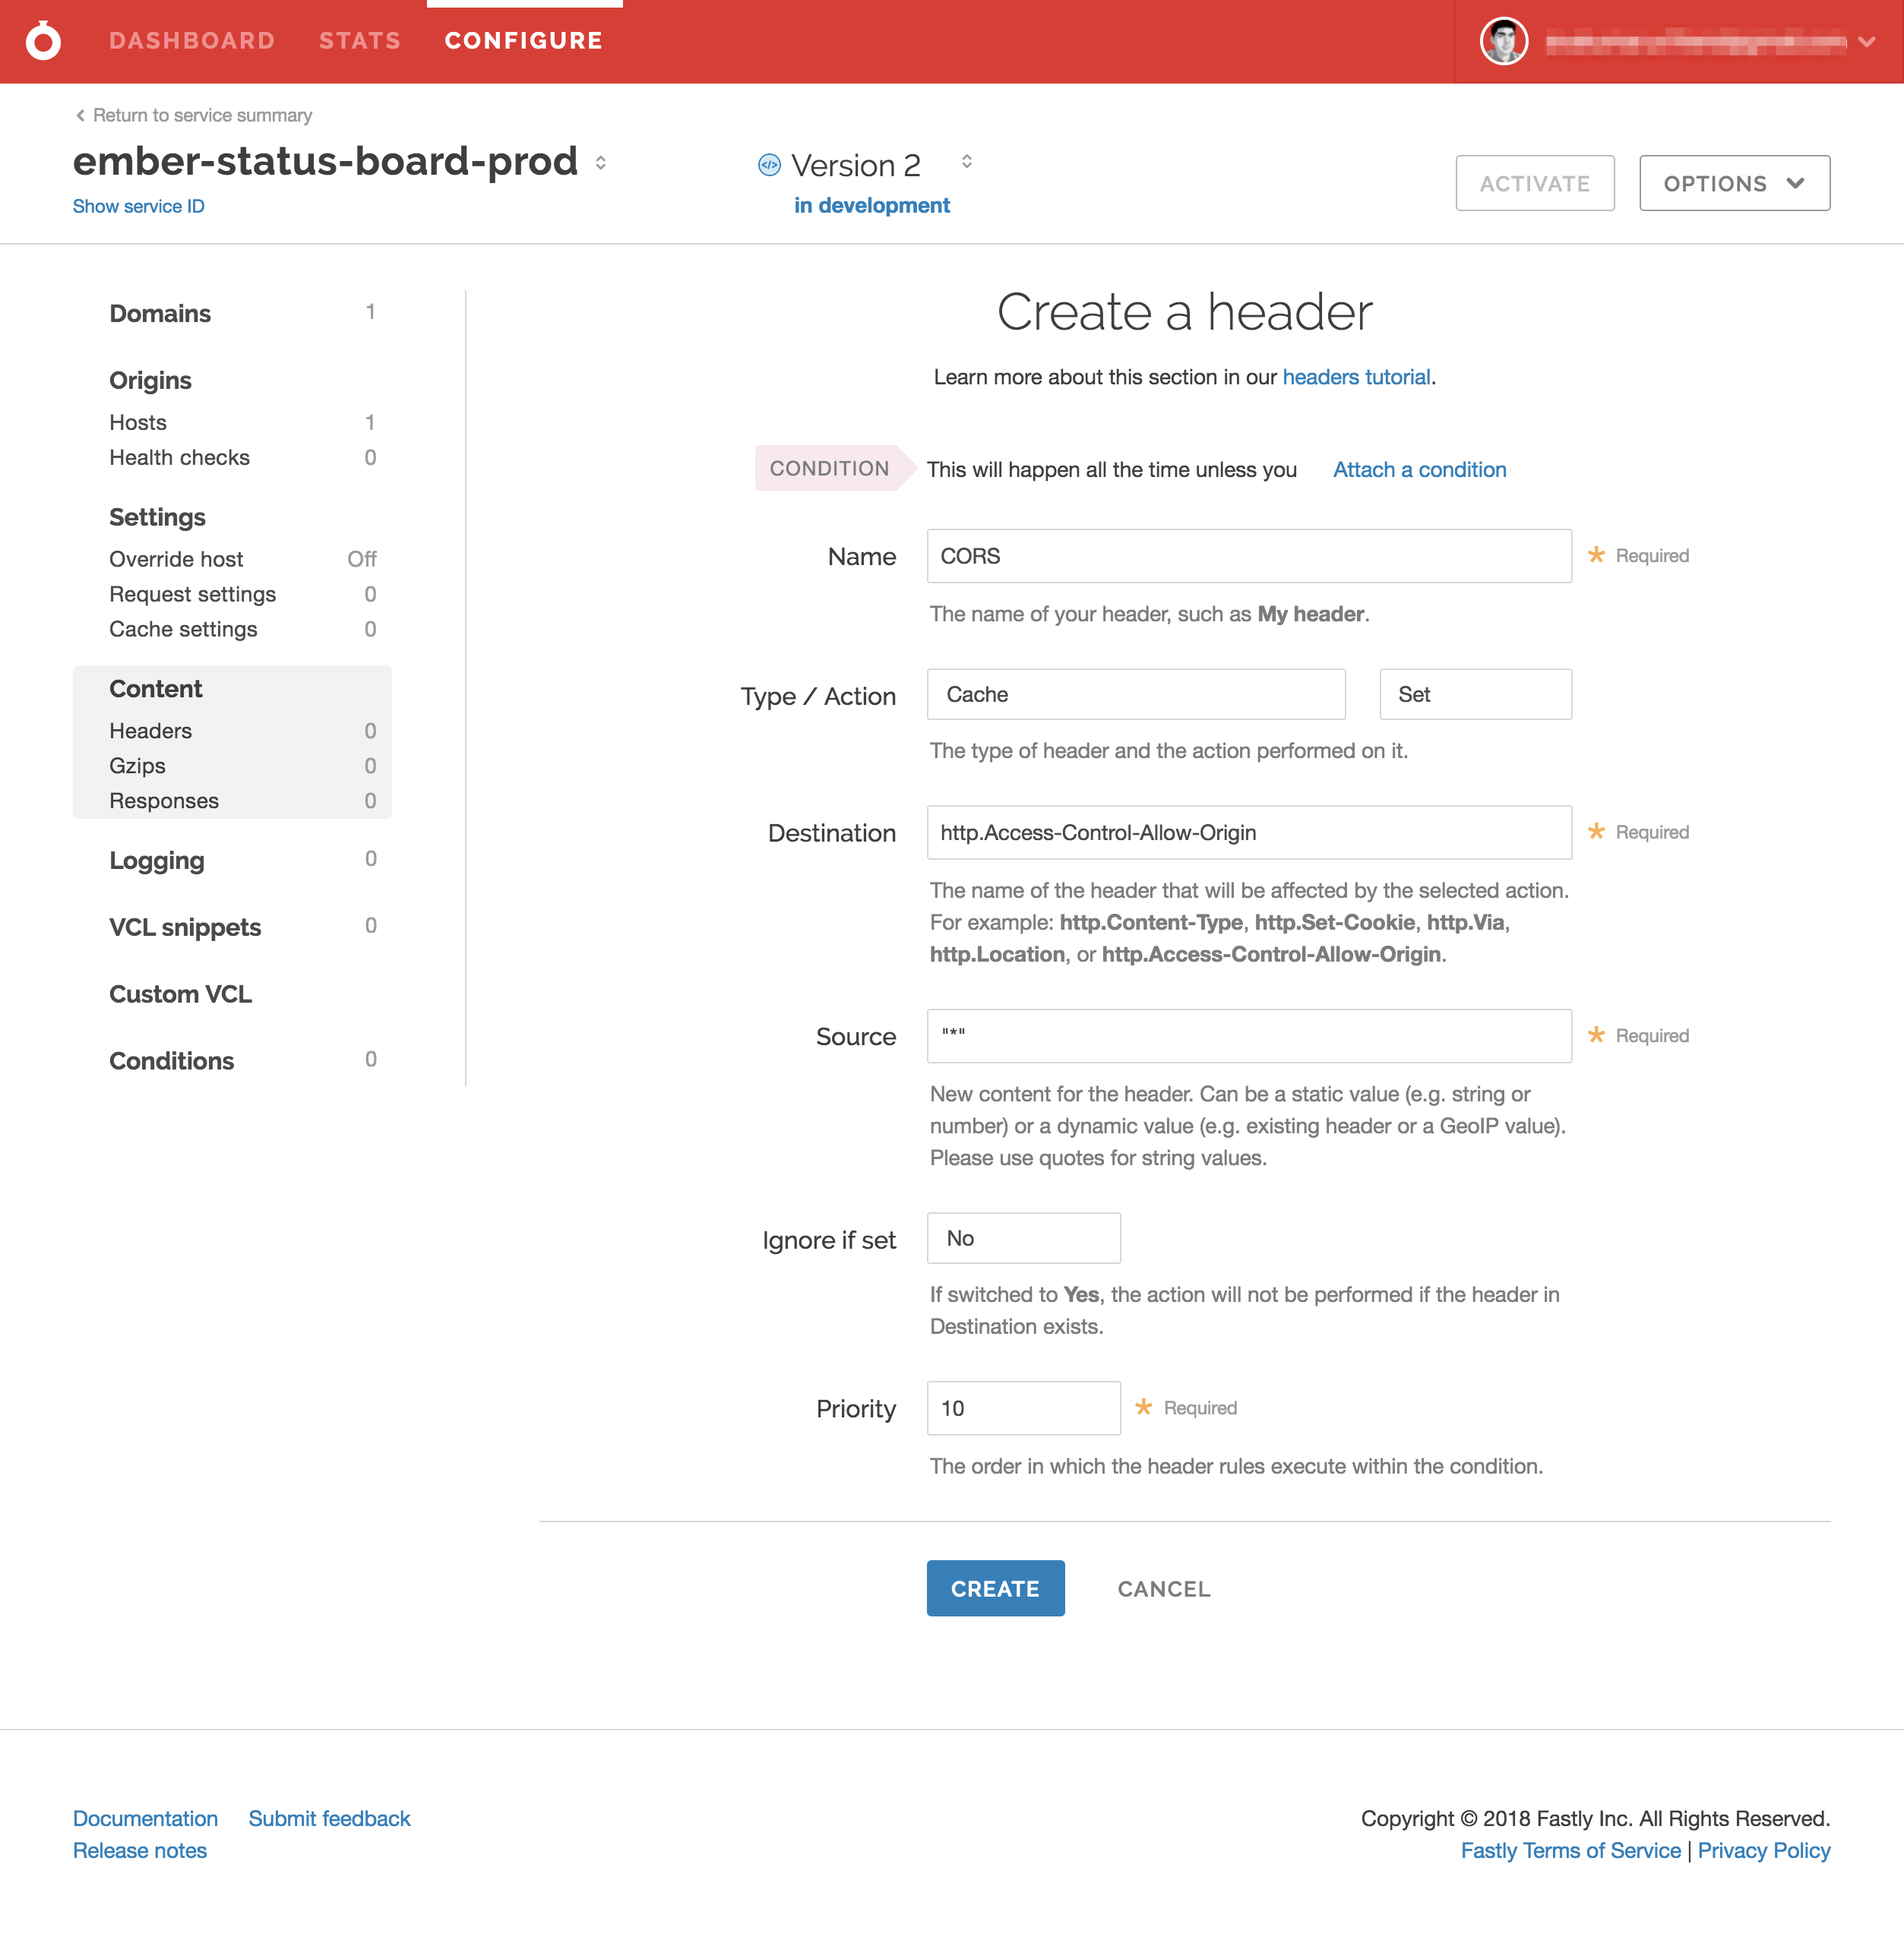
-
On the same page click on
SET UP GZIPand clickCREATE. -
Once these are done, click on the
ACTIVATEbutton to activate the new changes.