Add or modify another language
We use for our translations a software called Zeta Resource Editor. You can download it for free using the following link:
There's also a portable version available.
You will need an Github account for any further steps - create one if not done yet.
Then follow the guide Contributing to a project which explains how to fork a project on Github until Clone your fork.
If you just want the source code, download it here
Open the Zeta Resource project file, located under SoundSwitch\SoundSwitch.zreproj with the Zeta Resource Editor.
- Open the Project Panel.
- Double-click onto any of the groups inside the panel.
- The translations are shown in the middle of the screen.

Feel free to navigate through the files and edit the translations. Don't forget to the save your changes.
TRY TO AVOID CHANGING THE "Name" OF THE TRANSLATIONS (e.g. activePlayback).
To add an entire new language you need to repeat the following steps for each group inside the Project Panel - see (2) from above.
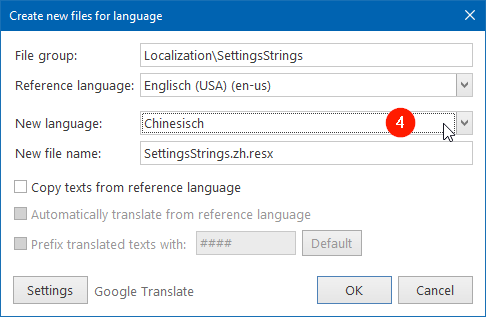
- Open the first group - for example Localization\SettingsStrings like shown in the screenshot above.
- Navigate to File groups and tags > Create new file for language.
- Select your language from the New language dropdown menu and press OK.
After doing this for all groups, close all group tabs and reopen them to see the new column of your language.
Close the Zeta Resource Editor and start the SoundSwitch\CleanTranslationProjectFile.bat file once - done.
This step must be done under the following situations:
- Any English translation was modified.
- Any Name key (e.g. activePlayback) was modified.
- Any translations were added or removed.
- A new language was added.
After adding a new language using Zeta, open up Visual Studio and navigate to Localization.
- Include new added files into the Visual Studio project:
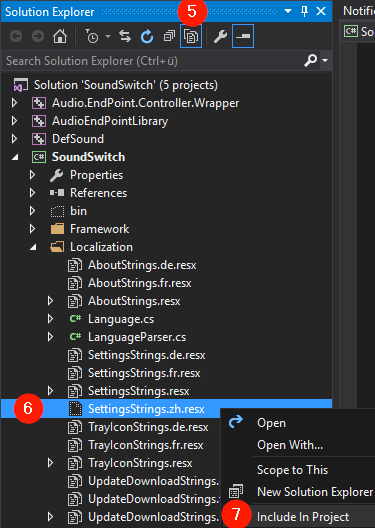
Open up Visual Studio and navigate to Localization
- Double-click onto the
*.resx(NOT *.de.resx) file which was modified (e.g.SettingsStrings.resx). (see 8->9) - Expand the
*.resxfile. (see ◢) - Right-click and Delete the
*.Designer.csfile. (see 10->11) - Change the Access Modifier of the still open
*.resxfile from Internal to Public and then back again.
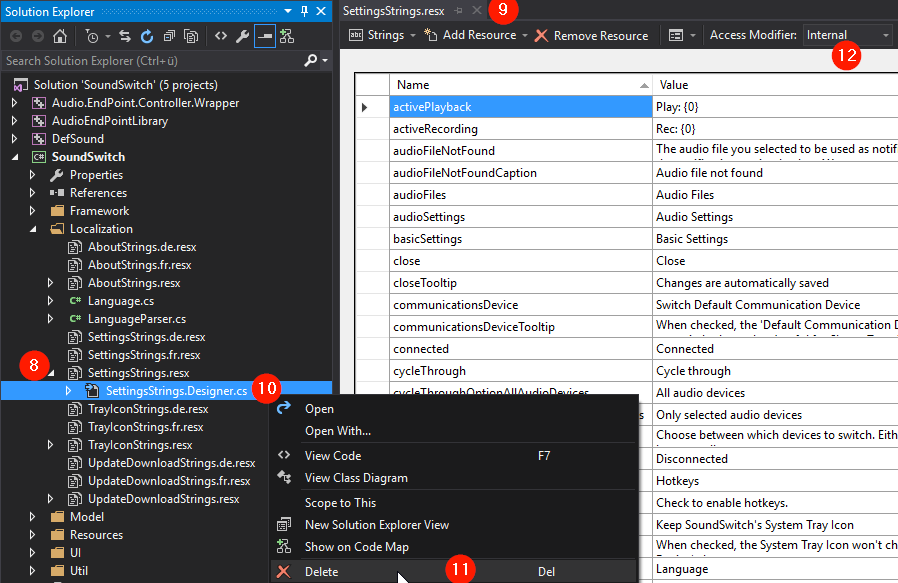
This procedure creates a new *.Designer.cs file for the changed resource files.
After all is done, follow our guide Contributing to a project and check the last two steps:
If you aren't practiced with Github, it's also possible that you zip the SoundSwitch\Localization folder as well as the SoundSwitch.zreproj file and open an issue including a link to your file.