User Dashboards
The "Patient dashboard" provides an overview of information needed to quickly assess patient conditions, planned visits and adherence feedback. It gives access to the details of the patient profile as well.
The "Caregiver dashboard" provides an overview of information about the patient(s) under his care. It gives access to the details of the caregiver profile as well.
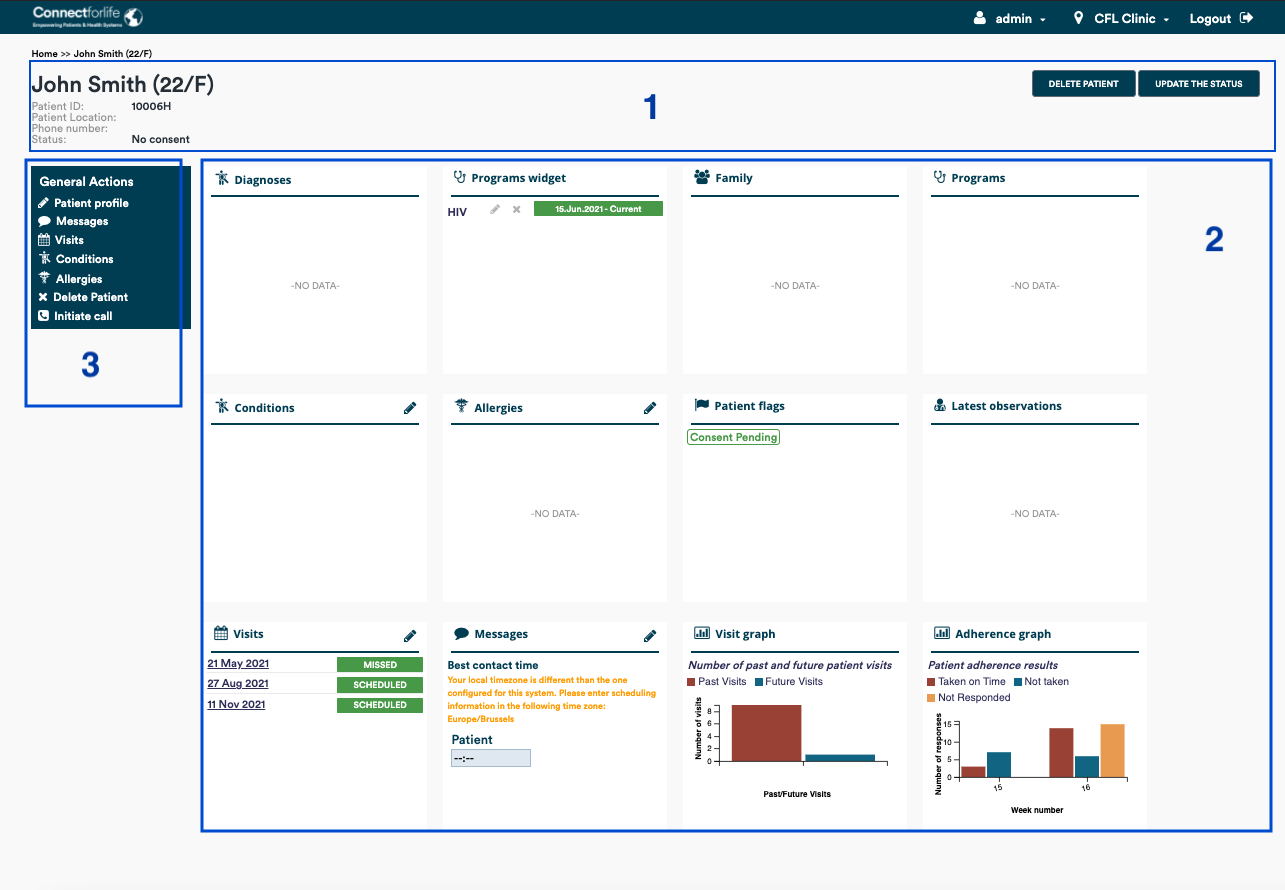
After clicking the desired patient from the "Search patient" page, the user is sent to the patient dashboard. It consists of a few elements:
- Header
- Widgets
- General actions panel
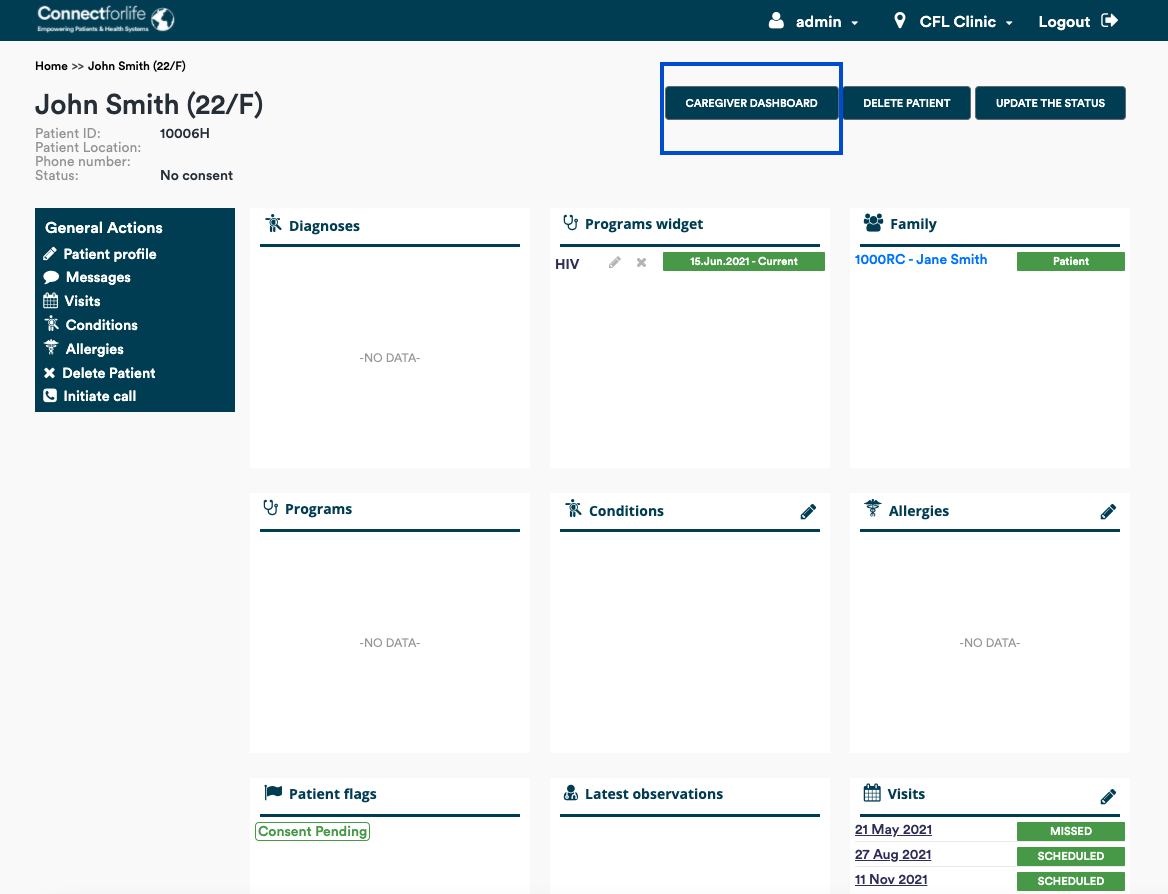
Note: If the patient is assigned as a caregiver to another patient, the link to this profile is available from the dashboard:
The Patient header displays basic information about the patient provided during the registration process. Additionally, generated and assigned ID and status of the patient are displayed.
Right after registration, the patient status is set to “No consent”. It’s required to obtain consent due to gaining a possibility to send automated Connect for Life™ messages.
The status can be changed to ‘Consent’ in three ways:
- Via a phone call initiated from the general actions panel (outbound call)
- Via the patient dialing in to the provided number (inbound call)
- Via the application user manually changing the status in the header
Consent validation can be turned off per implementation by the admin. See the "Consent validation" documentation for further information.
The patient header is displayed on every page.
### WidgetsInformation displayed on the widgets reflects the provided data.
- The "Messages" widget shows the best contact time scheduled for patient and caregiver(s) if added.
- The "Family" widget is populated with the relatives added in the patient profile.
- The "Adherence graph" widget reflects the patient’s answers to adherence report daily service. Answers can be displayed by week or month. Exemplary graph:

- The "Diagnoses" widget is populated from the intake and follow up visit notes. See the "Visit notes" documentation for further information.
- The "Program" widget shows to what programs the patient is enrolled. See the "Programs module" documentation for further information.
- The "Conditions" widget reflects conditions and symptoms from the patient. Only active conditions are shown on the widget. See the "Conditions module" documentation for further information.
- The "Allergies" widget shows the allergies from the patient. See the "Allergies module" documentation for further information.
- The "Patient flags" widget draws attention to issues that can be alarming. Exemplary flags:
- No consent - this flag is raised if consent is not given
- Low adherence flag - this flag is raised when patient's reported adherence is below a defined threshold for a defined period
- Wrong pin - is raised in a case when patient provides the wrong pin 3 times during one phone call
- See the "Patient flags" documentation for further information.
- "Latest observation" widget is populated from follow up visit notes and reflects the last observation. See the "Visit notes" documentation for further information.
- The "Visits" widget shows 1 past visit and 2 upcoming visits. This number of displayed visits is customizable. See the "Visits widget" documentation for further information.
A few of these modules can be customizable by concepts, for example the "Allergies" or "Programs" modules. See the "Concepts" documentation for further information.
### General actionsThe "General actions" panel consists of links to the modules that are needed to manage the patient in OpenMRS. The description of the items in the panel is available below.
This link allows editing patient information. This form is consistent with the registration form, including the same set of sections, in the same order.
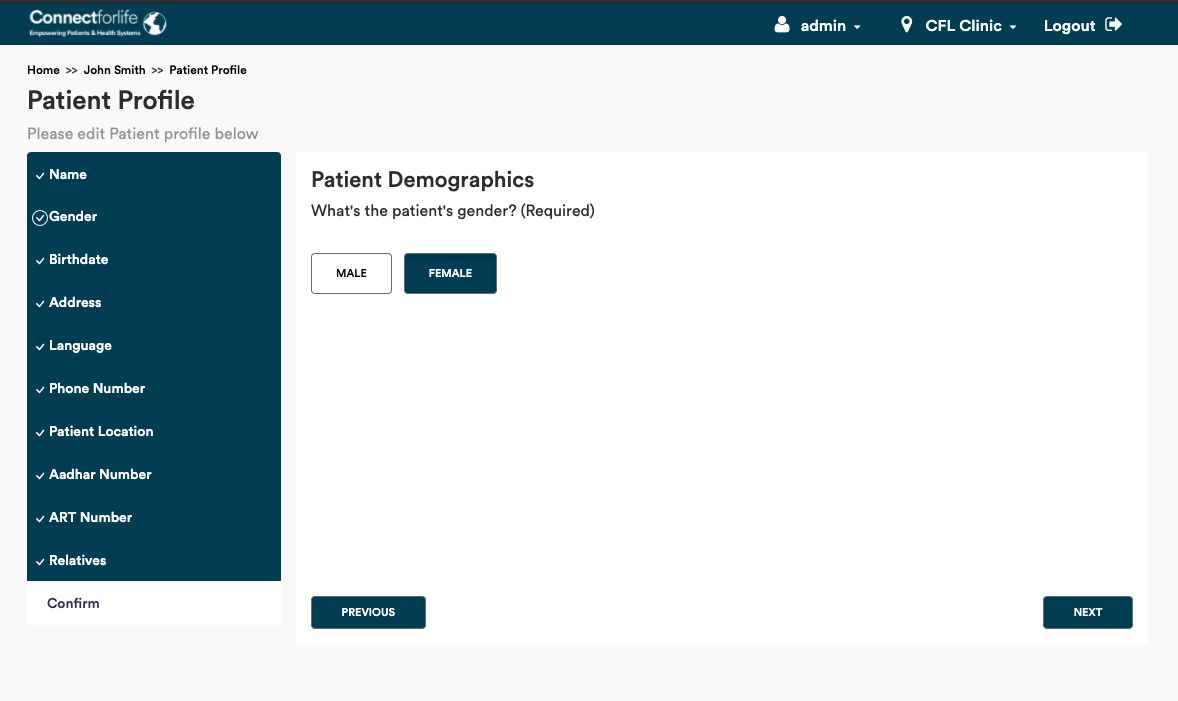
All of the provided changes are applied after saving the edit profile form. To save this form, the user needs to click on the “Confirm” button in the “Confirm” section.
See the "Patient registration" documentation for further information.
This link navigates the user to the "Messages" page. See the "Messages module" documentation for further information.
This link sends the user to the "Visit" page. See the "Visits module" documentation for further information.
This link navigates the user to the "Conditions" page. See the "Conditions module" documentation for further information.
This link navigates the user to the "Allergies" page. See the "Allergies module" documentation for further information.
This link causes patient removal from the system – that means that all of the provided information from all of the modules will be removed. The patient will be removed from his/her relatives widgets as well. A removed patient won’t be available on the patient records’ list.
After clicking “Delete Patient”, a confirmation dialog appears. At this point the user can cancel this process or confirm this. To successfully confirm patient removal, the reason for deletion needs to be provided.

This link is used to obtain a patient's consent to receive messages. While clicking this link, a phone call is performed to the provided phone number and a message asking for the consent is played. The patient needs to provide "yes" or "no" answer in order to change the patient status.
Positive answers result in status change to "Activated"; negative answers don't change anything on the patient profile.
Note: Call initiation for patients with statuses activated and deactivated results in the phone call to the provided phone number, but the patient is not asked for consent anymore.
After clicking the desired caregiver from the "Search caregiver" page, the user is sent to the caregiver dashboard. It consists of a few elements:
- Header
- Widgets
- General actions panel

Note: If this caregiver is also assigned as a caregiver for another patient, the link to the patient dashboard is available:

The Caregiver header displays basic information about the caregiver provided during the registration process. Additionally, generated and assigned ID and status of the caregiver are displayed.
Right after registration, the caregiver status is set to “No consent”. It’s required to get consent due to gain a possibility to send automated Connect for Life™ messages.
The status can be changed to ‘Consent’ in three ways:
- Via a phone call initiated from the general actions panel (outbound call)
- Via the caregiver dialing in to the provided number (inbound call)
- Via the application user manually changing the status in the header
Consent validation can be turned off per implementation by the admin. See the "Consent validation" documentation for further information.
The caregiver header is displayed on every page.
### WidgetsInformation displayed on the widgets reflects the provided data.
- Messages widget shows the best contact time scheduled for caregiver and patient(s) under his care.
- The "Family" widget is populated with the relatives added in the patient profile.
- The "Adherence graph" widget reflects his/her patient’s answers to adherence report daily service. Answers can be displayed by week or month. Exemplary graph:

Note: The "Adherence graph" for the caregiver aggregates the answers of all his/her patients. For example, if the caregiver is assigned to 2 patients, and during a week the answers to the adherence report daily question is 3x “yes” and 4x “no” for the first patient and 5x “yes” and 2x “no” for the second patient, then on the graph 2 bars will be displayed for this week, with 8 “yes” answers and 6 “no” answers.
### General actionsThe "General actions" panel consists of links to the modules that are needed to manage the caregiver in OpenMRS. The description of the items in the panel is available below.
This link allows editing caregiver information. This form is consistent with the registration form, including the same set of sections, in the same order.

All of the provided changes are applied after saving the edit profile form. To save this form, the user needs to click on the “Confirm” button in the “Confirm” section.
See the "Caregiver registration" documentation for further information.
This link navigates the user to the "Messages" page. See the "Messages module" documentation for further information.
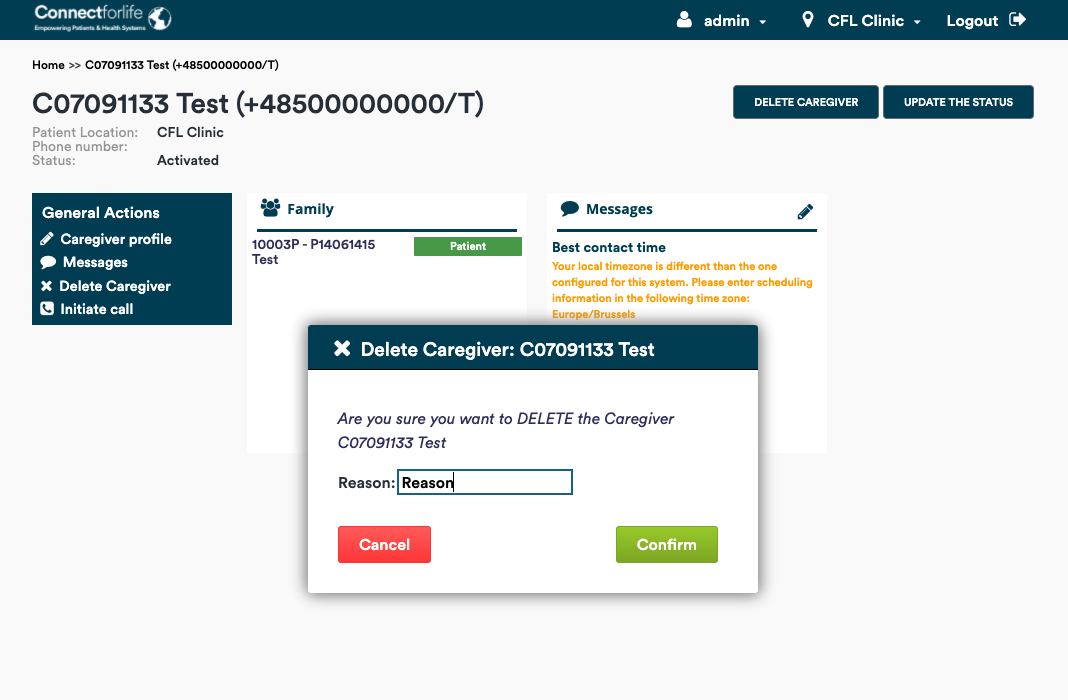
This link causes caregiver removal from the system – that means that all of the provided information from all of the modules will be removed. The caregiver will be removed from his/her relatives widgets as well. The removed caregiver won’t be available on the caregiver records’ list.
After clicking “Delete Caregiver” a confirmation dialog appears. At this point the user can cancel this process or confirm this. To successfully confirm caregiver removal, the reason needs to be provided.
This link is used to obtain the caregiver’s consent to receive messages. While clicking this link, a phone call is performed to the provided phone number and a message asking for the consent is played. The caregiver needs to provide "yes" or "no" answer in order to change the caregiver status.
Positive answers result in status change to "Activated"; negative answers don’t change anything on the caregiver profile.
Note: Call initiation for caregiver with statuses activated and deactivated results in the phone call to provided phone number, but the caregiver is not asked for consent.