
Please refer to the original project (in Japanese) from @kamino410.

Similar process with the 3D reconsturction with Structured Light 3D Scanning (see this page).
This git provides the sourcecode regards the projection mapping technique using Gray Code pattern. Technically, in order to project an image on the correct geometry of the projection target, the projector and the object surface should know the exactly corresponding location between each other. Unfortunately, the projector itself does not have eye. The only (easy) method to due with this is to add the camera into system. Therefore, instead of finding the corresponding between object and projector directly, in this case, we can find the relationship between projector-camera and object-camera. Precisely, find the intrinsic and extensic parateters of camera and projector.
In this case, we looking at the graycode method, which is the way to obtain the target surface information by projecting the pattern contain special code to the surface and capture it with the camera. Assumed the projector and camera setup is identical and sharing the axis, it is automatically obtain intrinsic and extensic including the mapping points between surface-camera-projector with a single shot.
Some related work
- Projector Optical Distortion Calibration Using Gray Code Patterns
- Shape Disparity Inspection of the Textured Object and Its Notification by Overlay Projection
- Structured-light 3D surface imaging: a tutorial
This code requires the following thirdparty
- Windows 10 (at least Home version)
- Visual Studio Community 2017
- Visual C++ SDK: VC15
- OpenCV 3.4.1
- OpenCV Contrib 3.4.1
- CMake 3.11.0 or newer
- Git for Windows 2.17.0
To install the OpenCV and OpenCV contributes, you can go through this automatic installation process.
Step 1
Install CMake for Windows. You can download CMake from [this page](https://cmake.org/download). Please select the version (32 or 64 bit) depends on your operation system.
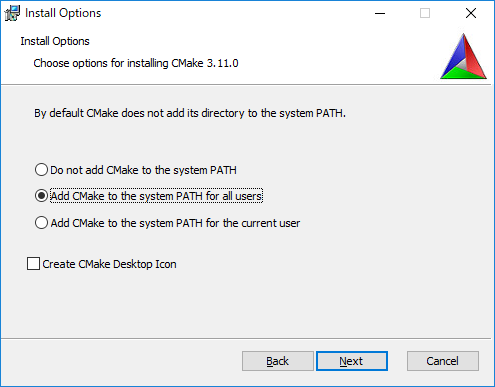
Please make sure that the above selection is set when install the software.
Add CMake to the system PATH for all usersStep 2
Install Git for Windows. You can download from [this page](https://gitforwindows.org/). Please select the version (32 or 64 bit) depends on your operation system.

Step 3
We then have to install OpenCV. First create the empty folder in your C:\opencv
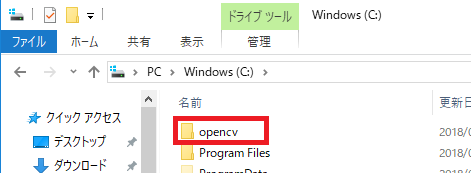
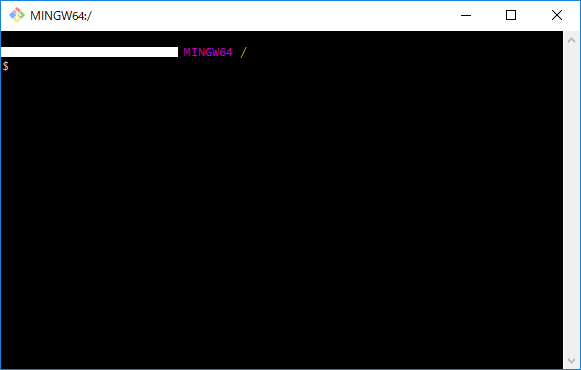
Click in to the folder, and then right click and select 'Git Bash Here' to open Git Bash command.
Step 4
Type the command touch install.sh to create the install command file. The file 'install.sh' will display in the folder.
Right-click on the file and open it with Notepad. Then, copy the follows code to the file.
#!/bin/bash -e
myRepo=$(pwd)
CMAKE_CONFIG_GENERATOR="Visual Studio 15 2017 Win64"
if [  ! -d "$myRepo/opencv"  ]; then
    echo "clonning opencv"
    git clone https://github.com/opencv/opencv.git
    mkdir -p Build
    mkdir -p Build/opencv
    mkdir -p Install
    mkdir -p Install/opencv
else
    cd opencv
    git checkout master
    git pull --rebase
    git pull refs/tags/3.4.1
    cd ..
fi
if [  ! -d "$myRepo/opencv_contrib"  ]; then
    echo "clonning opencv_contrib"
    git clone https://github.com/opencv/opencv_contrib.git
    mkdir -p Build
    mkdir -p Build/opencv_contrib
else
    cd opencv_contrib
    git checkout master
    git pull --rebase
    git checkout refs/tags/3.4.1
    cd ..
fi
RepoSource=opencv
pushd Build/$RepoSource
CMAKE_OPTIONS='-DBUILD_PERF_TESTS:BOOL=OFF -DBUILD_TESTS:BOOL=OFF -DBUILD_DOCS:BOOL=OFF  -DWITH_CUDA:BOOL=OFF -DBUILD_EXAMPLES:BOOL=OFF -DINSTALL_CREATE_DISTRIB=ON'
cmake -G"$CMAKE_CONFIG_GENERATOR" $CMAKE_OPTIONS -DOPENCV_EXTRA_MODULES_PATH="$myRepo"/opencv_contrib/modules -DCMAKE_INSTALL_PREFIX="$myRepo"/install/"$RepoSource" "$myRepo/$RepoSource"
echo "************************* $Source_DIR -->debug"
cmake --build .  --config debug
echo "************************* $Source_DIR -->release"
cmake --build .  --config release
cmake --build .  --target install --config release
cmake --build .  --target install --config debug
popd
The line 'git checkout refs/tags/3.4.1' indicate the version of OpenCV. In this case, we will use the 3.4.1 version (you can change the version by going to the tag and checking the right version you need).
THe line 'CMAKE_CONFIG_GENERATOR="Visual Studio 15 2017 Win64' indicate the complier, make sure that you are install the 'Visuali Studio 2017 (VC15)' with 64x version. You can change to the different version based on your Visual Studio version.
Step 5
Then run the install.sh by typing the command ./install.sh in Git Bash.
The build process will run approximately 10 minutes to install and build OpenCV and Contribute.
Once the build finish, please check install/opencv/x64/vc15 has folder bin and lib, and inside those folder has opencv_world400.lib (They should also has opencv_world400d.lib as the debug version).
Please also add C:\opencv\Install\opencv\x64\vc15\bin to the PATH of operation system.
You then can pull the source code from this git and setup the Visual Studio software.
The current version setup the webcamera (any USB camera that connected to the computer) as the camera for calibration with projector.
Once setup the Visual Studio project, setup and link the library. One the file main.cpp, and setup the projection resolution:
#define WINDOWWIDTH 1920
#define WINDOWHEIGHT 1080
This TWO parameters should similar to the size of the projector resolution (the display from projector).
The current code provides the standard camera (e.g., webcam) via this line of code initializeCamera() :
void initializeCamera()
{
	camera = cv::VideoCapture(0);
}
Please modify to the different setting in the case you are using different type of camera.
Please also change the SCREENPOSX and SCREENPOSY related to your second display (the display that displayed by projection). Otherwise, the image should display on your first screen (the computer screen).
#define SCREENPOSX 3440
#define SCREENPOSY 0
For example, in this case the x = 3440 pixel location and y = 0 pixel location it is located at the end of first screen position. Then, run the code, the gray image should appears on the projector. In the case, it is stop running, enter the spacebar.

Once the captured completed the captured image will stored in the folder captured and the mapping between camera-projector pixel will save as an c2p.csv file.
The file c2p.csv contains the coordinate between camera-projector. It is easy to use as an lookup table where the user select the object position in the camera captured image, read that location, and translate to projector pixel for the projection mapping.

MIT