Using Authentication API to Authenticate a User
The goal of this guide is to show you how to use the Predix SDK For iOS Authentication API to authenticate a user for your application using a native UI for the authentication screen.
You must have:
- Completed the Getting Started Guide
- Knowledge of Xcode's Interface Builder
- Experience in connecting the Xcode Interface Builder elements (IBOutlets and IBActions) to a Swift UIViewController
Modify your story board to create a screen that you can use to allow your users to input their user credentials.
- Open Xcode and re-open the Getting Started project from the previous guide or create a new single view application.
- Select the applications
Main.storyboard. - Then, select the first
ViewControllerin the storyboard. - Drag in some
UILabels,UITextFields, and aUIButtonfor your login screen.
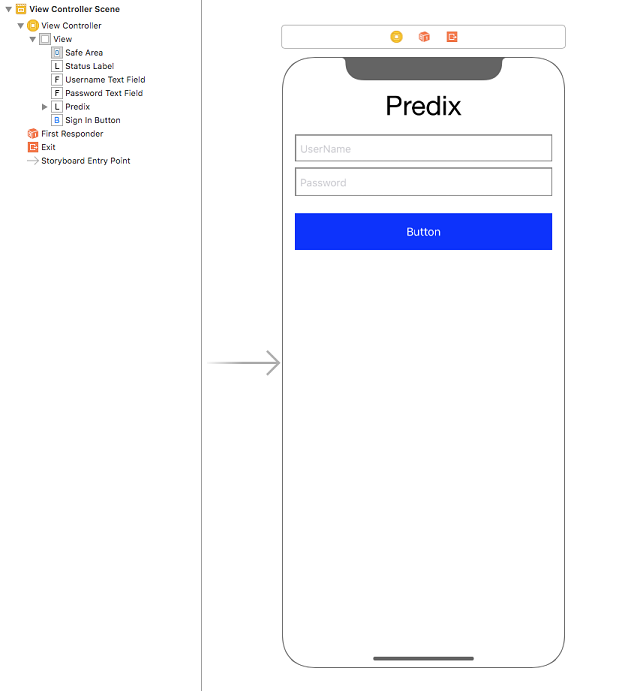
Following is an example of a simple login screen that we have put together for this guide.
- Assign the
IBOutletsand anIBActionin theViewController.swift.
IBOutlets for the controls which we have just created above are named as:
@IBOutlet weak var usernameTextField: UITextField!
@IBOutlet weak var passwordTextField: UITextField!
@IBOutlet weak var signInButton: UIButton!
@IBOutlet weak var statusLabel: UILabel!
IBAction functions:
@IBAction func signInPressed(_ sender: Any) {

}
6.Hit the run button in Xcode. You should see the login button in simulator/device.
Note: This guide does not cover the instructions to set up a UAA service, for more information on UAA Service, see https://www.predix.io/services/service.html?id=1172
Note: Authentication documentation and other examples are available at: https://github.build.ge.com/predix-mobile/iOSAuthenticationExampleApps
- Make your
ViewControlleraServiceBasedAuthenticationHandlerDelegate.
import UIKit
import PredixMobileSDK

class ViewController: UIViewController, ServiceBasedAuthenticationHandlerDelegate {
   ...
}- Create a couple of class properties to hold your credential provider and authentication manager.
class ViewController: UIViewController, ServiceBasedAuthenticationHandlerDelegate {
    ...
    private var credentialProvider: AuthenticationCredentialsProvider?
    private var authenticationManager: AuthenticationManager?
}
For your convenience, we have defined a function in the ViewController to handle updating the lable text on the main thread so that you don't have to define this task multiple times in the code.
class ViewController: UIViewController, ServiceBasedAuthenticationHandlerDelegate {
...

private func updateStatusText(message: String) {
    DispatchQueue.main.async {
        self.statusLabel.text = message
    }
}
- Create an authentication configuration and an authentication manager.
In theViewControllersViewDidLoadmethod, add the following code:
override func viewDidLoad() {
    super.viewDidLoad()

    //Creates an authentication manager configuration configured for your UAA instance.  You can also define the baseURL, clientId, and clientSecret in your info.plist file. To simplify the usage, we have defined these in configuration below:
    var configuration = AuthenticationManagerConfiguration()
    configuration.baseURL = URL(string: "https://predixsdkforiosdemo.predix-uaa.run.aws-usw02-pr.ice.predix.io")
    configuration.clientId = "NativeClient"
    configuration.clientSecret = "test123"

    //Create an online handler so that we can tell the authentication manager we want to authenticate online
    let onlineHandler = UAAServiceAuthenticationHandler()
    onlineHandler.authenticationServiceDelegate = self

    //Create an authentication manager with our UAA configuration, set UAA as our authorization source, set the online handler so that the manager knows that you want to perform an online authentication
    authenticationManager = AuthenticationManager(configuration: configuration)
    authenticationManager?.authorizationHandler = UAAAuthorizationHandler()
    authenticationManager?.onlineAuthenticationHandler = onlineHandler

    //Tell authentication manager we are ready to authenticate, once we call authenticate it will call our delegate with the credential provider
    authenticationManager?.authenticate { status in
        self.updateStatusText(message: "Authentication \(status)")
    }

    self.updateStatusText(message: "Authentication Started")
}You need to implement a few delegate methods so that your controller can react to events that happen during the authentication process.
- Implement the credential provider method as shown below:
func authenticationHandler(_ authenticationHandler: AuthenticationHandler, provideCredentialsWithCompletionHandler completionHandler: @escaping AuthenticationCredentialsProvider) {
    //Set your credential provider so that when you sign-in you can pass the username and password from the text fields to the authentication manager
    credentialProvider = completionHandler
}- Implement two additional methods that will be called in the event of an error or if the user is unable to authenticate because of entering bad credentials
public func authenticationHandler(_ authenticationHandler: PredixMobileSDK.AuthenticationHandler, didFailWithError error: Error) {
    updateStatusText(message: "Authentication failed: \(error)")
}

public func authenticationHandlerProvidedCredentialsWereInvalid(_ authenticationHandler: AuthenticationHandler) {
    updateStatusText(message: "Invalid username and/or password")
}- After applying all the authentication logics, lets call it from the login button IBAction. Replace the
@IBAction func signInPressed(_ sender: Any)logic with following code:
@IBAction func signInPressed(_ sender: Any) {
    updateStatusText(message: "Authentication credentials received, sending request to UAA")
    //Give the username and password to the credential provider
    credentialProvider?(self.usernameTextField.text ?? "", self.passwordTextField.text ?? "")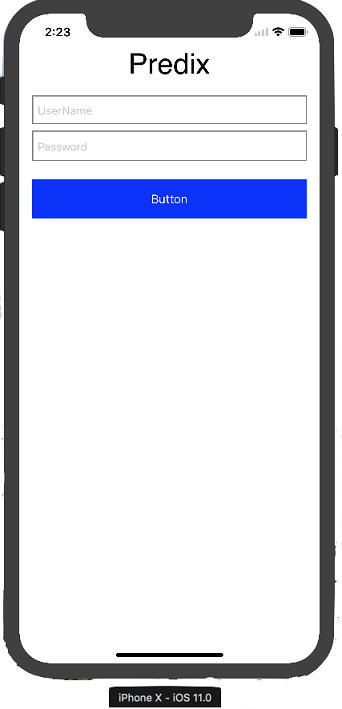
}- Click on the run button in Xcode and then click the login Button, you should see a login screen similar to the following:

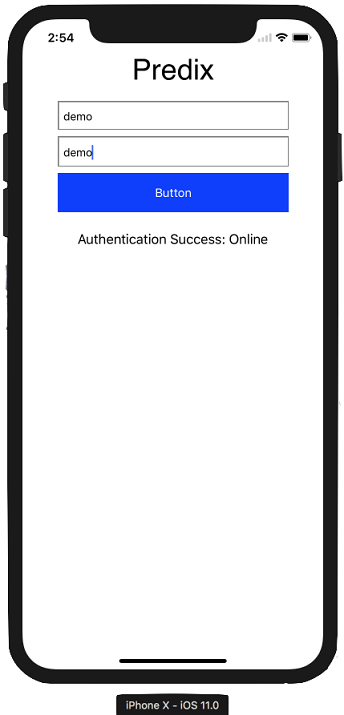
- Enter valid credentials and click on the login button. You will see the following on your screen:
Note: If you are using our example UAA instance, use “demo” as the username and password credentials.
- Check out the AuthenticationManager API documentation
- Check out the example project