This setup guide applies to the 2021 SIGNAL Superclass Telehealth workshop, hosted here on GitHub. During this workshop, you will be deploying a telehealth application in your Twilio account. You’ll then deploy an upgraded version of the application, with new functionality. Through this process, you’ll see how quickly you can get started with a fully-featured application and how you can build and deploy new features on top of it.
To get started: Sign up for a free trial account if you don't already have a Twilio account. You can then apply the code shared in the Superclass README on this page for $20 in trial credit.
If you already have a non-trial account, you're good to go, no other steps necessary!
Further information:
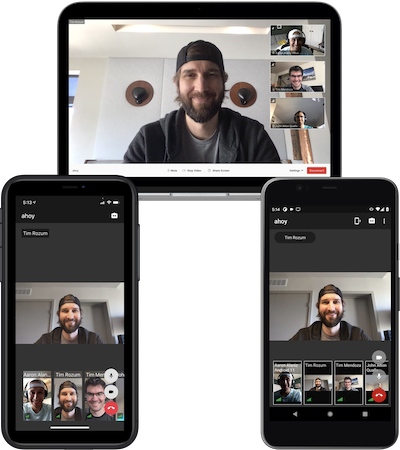
This application demonstrates a multi-party video application built with Twilio's Programmable Video JS SDK, Twilio's Conversations JS SDK, and Create React App.
- Deploy to Twilio Serverless in just a few minutes
- No other infrastructure is required
- No code changes are required before your first deploy
- There is no cost associated with deploying the app
- Go Rooms usage is free, however standard usage charges apply for Programmable Video when using the app with all other Room types. The chat feature is built using the Conversations API and is free-of-cost up to 200 monthly active users, standard usage charges apply thereafter.
You must have the following installed:
- git cli
- Node.js v12+
- NPM v6+ (comes installed with newer Node versions)
- jq installation for JSON processing
- https://stedolan.github.io/jq/
brew install jqif you’re on Mac/Linux and have brew installed, otherwise follow directions in the github page above- Twilio account
- (Sign up for an account using the instructions above, then, make note of your ACCOUNT_SID & AUTH_TOKEN)
- Buy a Twilio phone number (make sure it’s SMS enabled/SMS capable) - we’ll use this to send SMS links to the video visit room.
- Set up a Conversations Service and note its SID: https://www.twilio.com/docs/conversations/fundamentals#configuring-default-conversation-services-and-messaging-services
- Set up an API key and note down the key and secret (you will NOT be able to access the secret once you click submit on the dialog box, so make sure you have it accessible somewhere for this workshop!): https://www.twilio.com/docs/glossary/what-is-an-api-key#how-can-i-create-api-keys
Preferred: two video- and internet-capable devices to simultaneously join in the video room as patient and provider
Set environment variables from your Twilio account - substitute below with your Twilio Account SID and Auth Token respectively, as well as your conversations service SID, API key and secret (see the steps above to configure).
$ export ACCOUNT_SID=ACxxxxxxxxxxxxxxxxxxxxxxxxxxxxxxxx
$ export AUTH_TOKEN=xxxxxxxxxxxxxxxxxxxxxxxxxxxxxxxx
$ export TWILIO_CONVERSATIONS_SERVICE_SID=xxxxxxxxxxxxxxxxxxxxxxxxxxxxxxxx
$ export TWILIO_API_KEY=xxxxxxxxxxxxxxxxxxxxxxxxxxxxxxxx
$ export TWILIO_API_SECRET=xxxxxxxxxxxxxxxxxxxxxxxxxxxxxxxx
$ git clone https://github.com/TwilioDevEd/telehealth-video-workshop/        # clone from repo
$ ...
$ cd telehealth-video-workshop                                 # cd to application root folder
Run npm install to install all dependencies from NPM.
The app is deployed to Twilio using the Twilio CLI. Install twilio-cli with:
$ npm install -g twilio-cli
Login to the Twilio CLI. You will be prompted for your Account SID and Auth Token, both of which you can find on the dashboard of your Twilio console.
$ twilio login
This app requires an additional plugin. Install the CLI plugin with:
$ twilio plugins:install @twilio-labs/plugin-rtc
Note: If you have previously installed the @twilio-labs/plugin-rtc plugin, please make sure that you are using the most recent version. You can upgrade the plugin by running twilio plugins:update. The chat feature requires version 0.8.1 or greater of @twilio-labs/plugin-rtc.
Before deploying the app, make sure you are using the correct account on the Twilio CLI (using the command twilio profiles:list to check).
The app is deployed to Twilio with a single command:
$ make deploy
This performs the following steps:
- Builds the React app in the
srcdirectory - Generates a random code used to access the Video app
- Deploys the React app and token server function as a Twilio Serverless service.
- Prints the URL for the app and the passcode.
telehealth-video-workshop $ make deploy           # deploy application to twilio serverless

$ npm run deploy:twilio-cli
$ ./tool-deploy-functions.sh
$ ...
$ Enter Twilio Phone to send SMS from (E164 format): +1xxxxxxxxxx # THIS IS YOUR TWILIO PHONE NUMBER YOU WILL USE AS THE FROM NUMBER
$ ...

$ !!!!!!!!!!!!!!!!!!!!!!!!!!!!!!!!!!!!!!!!!!!!!!!!!!!!!!!!!!!!!!!!!!!!!!
$ Please goto Twilio console https://console.twilio.com/
$ Open the telehealth service: video-app-xxxx
$ Click 'Deploy All' to deploy the functions along with app
$ !!!!!!!!!!!!!!!!!!!!!!!!!!!!!!!!!!!!!!!!!!!!!!!!!!!!!!!!!!!!!!!!!!!!!!
→ Note that there is a MANUAL STEP noted below that requires you to go to your Twilio Console and deploy the serverless app.
Twilio Serverless Functions allow you to host function code without having to stand up your own server (more information is available here. Navigate to Twilio’s Serverless Functions page to access the Twilio service created in the previous step.
It should look like this when you first open the Functions Service, with one Function having a grey circle next to it:

Once you click the blue "Deploy All" button at the bottom, it should look like this, with all Functions having green circles next to them:

We deployed the telehealth application using Twilio Video and Serverless. Let’s run through a scenario where a patient joins a telehealth video room for a virtual appointment with their provider.
Create Video Room and Generate URLs
Pre-generate the direct link URLs to access the video room. You’ll do this by invoking the command make get-urls.
Note the provider link - you’ll use this again later to log into the video visit room as the provider.
telehealth-video-workshop $ make get-urls

Enter video room Name (default Video Visit Room 0):
Enter provider's display Name (default Dr X):
Enter patient's display Name (default Jane):
url: https://video-app-1912-xxxx-dev.twil.io?passcode=xxxxxxxxxxxxxx
host: https://video-app-1912-xxxx-dev.twil.io
passcode: passcode=xxxxxxxxxxxxxx

provider link:
https://video-app-1912-xxxx-dev.twil.io/?room=Video%20Visit%20Room%200&persona=provider&name=Dr%20X&passcode=xxxxxxxxxxxxxx

sample patient link:
https://video-app-1912-xxxx-dev.twil.io/?room=Video%20Visit%20Room%200&persona=patient&name=Jane&passcode=xxxxxxxxxxxxxx

sample 3rd party link:
https://video-app-1912-xxxx-dev.twil.io/?room=Video%20Visit%20Room%200&persona=thirdparty&name=Uncle%20Frank&passcode=xxxxxxxxxxxxxx
Appointment Reminder sent to Patient
Send an SMS reminder to patient using make send-sms
telehealth-video-workshop $ make send-sms

Sending From Phone: +1xxxxxxxxxx			# Twilio phone number entered earlier during installation
Enter To Phone: +1xxxxxxxxxx	            # patient's phone number that this sms is sending to
Enter Patient Name: 						# make sure this is same as patient display name above

patient URL
https://video-app-1912-xxxx-dev.twil.io/?room=Video%20Visit%20Room%200&persona=patient&name=MO&passcode=xxxxxxxxxxxxxx

...
You, as the Patient, will receive an SMS pre-filled with the entered name and the generated patient URL - click this link on one of your devices to enter the video visit room.
Test Telehealth Room
- Log in as Patient see how the waiting room functions
- Use the provider link (noted in the step above) to access and start the room
- Once you’re in, test how the room works and note some of the features (chat, media share, etc)
- After you’re done testing, close out of the room on both devices
- Go back to the Terminal and run command
make deleteto pull this telehealth application down
NOTE: The Twilio Function that provides access tokens via a passcode should NOT be used in a production environment. This token server supports seamlessly getting started with the collaboration app, and while convenient, the passcode is not secure enough for production environments. The access token generated by this demo uses the default passcode authentication scheme, which means any participant will be able to start a video room and charge your Twilio account using the URL links. You should use an authentication provider to securely provide access tokens to your client applications. You can find more information about Programmable Video access tokens in this tutorial. This is why you should always DELETE your deployed instance after a demo and re-deploy. A gentle reminder: THIS IS NOT PRODUCTION CODE :)
Let's now quickly modify this telehealth application, by adding a new functionality to invite other participants into the telehealth video room. To make it easy for this workshop, we created a branch with all these changes.
Let's review the changes and switch our branch to deploy the new version of the application. For a deeper dive into the code, please review this diff from the PR where we implemented the invite functionality. This is how we were able to add this ability to invite additional participants to the call. Additional details and documentation is available as an appendix to this document.
Change to a different branch:
$ git branch -a #list all branches
$ git checkout with-invite
-
Repeat Step 3 of the Installation phase (Run
make deploy), all steps of the Demo Steps phase, and steps 1-3 of the Test Telehealth Room phase -
Click the “Invite” option (bottom left of the video room) to open the dialog box to invite another participant:


- Once you’ve noted the capability, feel free to continue exploring around the video room and understanding its features and functionality
- After you’re done testing, close out of the room on both your devices
- Go back to the Terminal and run command
make deleteto pull this video room down - Congratulations! You’ve completed the workshop! Now go build something cool on top of this telehealth example!
*src/components/Buttons/InviteButton - new file added
- Invite button (link) to display in the MenuBar component. This invokes the invite dialog when clicked
*src/components/InviteDialog - new file added
- Dialog for patient to enter third party’s name, phone number and send an invite
- When a patient enters the name, phone number and clicks on the Invite button, it invokes a Twilio functionI to send a message to the third party.
*src/components/MenuBar/Menubar.tsx - added code to this existing file
- Modify to show InviteButton and display InviteDialog when patient clicks on it
*src/components/Room/RoomUtils.tsx - added code to this existing file
- Add a function getPatientName() using URLSearchParams
- Add a function getThirdPartyUrl() to return the url to send to a third party.
*functions/send-third-party-message - new file added
- Add a server side Twilio function to send a message to the third party. This is invoked by InviteDialog.
*Tool-deploy-functions.sh - Added code to this existing file
- Add code that deploys the send-third-party- message Twilio function on the server.
If any errors occur after running a Twilio CLI RTC Plugin command, then try the following steps.
- Run
twilio plugins:updateto update the rtc plugin to the latest version. - Run
twilio rtc:apps:video:deleteto delete any existing video apps. - Run
npm run deploy:twilio-clito deploy a new video app.
After running the command to deploy the app to Twilio, the room type will be returned in the command line output. Each room type provides a different video experience. More details about these room types can be found here. The rest of this section explains how these room types affect the behavior of the video app.
Group - The Group room type allows up to fifty participants to join a video room in the app. The Network Quality Level (NQL) indicators, dominant speaker, and start-stop recordings are demonstrated with this room type. Also, the VP8 video codec with simulcast enabled along with a bandwidth profile are set by default in order to provide an optimal group video app experience.
Small Group - The Small Group room type provides an identical group video app experience except for a smaller limit of four participants.
Peer-to-peer - Although up to ten participants can join a room using the Peer-to-peer (P2P) room type, it is ideal for a one to one video experience. The NQL indicators, bandwidth profiles, dominant speaker, and start-stop recordings cannot be used with this room type. Thus, they are not demonstrated in the video app. Also, the VP8 video codec with simulcast disabled and 720p minimum video capturing dimensions are also set by default in order to provide an optimal one to one video app experience. If more than ten participants join a room with this room type, then the video app will present an error.
Go - The Go room type provides a similar Peer-to-peer video app experience except for a smaller limit of two participants. If more than two participants join a room with this room type, then the video app will present an error.
If the max number of participants is exceeded, then the video app will present an error for all room types.
The Video app has the following features:
- Video conferencing with real-time video and audio
- Chat support for textual and file-based messaging
- Enable/disable camera
- Mute/unmute mic
- Screen sharing
- Dominant speaker indicator
- Network quality indicator
- Defines participant bandwidth usage with the Bandwidth Profile API
- Start and stop recording with the Recording Rules API
See browser support table for twilio-video.js SDK.
This application requires an access token to connect to a Room for Video and a Conversation for Chat. The included local token server provides the application with access tokens. This token server can be used to run the app locally, and it is the server that is used when this app is run in development mode with npm start. Perform the following steps to setup the local token server:
- Create an account in the Twilio Console.
- Click on 'Settings' and take note of your Account SID.
- Create a new API Key in the API Keys Section under Programmable Video Tools in the Twilio Console. Take note of the SID and Secret of the new API key.
- Create a new Conversations service in the Services section under the Conversations tab in the Twilio Console. Take note of the SID generated.
- Store your Account SID, API Key SID, API Key Secret, and Conversations Service SID in a new file called
.envin the root level of the application (example below).
TWILIO_ACCOUNT_SID=ACxxxxxxxxxxxxxxxxxxxxxxxxxxxxxxxx
TWILIO_API_KEY_SID=SKxxxxxxxxxxxxxxxxxxxxxxxxxxxxxxxx
TWILIO_API_KEY_SECRET=xxxxxxxxxxxxxxxxxxxxxxxxxxxxxxxx
TWILIO_CONVERSATIONS_SERVICE_SID=ISxxxxxxxxxxxxxxxxxxxxxxxxxxxxxxxx
Now the local token server (see server/index.ts) can dispense Access Tokens to connect to a Room and a Conversation. See .env.example for information on additional environment variables that can be used.
Note: the use of Twilio Conversations is optional. If you wish to opt out, simply run or build this app with the REACT_APP_DISABLE_TWILIO_CONVERSATIONS environment variable set to true.
Run the app locally with
$ npm start
This will start the local token server and run the app in the development mode. Open http://localhost:3000 to see the application in the browser.
The page will reload if you make changes to the source code in src/.
You will also see any linting errors in the console. Start the token server locally with
$ npm run server
The token server runs on port 8081 and expects a POST request at the /token route with the following JSON parameters:
{
  "user_identity": string, // the user's identity
  "room_name": string, // the room name
}
The response will be a token that can be used to connect to a room. The server provided with this application uses the same endpoints as the plugin-rtc Twilio CLI plugin that is used to deploy the app. For more detailed information on the server endpoints, please see the plugin-rtc README.
If you want to see how the application behaves with multiple participants, you can simply open localhost:3000 in multiple tabs in your browser and connect to the same room using different user names.
Additionally, if you would like to invite other participants to a room, each participant would need to have their own installation of this application and use the same room name and Account SID (the API Key and Secret can be different).
Build the React app with
$ npm run build
This script will build the static assets for the application in the build/ directory.
This application has unit tests (using Jest) and end-to-end tests (using Cypress). You can run the tests with the following scripts.
Run unit tests with
$ npm test
This will run all unit tests with Jest and output the results to the console.
Run end to end tests with
$ npm run cypress:open
This will open the Cypress test runner. When it's open, select a test file to run.
Note: Be sure to complete the 'Getting Started' section before running these tests. These Cypress tests will connect to real Twilio rooms and real Twilio conversations, so you may be billed for any time that is used.
The state of this application (with a few exceptions) is managed by the room object that is supplied by the SDK. The room object contains all information about the room that the user is connected to. The class hierarchy of the room object can be viewed here.
One great way to learn about the room object is to explore it in the browser console. When you are connected to a room, the application will expose the room object as a window variable: window.twilioRoom.
Since the Twilio Video SDK manages the room object state, it can be used as the source of truth. It isn't necessary to use a tool like Redux to track the room state. The room object and most child properties are event emitters, which means that we can subscribe to these events to update React components as the room state changes.
React hooks can be used to subscribe to events and trigger component re-renders. This application frequently uses the useState and useEffect hooks to subscribe to changes in room state. Here is a simple example:
import { useEffect, useState } from 'react';

export default function useDominantSpeaker(room) {
  const [dominantSpeaker, setDominantSpeaker] = useState(room.dominantSpeaker);

  useEffect(() => {
    room.on('dominantSpeakerChanged', setDominantSpeaker);
    return () => {
      room.off('dominantSpeakerChanged', setDominantSpeaker);
    };
  }, [room]);

  return dominantSpeaker;
}
In this hook, the useEffect hook is used to subscribe to the dominantSpeakerChanged event emitted by the room object. When this event is emitted, the setDominantSpeaker function is called which will update the dominantSpeaker variable and trigger a re-render of any components that are consuming this hook.
For more information on how React hooks can be used with the Twilio Video SDK, see this tutorial: https://www.twilio.com/blog/video-chat-react-hooks. To see all of the hooks used by this application, look in the src/hooks directory.
The VideoProvider component contains much of the logic that relates to connecting to video rooms and acquiring local input devices. The VideoProvider component exposes many properties and methods to the rest of the application through the useVideoContext hook. Similarly, the ChatProvider contains logic that relates to connecting to a Twilio Conversation, and it exposes properties and methods through the useChatContext hook.
The connect function from the SDK accepts a configuration object. The configuration object for this application can be found in src/utils/useConnectionOptions/useConnectionOptions.ts. In this object, we 1) enable dominant speaker detection, 2) enable the network quality API, and 3) supply various options to configure the bandwidth profile.
This application dynamically changes the priority of remote video tracks to provide an optimal collaboration experience. Any video track that will be displayed in the main video area will have track.setPriority('high') called on it (see the VideoTrack component) when the component is mounted. This higher priority enables the track to be rendered at a high resolution. track.setPriority(null) is called when the component is unmounted so that the track's priority is set to its publish priority (low).
This application can be configured to authenticate users before they use the app. Once users have signed into the app with their Google credentials, their Firebase ID Token will be included in the Authorization header of the HTTP request that is used to obtain an access token. The Firebase ID Token can then be verified by the server that dispenses access tokens for connecting to a room.
See .env.example for an explanation of the environment variables that must be set to enable Google authentication.
See the LICENSE file for details.