How to add to your project
This documentation is out of date. Updated version is coming soon.
In this guide I will show you how you can add the OceanProject plugin (and content) to your own project in a few simple steps.
I will use a clean project based on the blueprint third person template for this example.
Step #1.
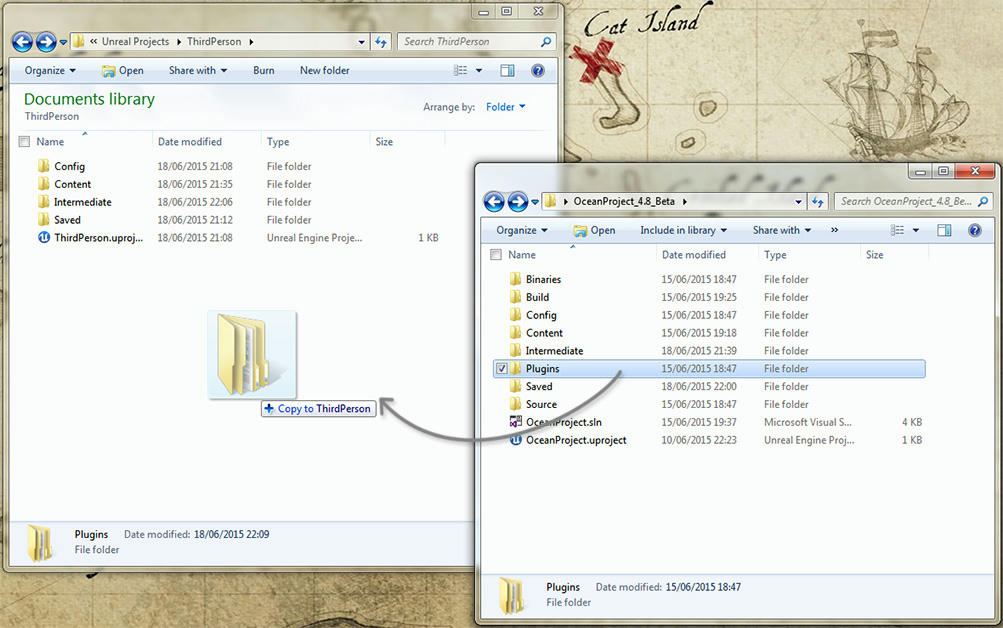
Assuming you have already downloaded and unzipped the project from github, first you want to copy the Plugins folder and paste it into your project's root folder.
The plugin provides the code base classes for the ocean system, buoyancy, fish flocking etc. If you only want to use the skydome then you can skip this step.
Step #2.
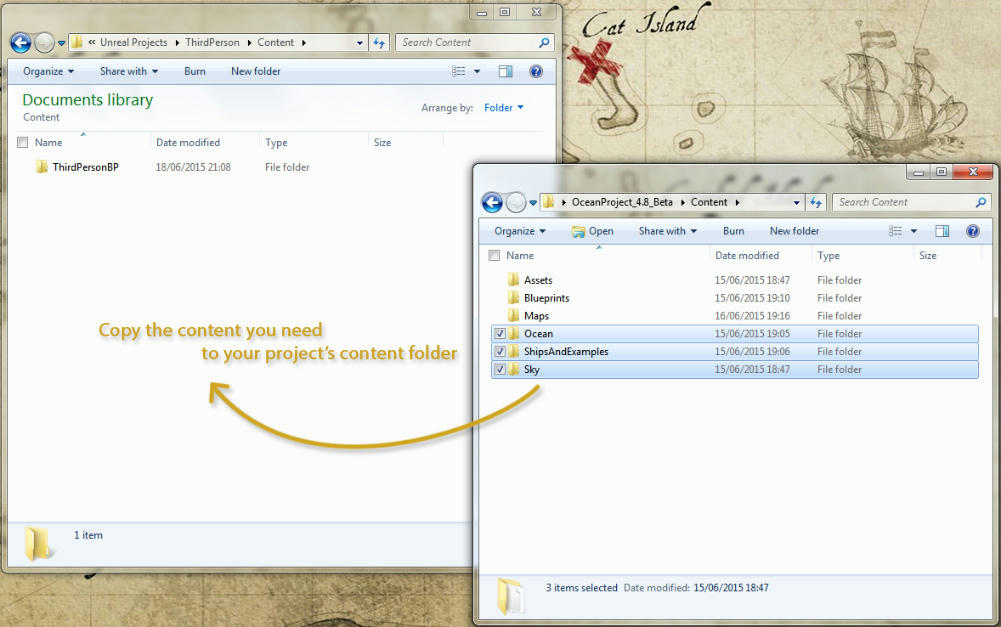
Open up the Content folder (of the OceanProject) then copy the folders that you require to your project's Content folder.
In this example I will copy the folders necessary for the ocean, sky and ships (no fish, no maps).
Step #3.
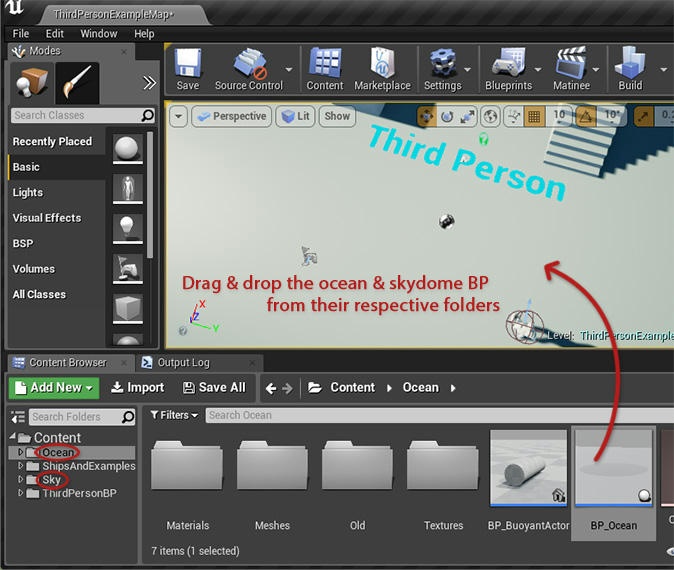
Now you could simply open your project and drop the BP_Ocean (found under Content/Ocean) into your level but it will not look very good since there are multiple things and parameters you need to setup into your level.
Instead of setting everything up from scratch (which would make this guide long), let's open up the OceanProject and load the example map.
Then we can copy all the things we need from that map and paste them over into our project's map.
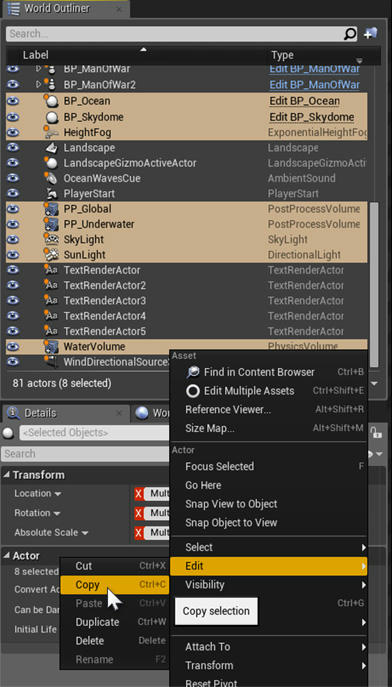
In the World Outliner select the objects shown in the image below (ctrl+click to select objects).
If you don't need any of the underwater stuff (swimming, underwater post process effects etc.) then you can skip the WaterVolume, PP_Underwater and Heightfog objects.
After you have the objects selected, right click->Edit->Copy (or just ctrl+c).
Step #4.
You can now close the OceanProject editor and open your own project.
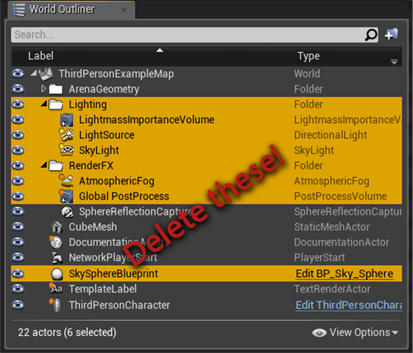
After you have loaded the map that you want to add the ocean to, you need to delete a few objects from the map first, such as the default skysphere, skylight etc.
Step #5.
Before you can paste the objects that we copied from the example map into your level, first you might need to temporarily drop the BP_Ocean and BP_Skydome into your level.
After you have placed them into your level you can delete them right away!
The reason for that step is that you can't copy paste freshly-added blueprints into a project right away apparently.
Weird I know 😜
Step #6.
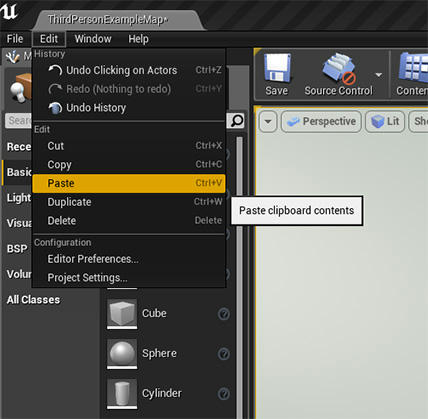
You can now paste the objects we copied from the example map into your map.
Simply go to Edit->Paste (or ctrl+v).
You should now see the ocean in your level!
Step #7.
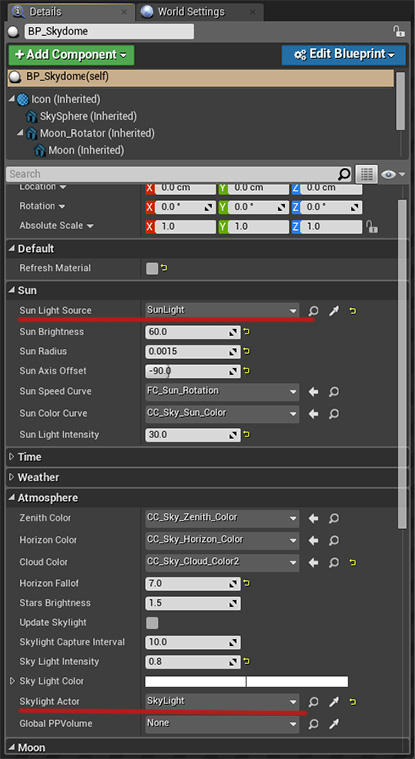
Unfortunately when copying an object it will not properly copy over any actor references, so there are a couple more things you need to setup.
Select the BP_Skydome from your map, and make sure it properly references the SunLight and SkyLight actors (under the Sun and Atmosphere categories) as shown below.
Extra Step.
You may need to update the skylight and any reflection captures in your level.
Simply select all SphereReflectionCapture actors in your level and click Update Captures.
Same thing with the skylight, select it and click on the Recapture Scene button.
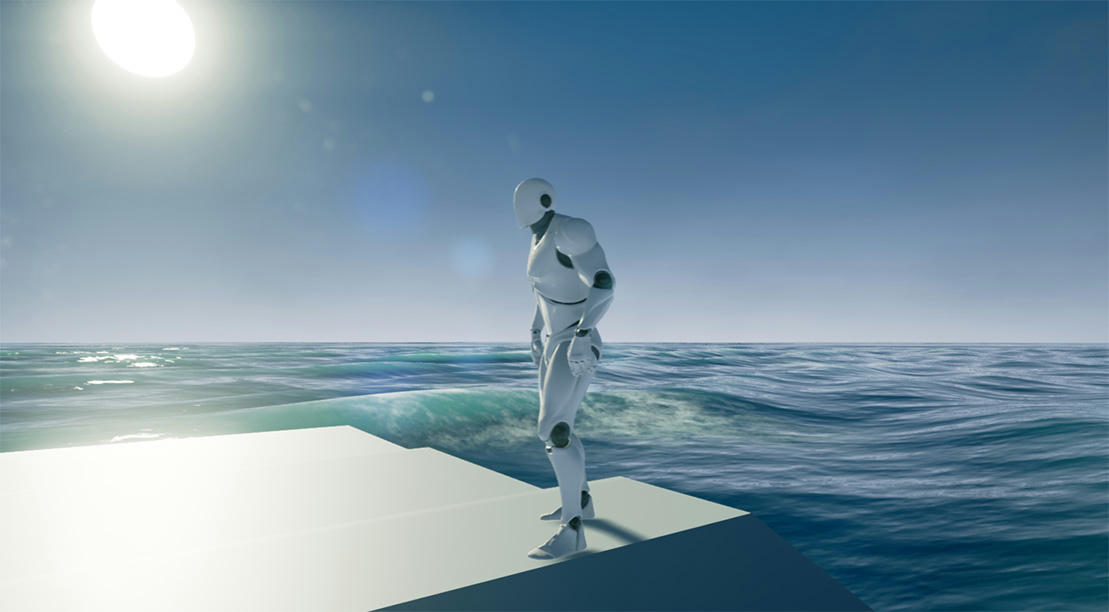
Finished!
If everything went right you should now see something like this:
Note:
If you want to properly toggle the underwater fog and post process effects on/off depending on the wave height, you should check the level blueprint of the example map and add the same nodes into your map's level blueprint.
We plan to improve the underwater stuff in the future by adding a new BP_Underwater that will handle all that but for now you have to set it up manually.