Getting Started with GUI
In this example, we will create a simple workflow that will generate a pdf report and upload it to an AWS S3 bucket.
If you have not already, install (or build) titanoboa server with GUI. Then start the server and open titanoboa GUI in a browser.
For pdf generation we will use clj-pdf library and for s3 upload we will use amazonica. In particular we will use following maven dependencies:
[amazonica "0.3.117"]
[com.amazonaws/aws-java-sdk-s3 "1.11.237"]
[clj-pdf "2.2.33"]
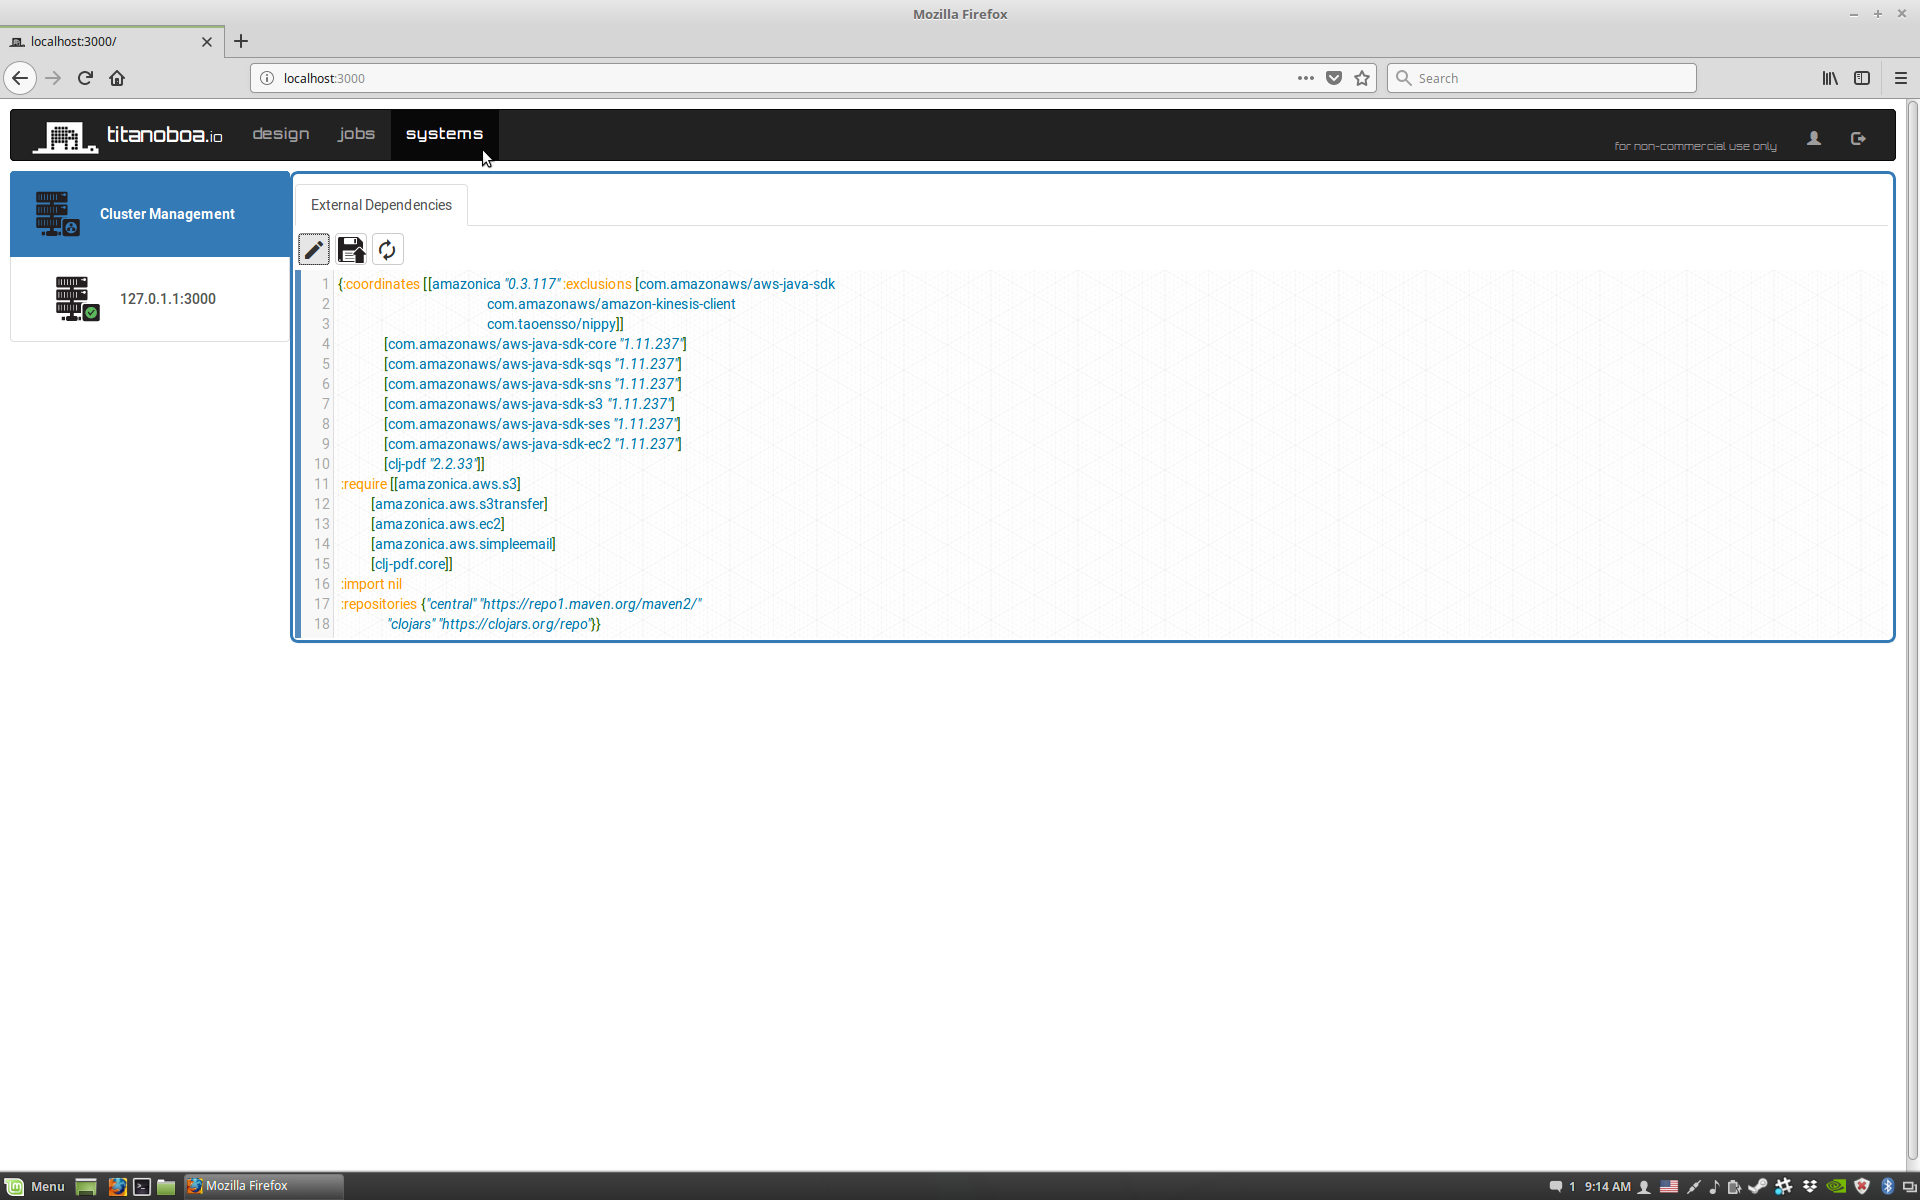
You can add these dependencies in titanoboa's "systems" tab under "External Dependencies":
Edit: in most recent titanoboa versions, we are now using titanoboa's predefined steps for both pdf generation as well as for s3 upload. The maven dependencies now look as follows:
[io.titanoboa.tasklet/pdf "0.1.0"]
[io.titanoboa.tasklet/aws-s3 "0.1.0"]
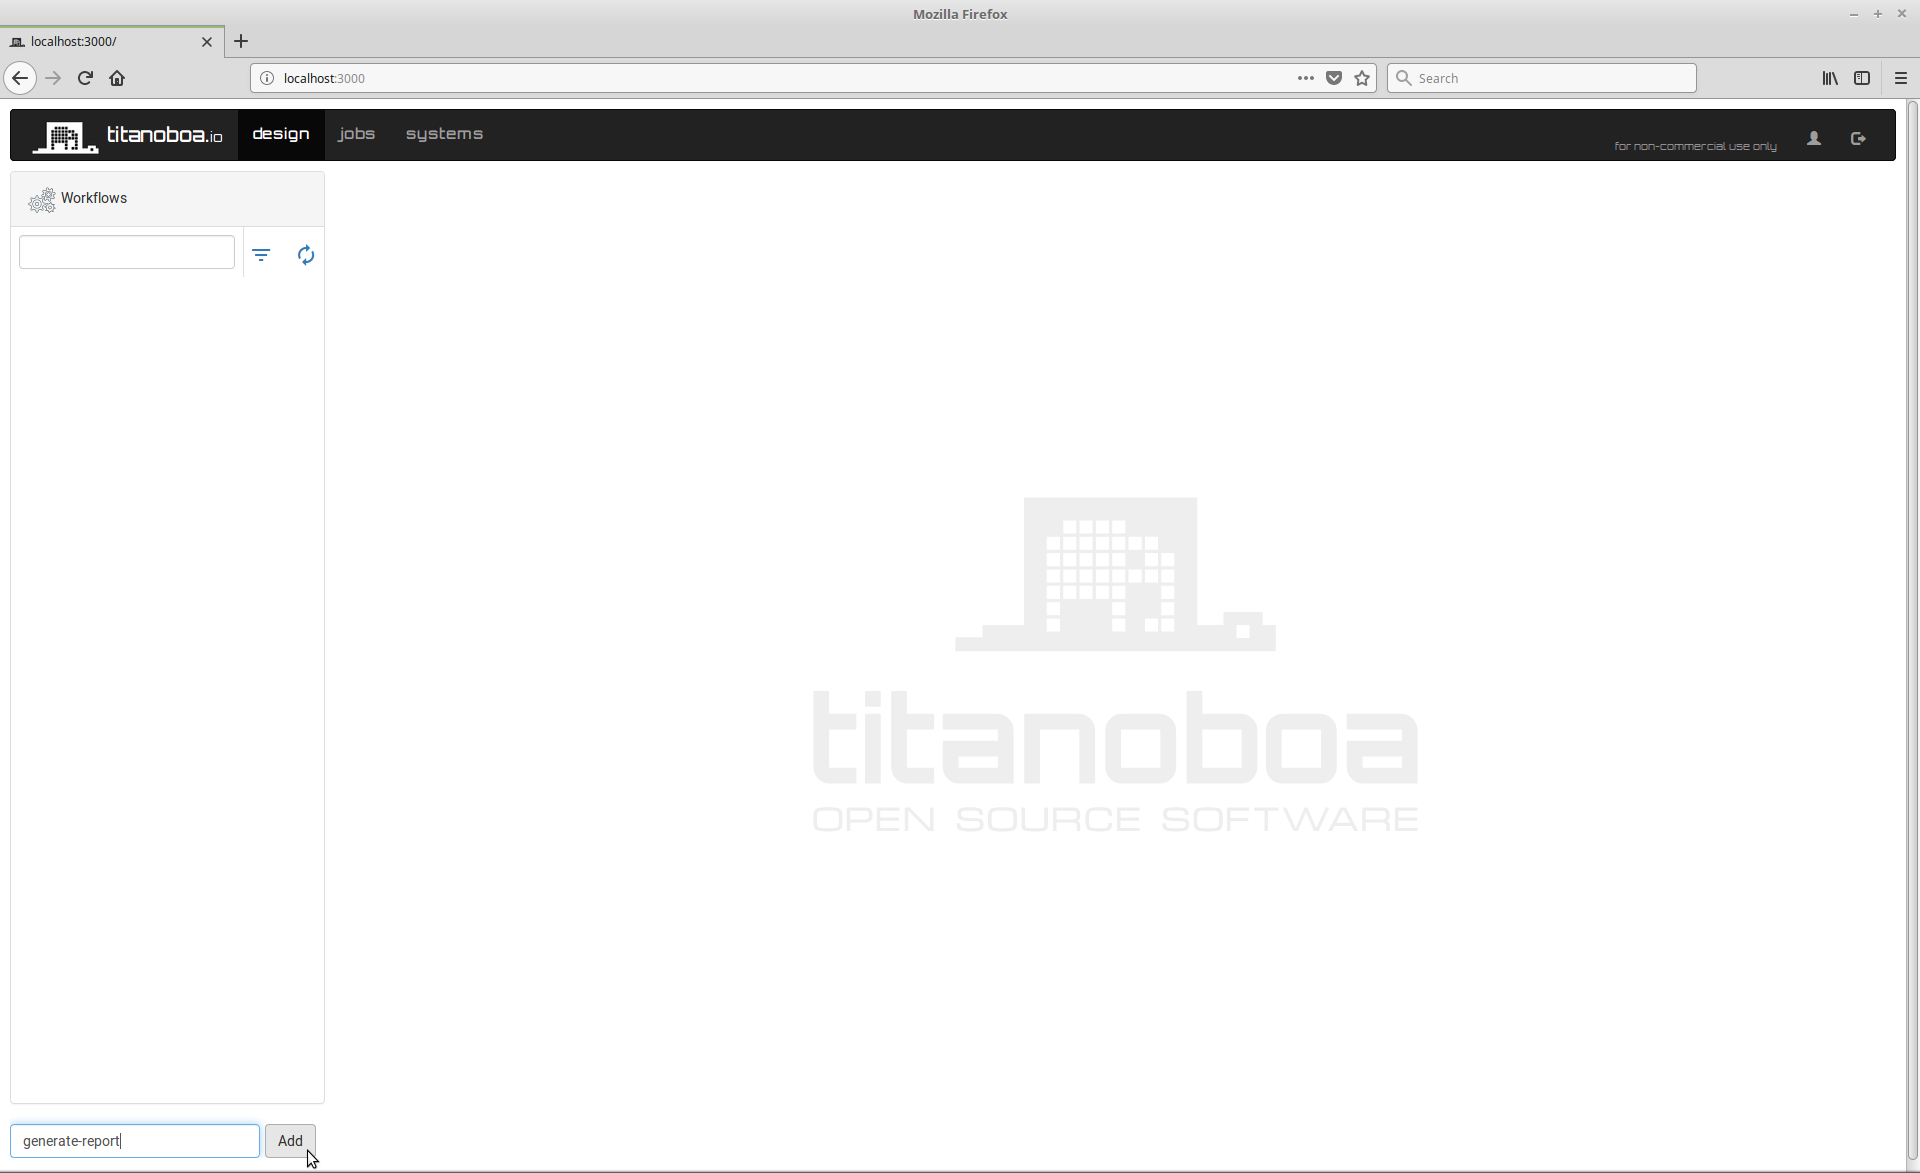
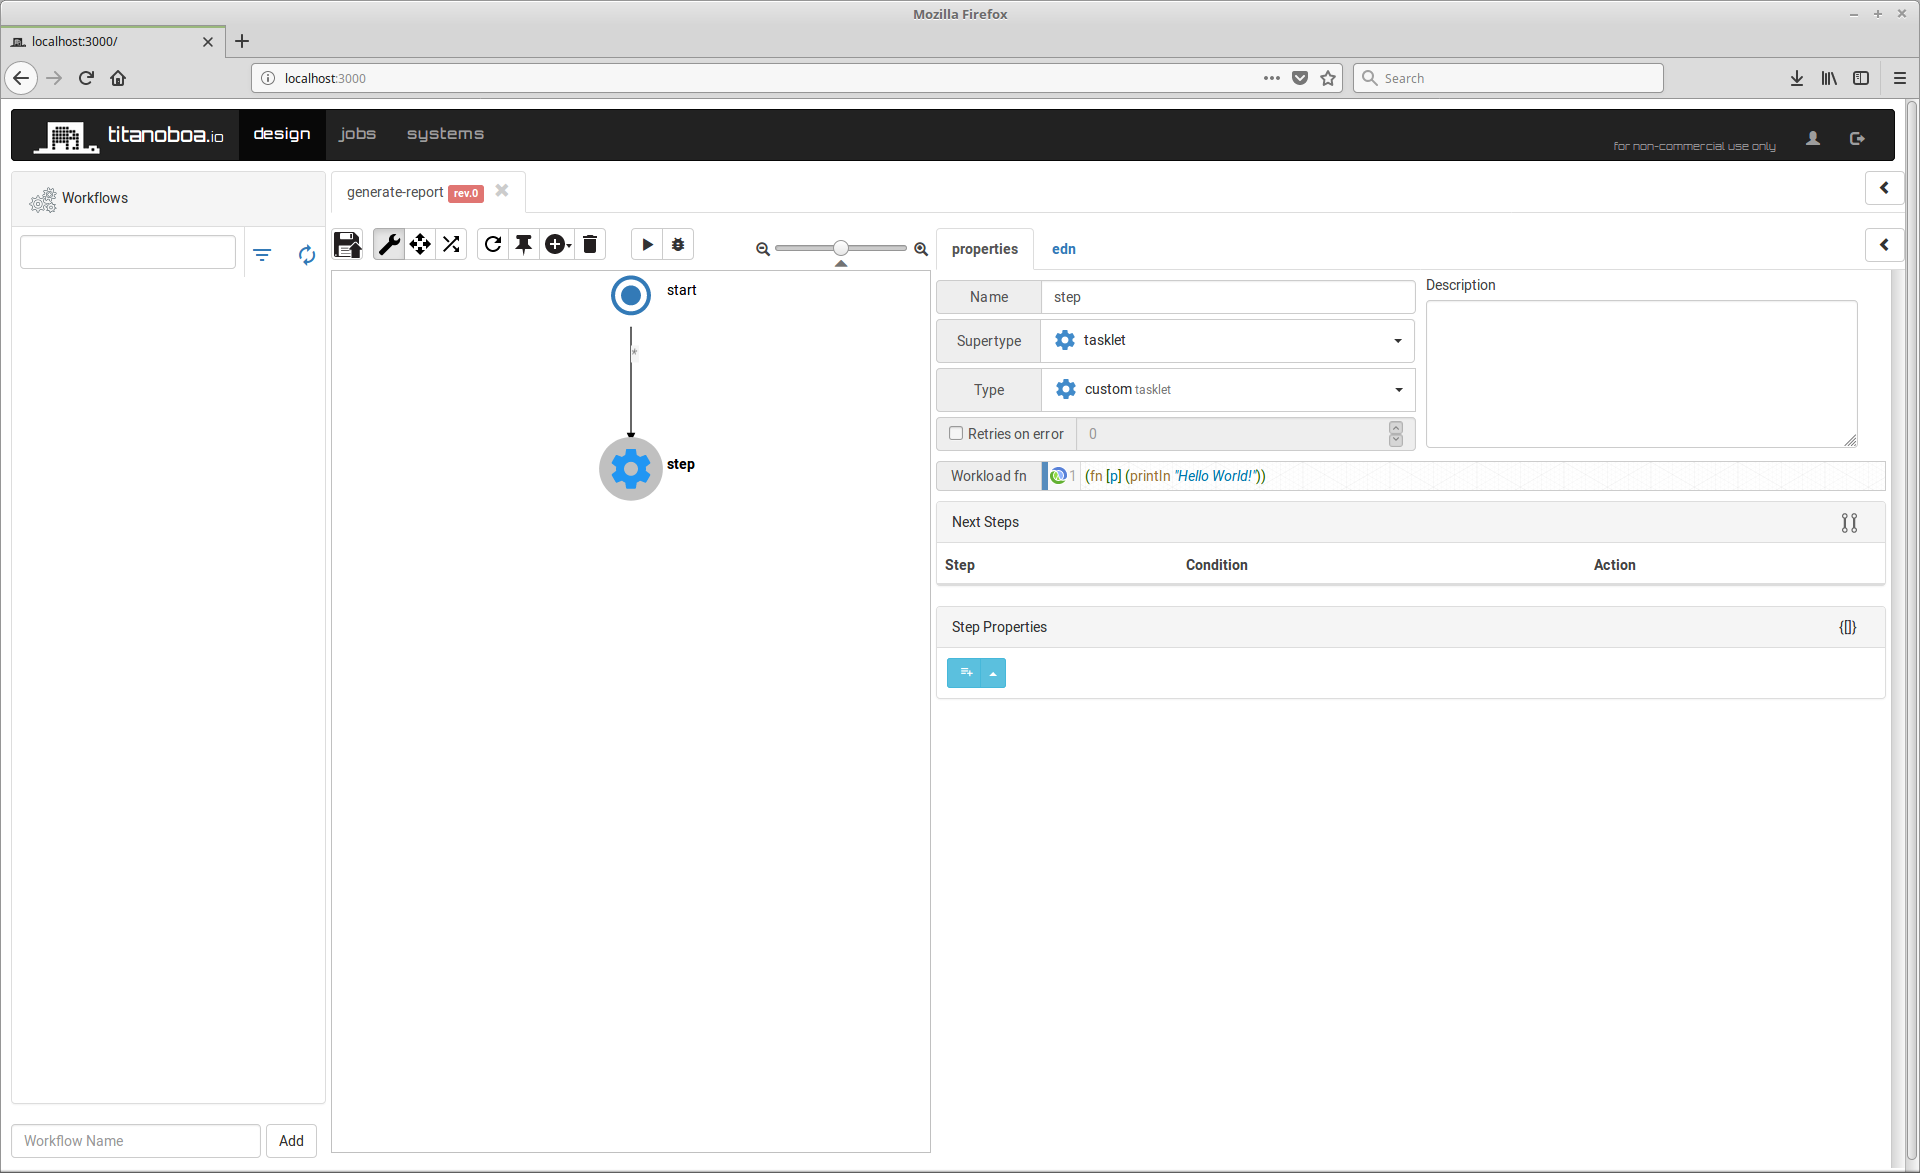
- Create a new workflow definition called "generate-report" In text field in the bottom left corner type in the name of new workflow and click "Add"
A sample new workflow definition (aka job definition) is created and opens. Update the workflow's description if you wish. Then make sure you are in "edit properties" mode (highlighted in red) and select the only step "step":

The step's properties will open in the right-hand panel:
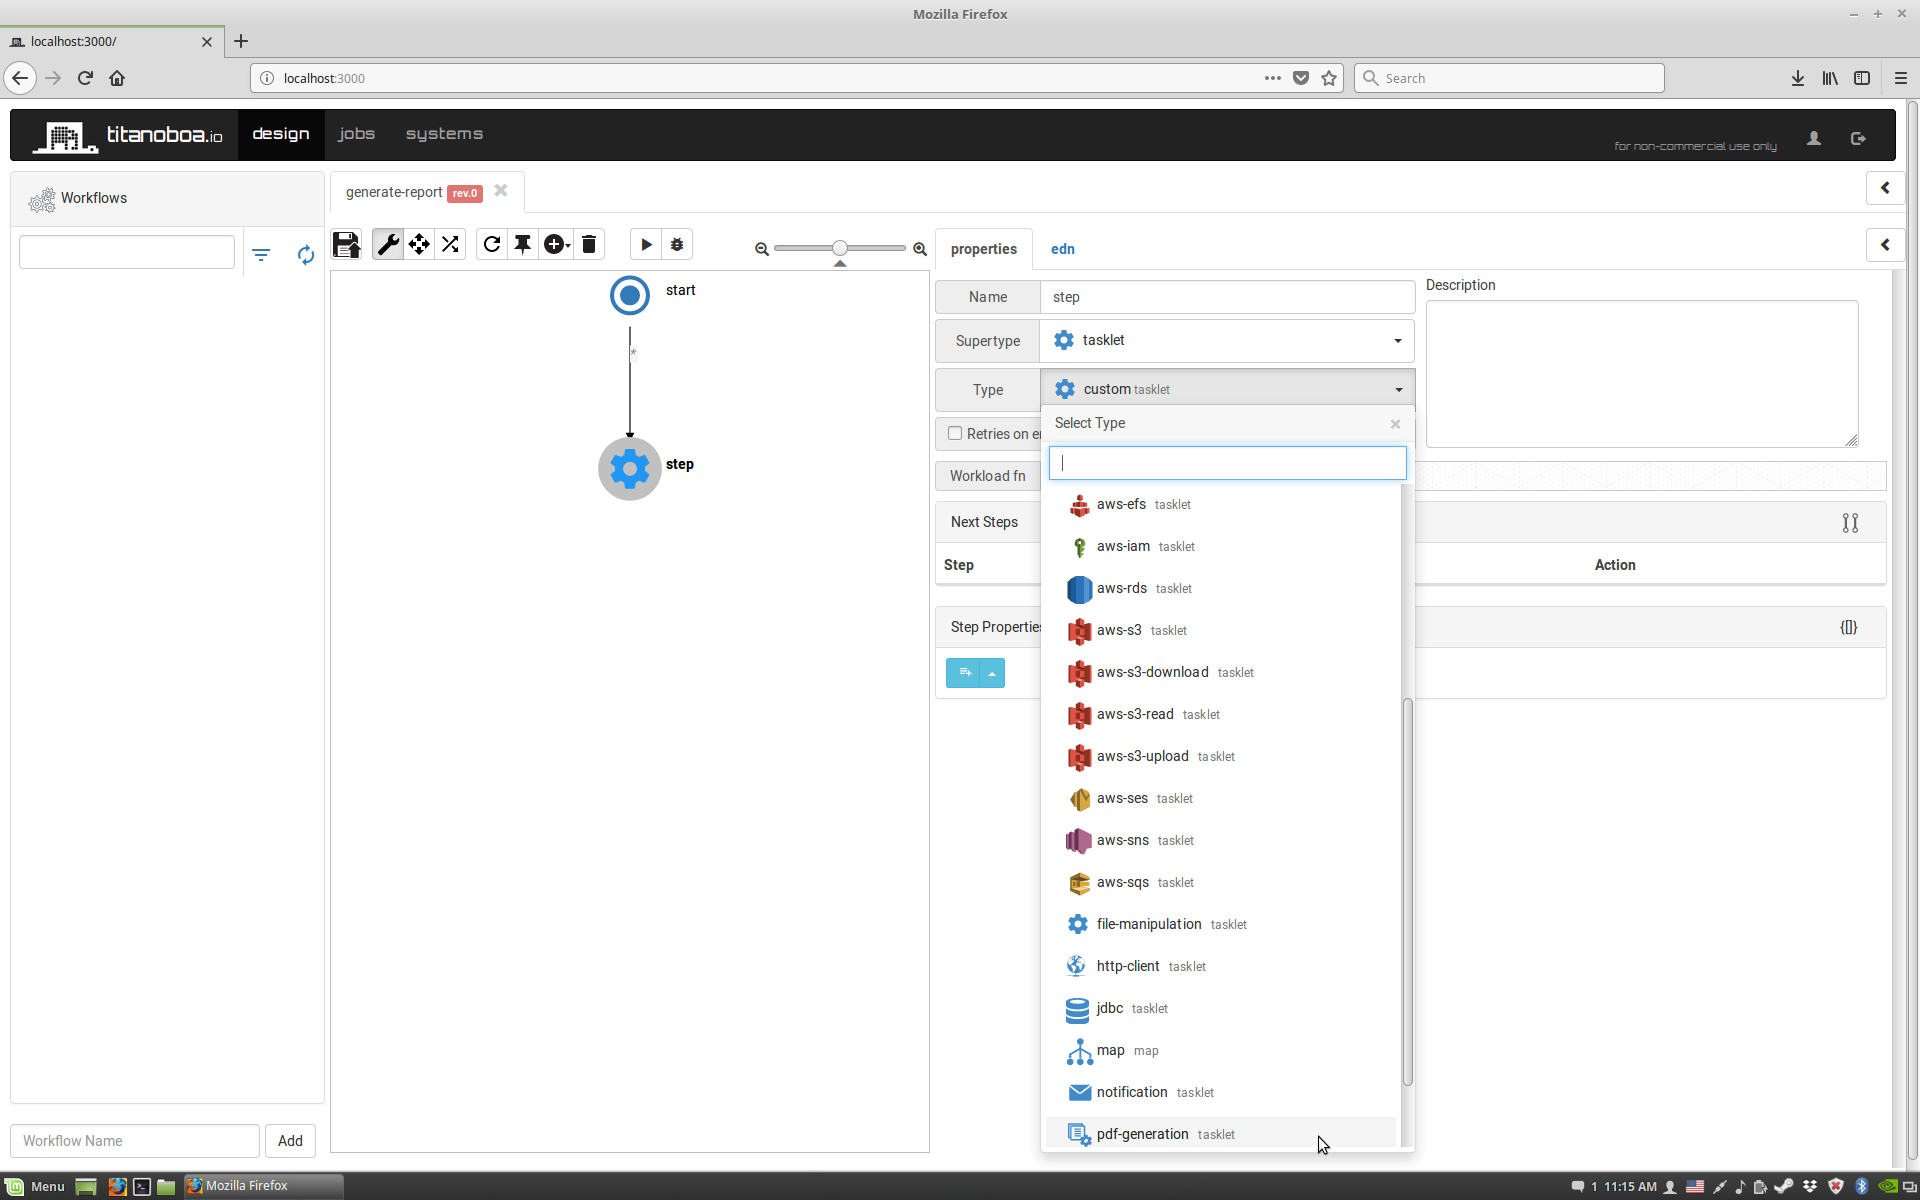
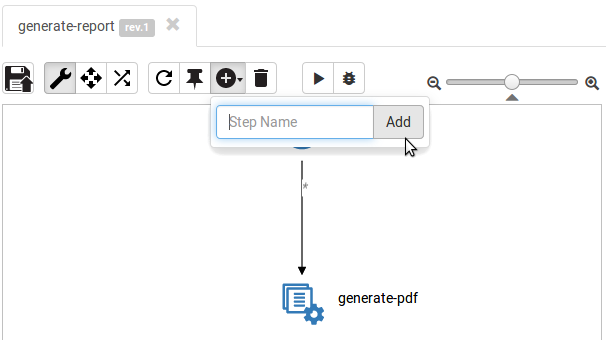
- Create a workflow step that will generate a pdf: Change type of the first step to "pdf-generation" Click on the drop-down box and select the appropriate step type.
A dialog box will open, offering you an option to merge step properties from a sample step into your current one.
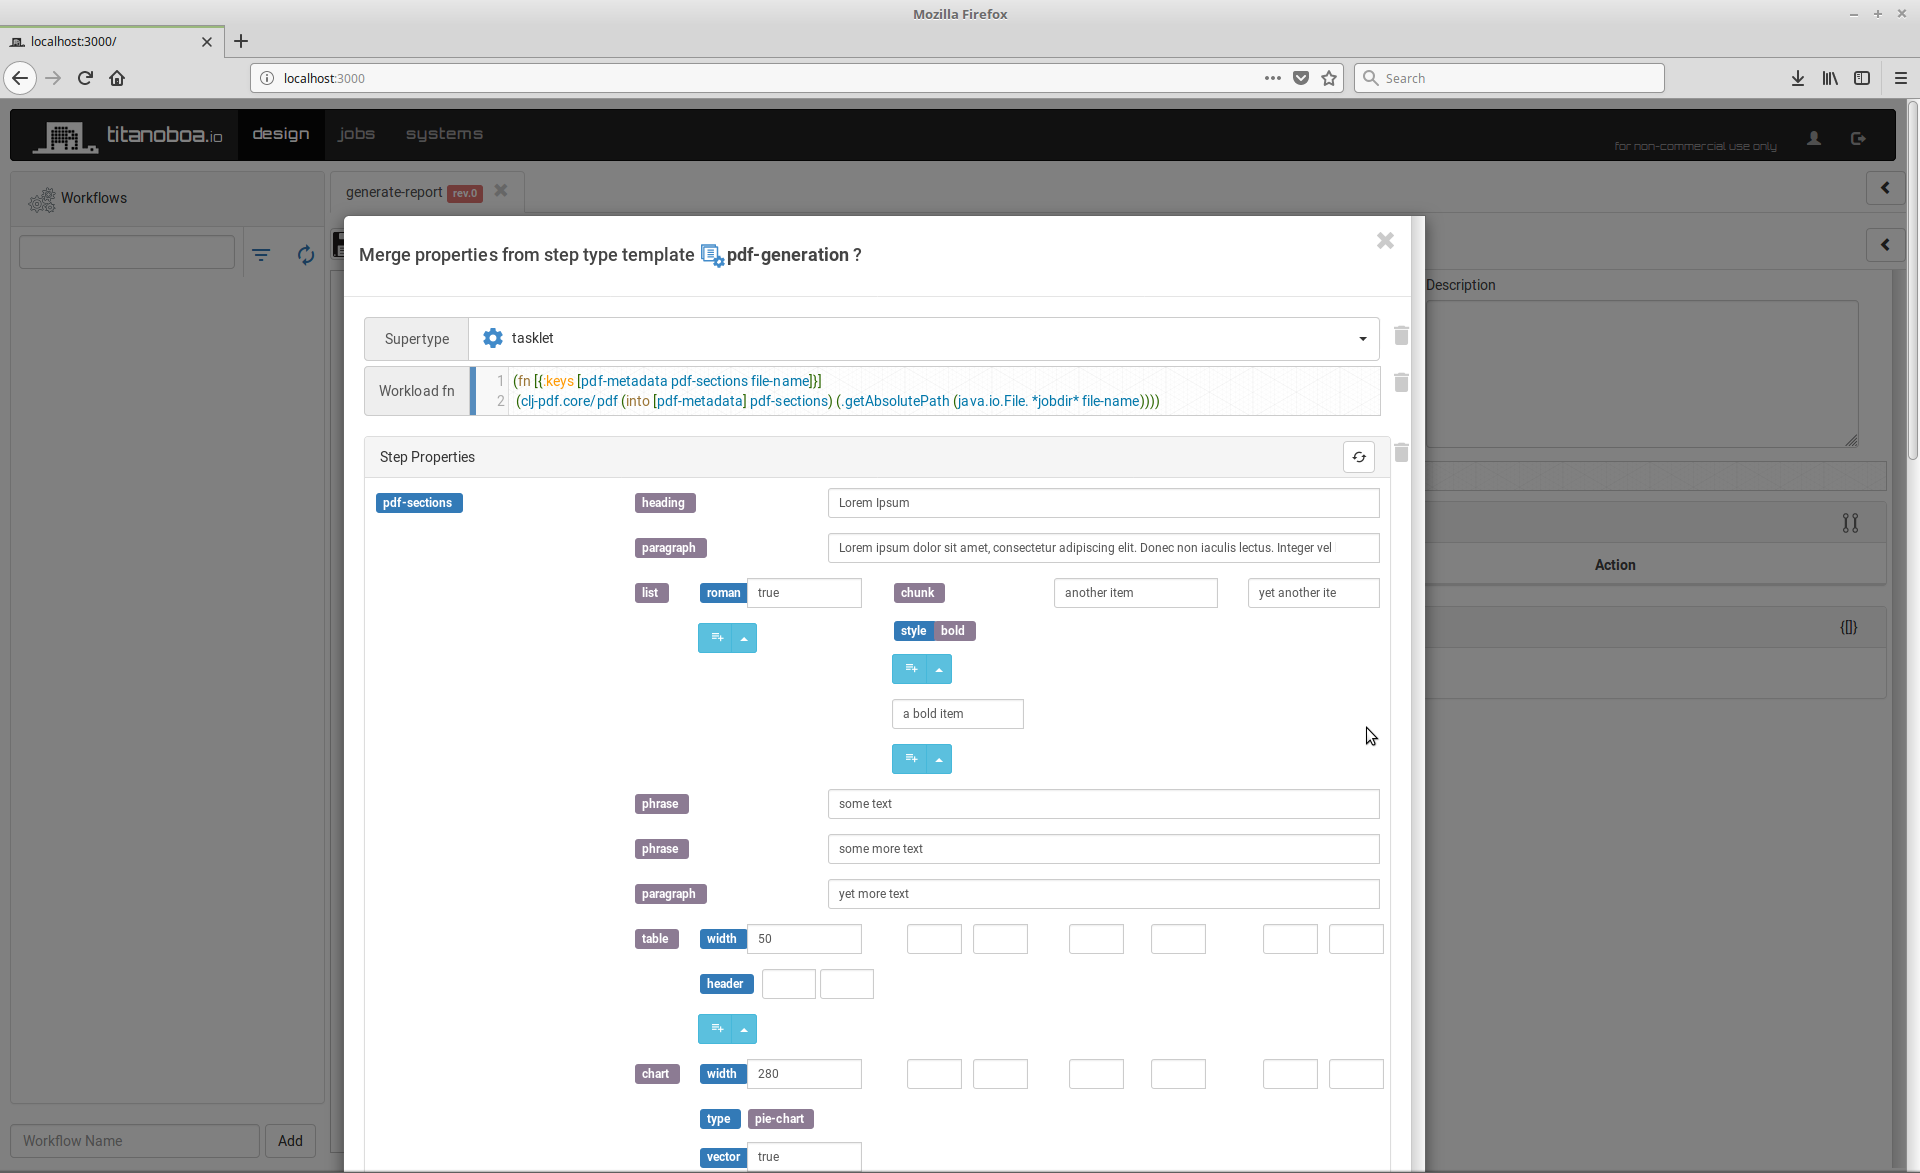
Scroll down and click "merge":
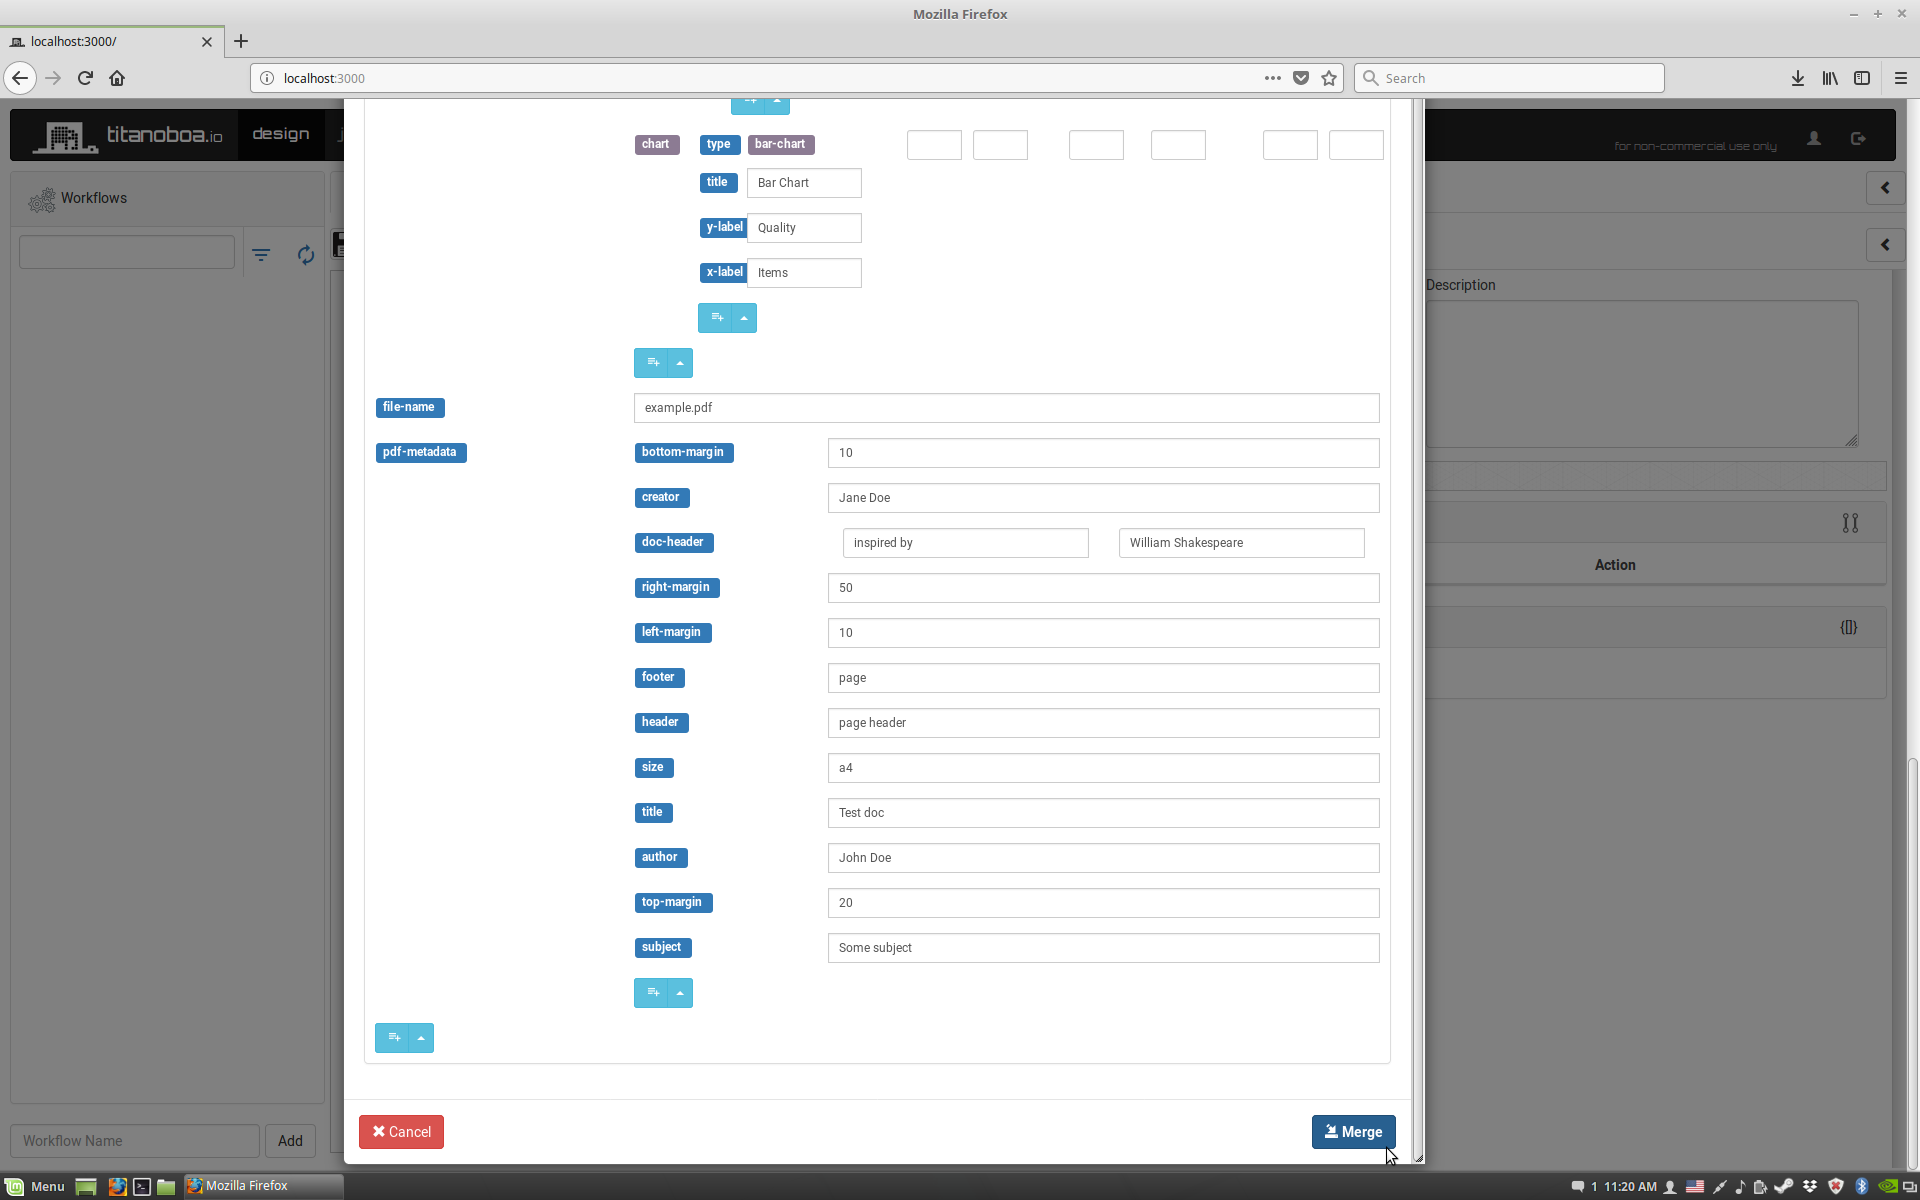
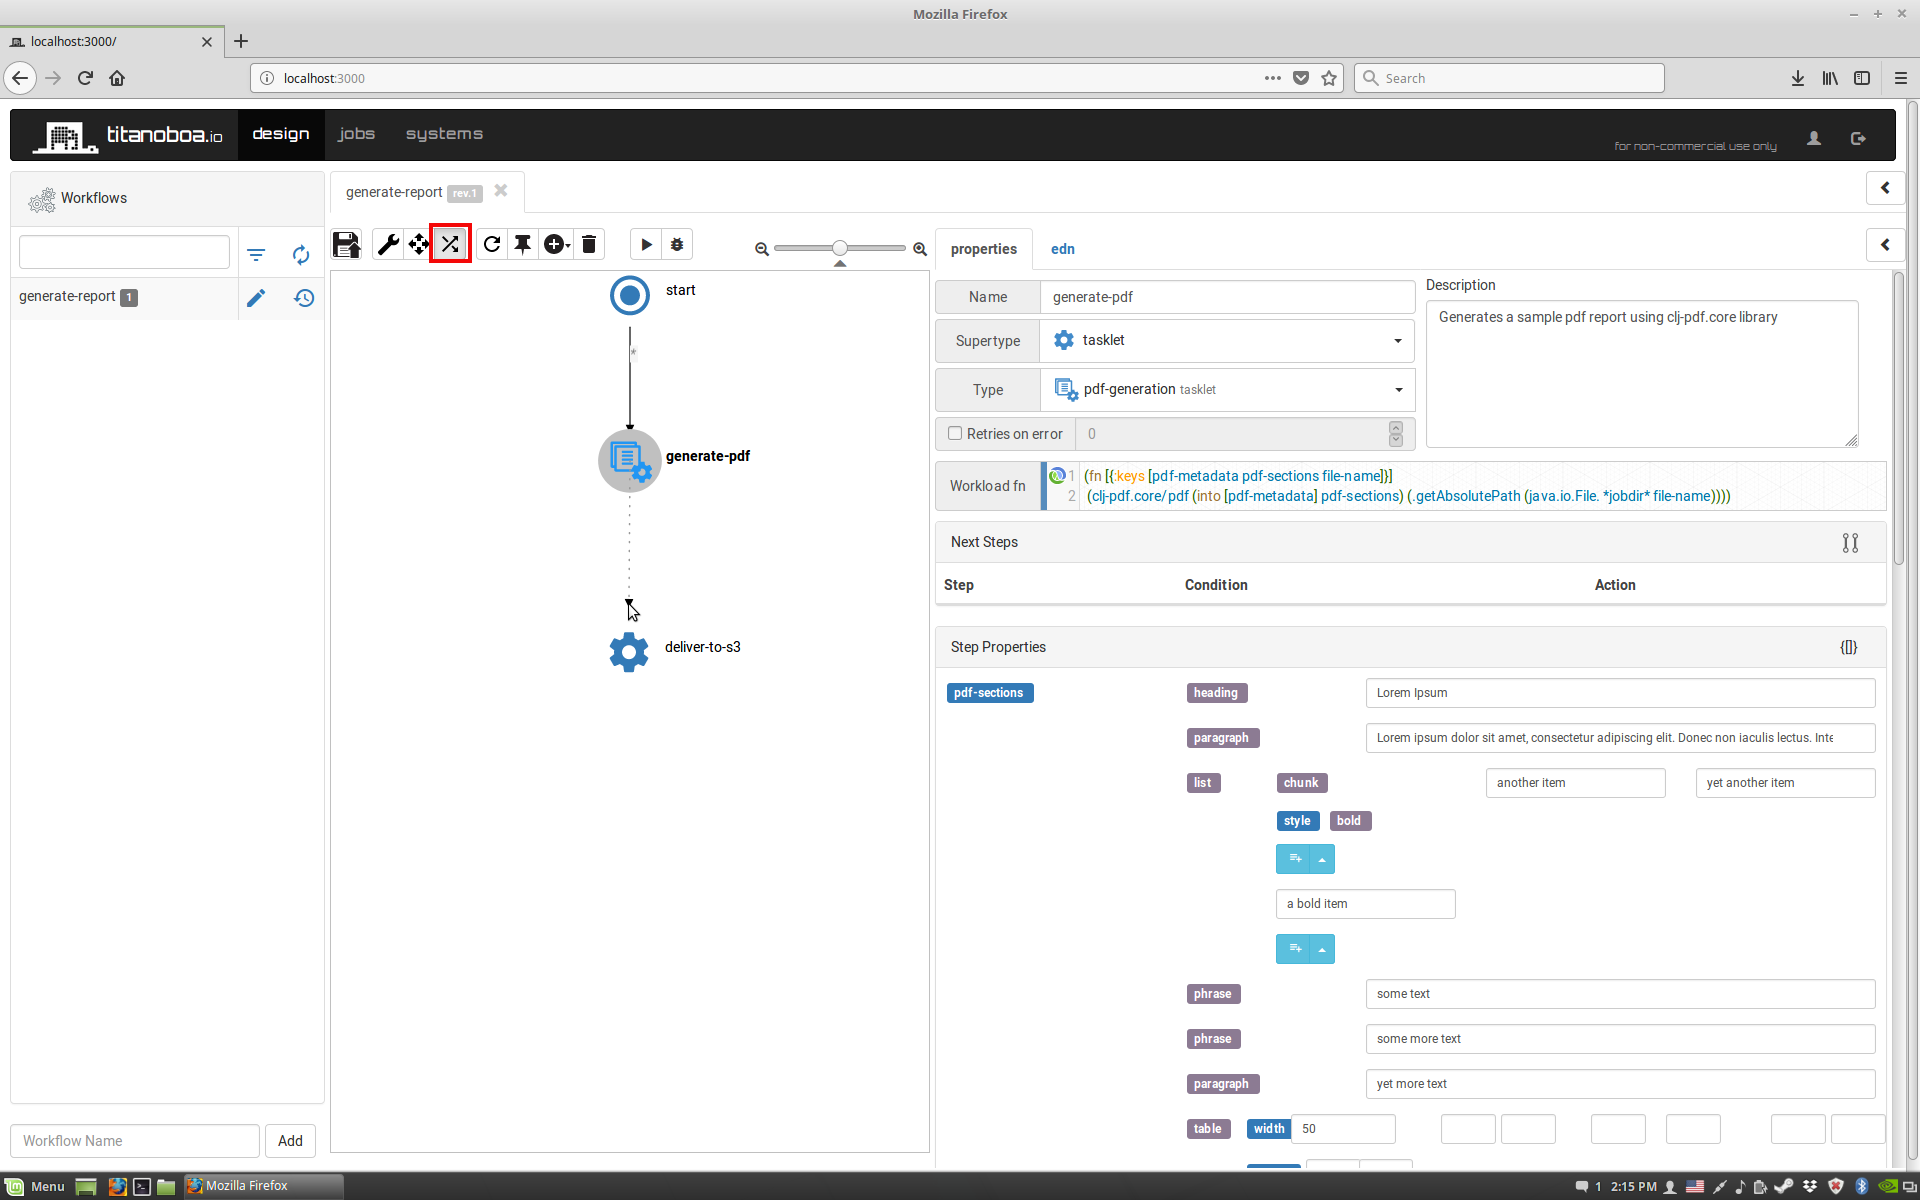
You will see the new sample step properties in the right hand panel.
You can now also edit the step's name and description. Whenever you wish you can also save the current version (under a new revision) of the workflow by clicking the save button:

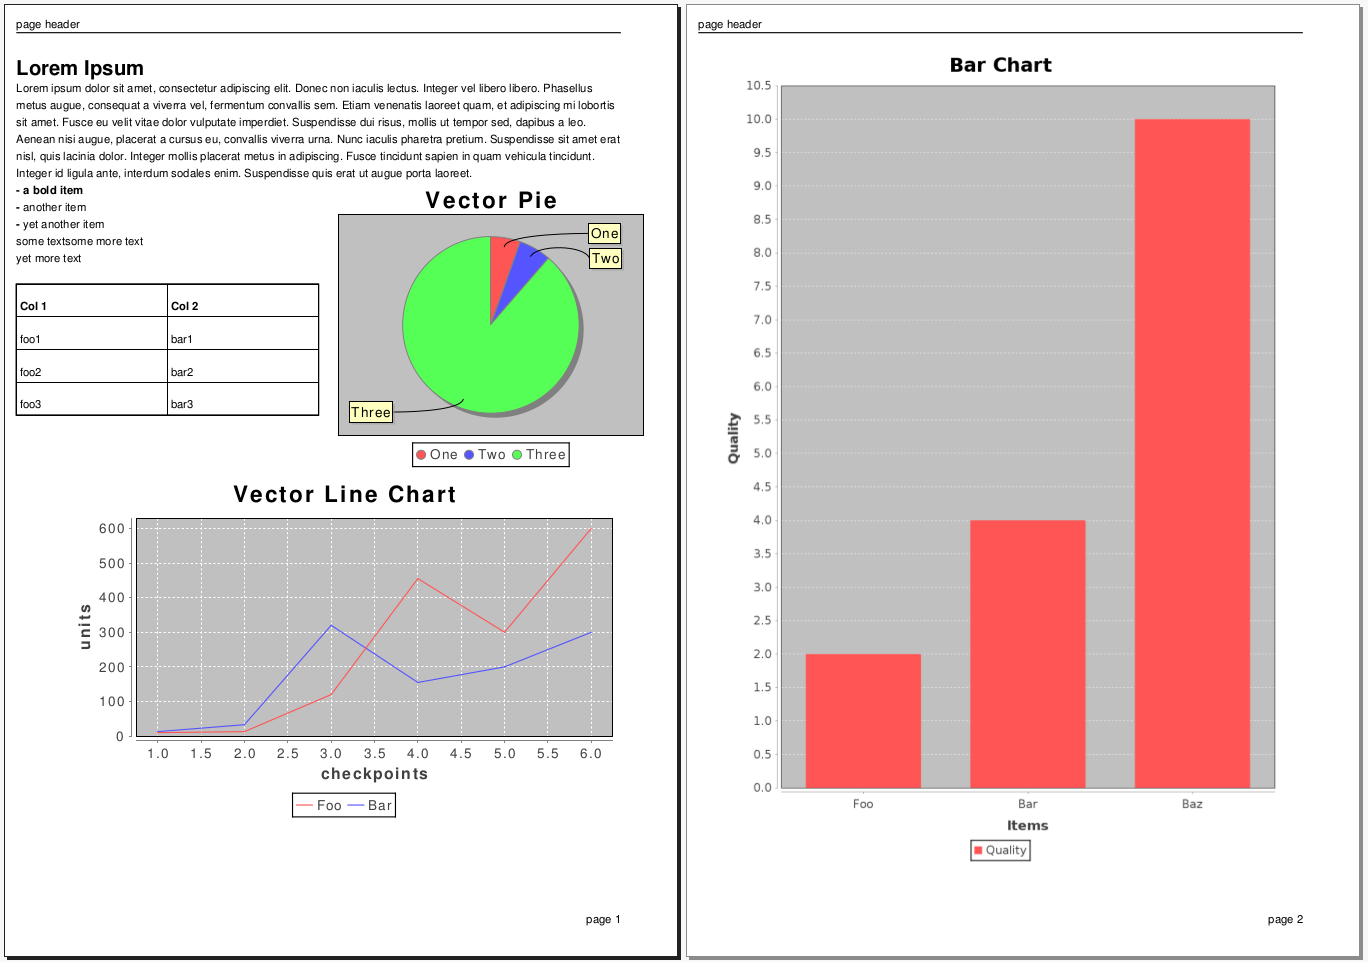
Since this particular properties contain a specification of a sample pdf report, they are quite complex. You can view and change them using the properties editor in the step properties panel and you can expand it to get the best view:
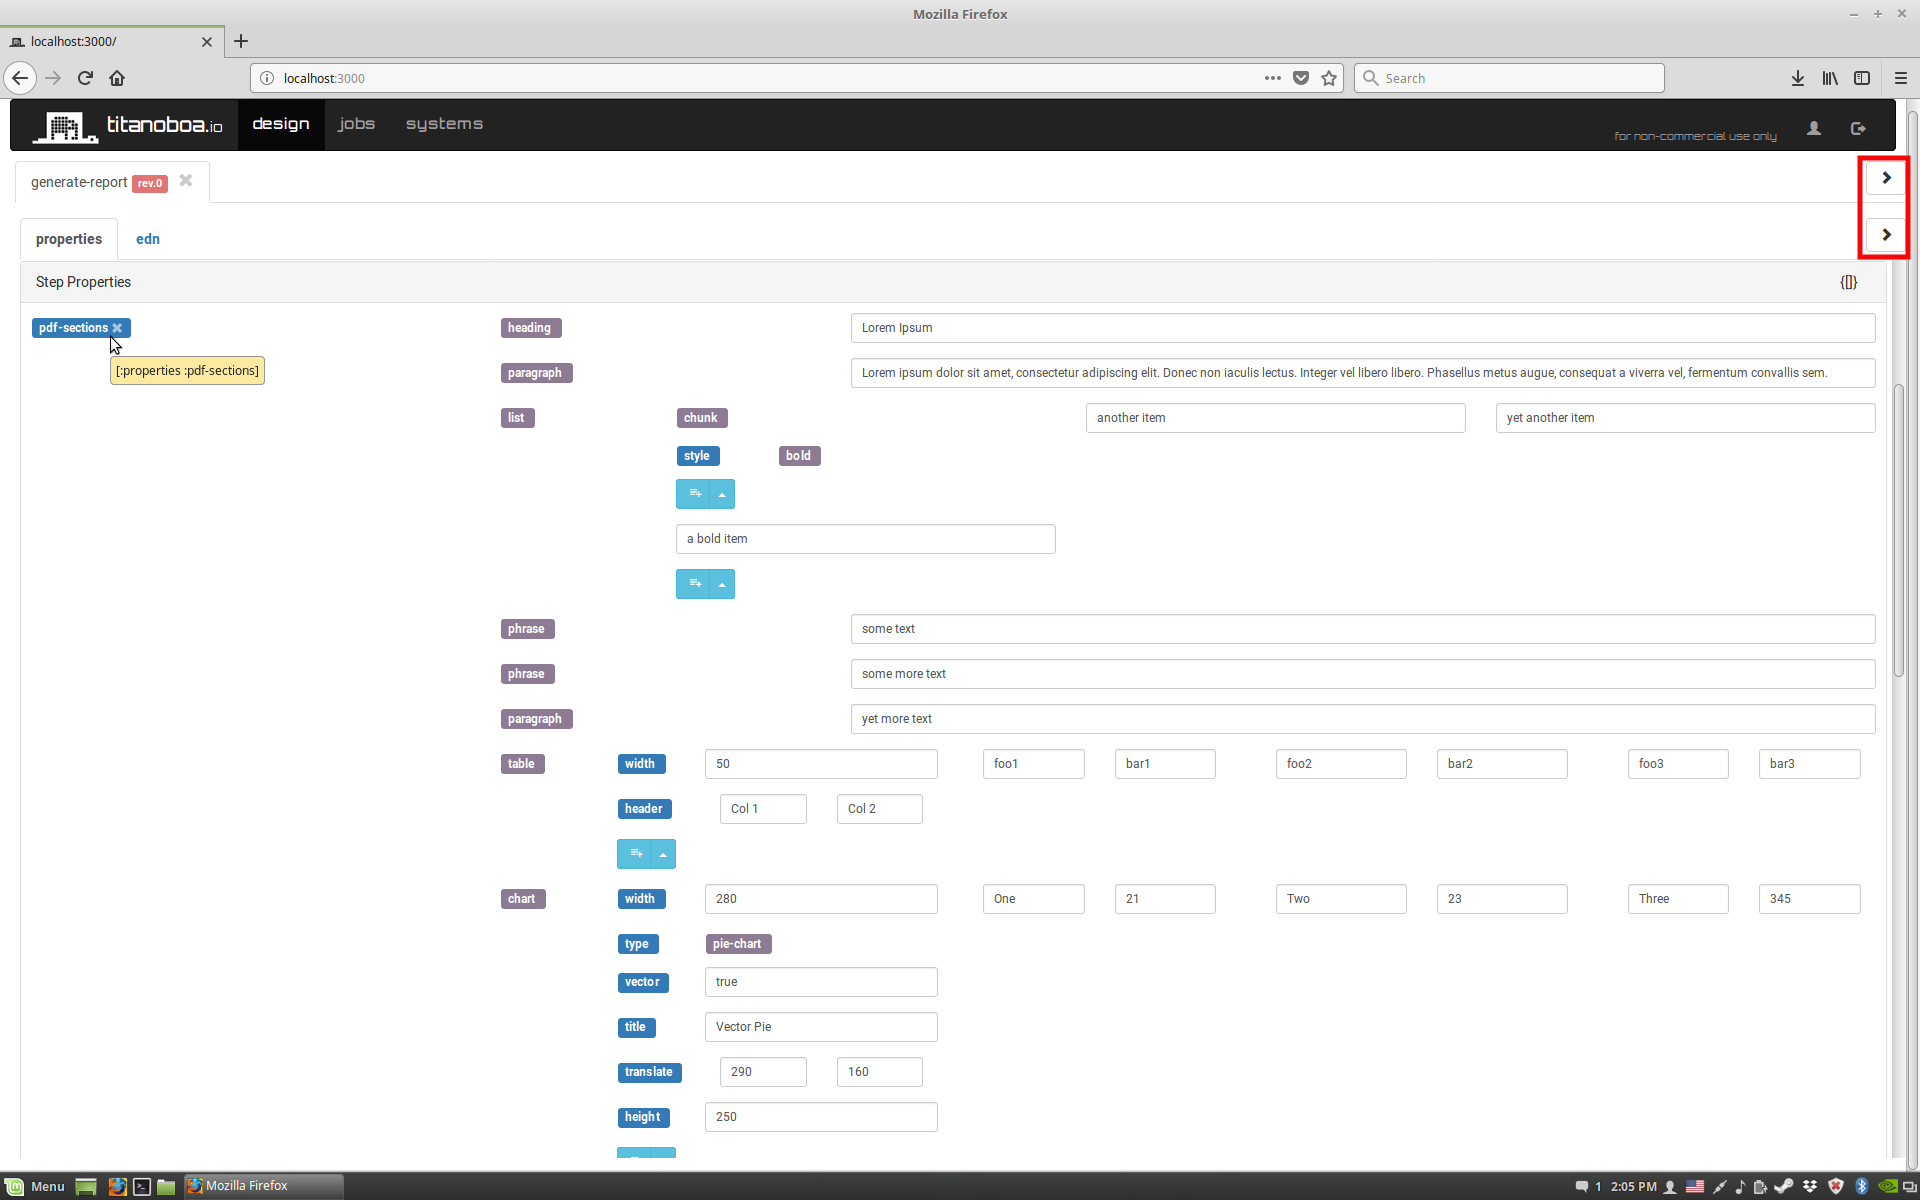
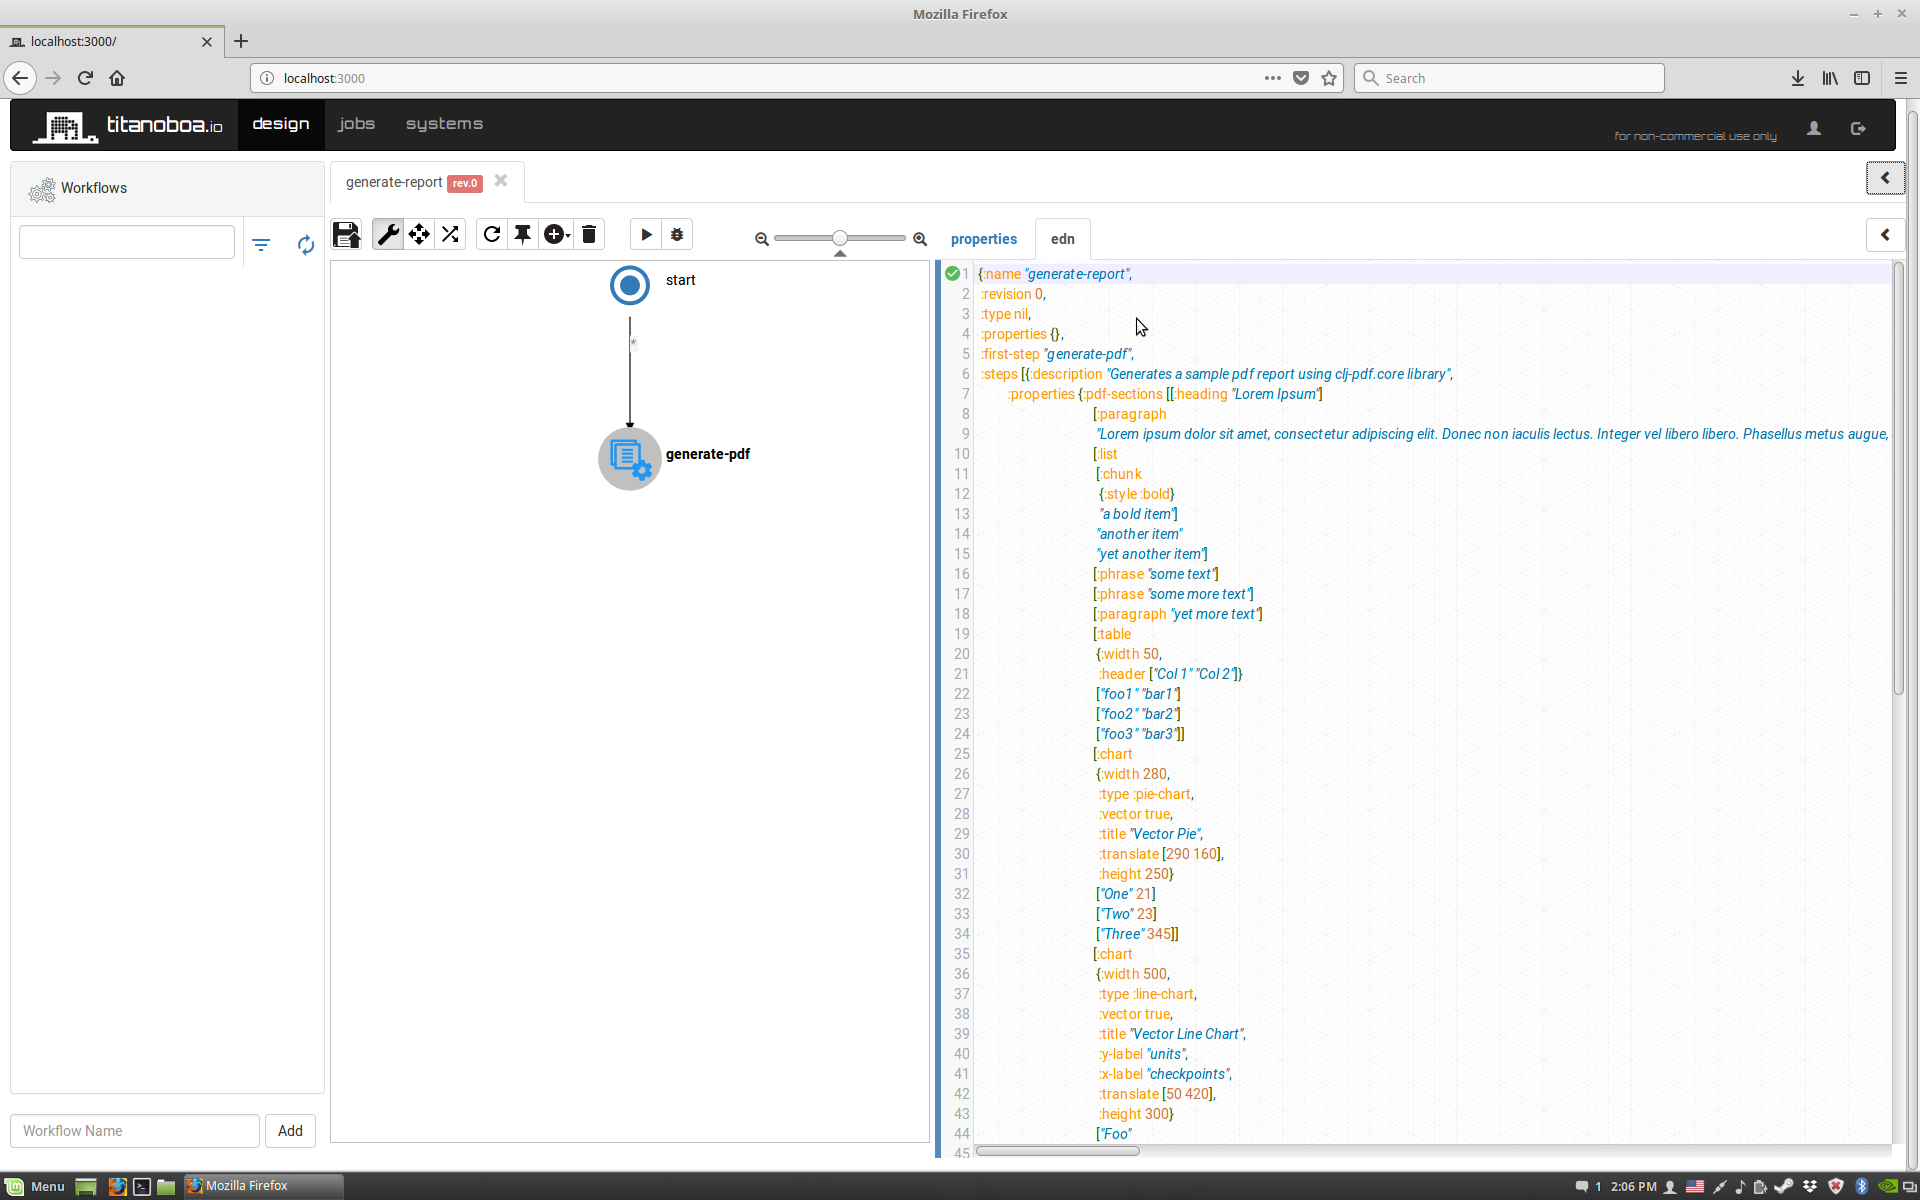
Alternatively you can just view the underlying EDN data in the EDN panel and edit it there directly:
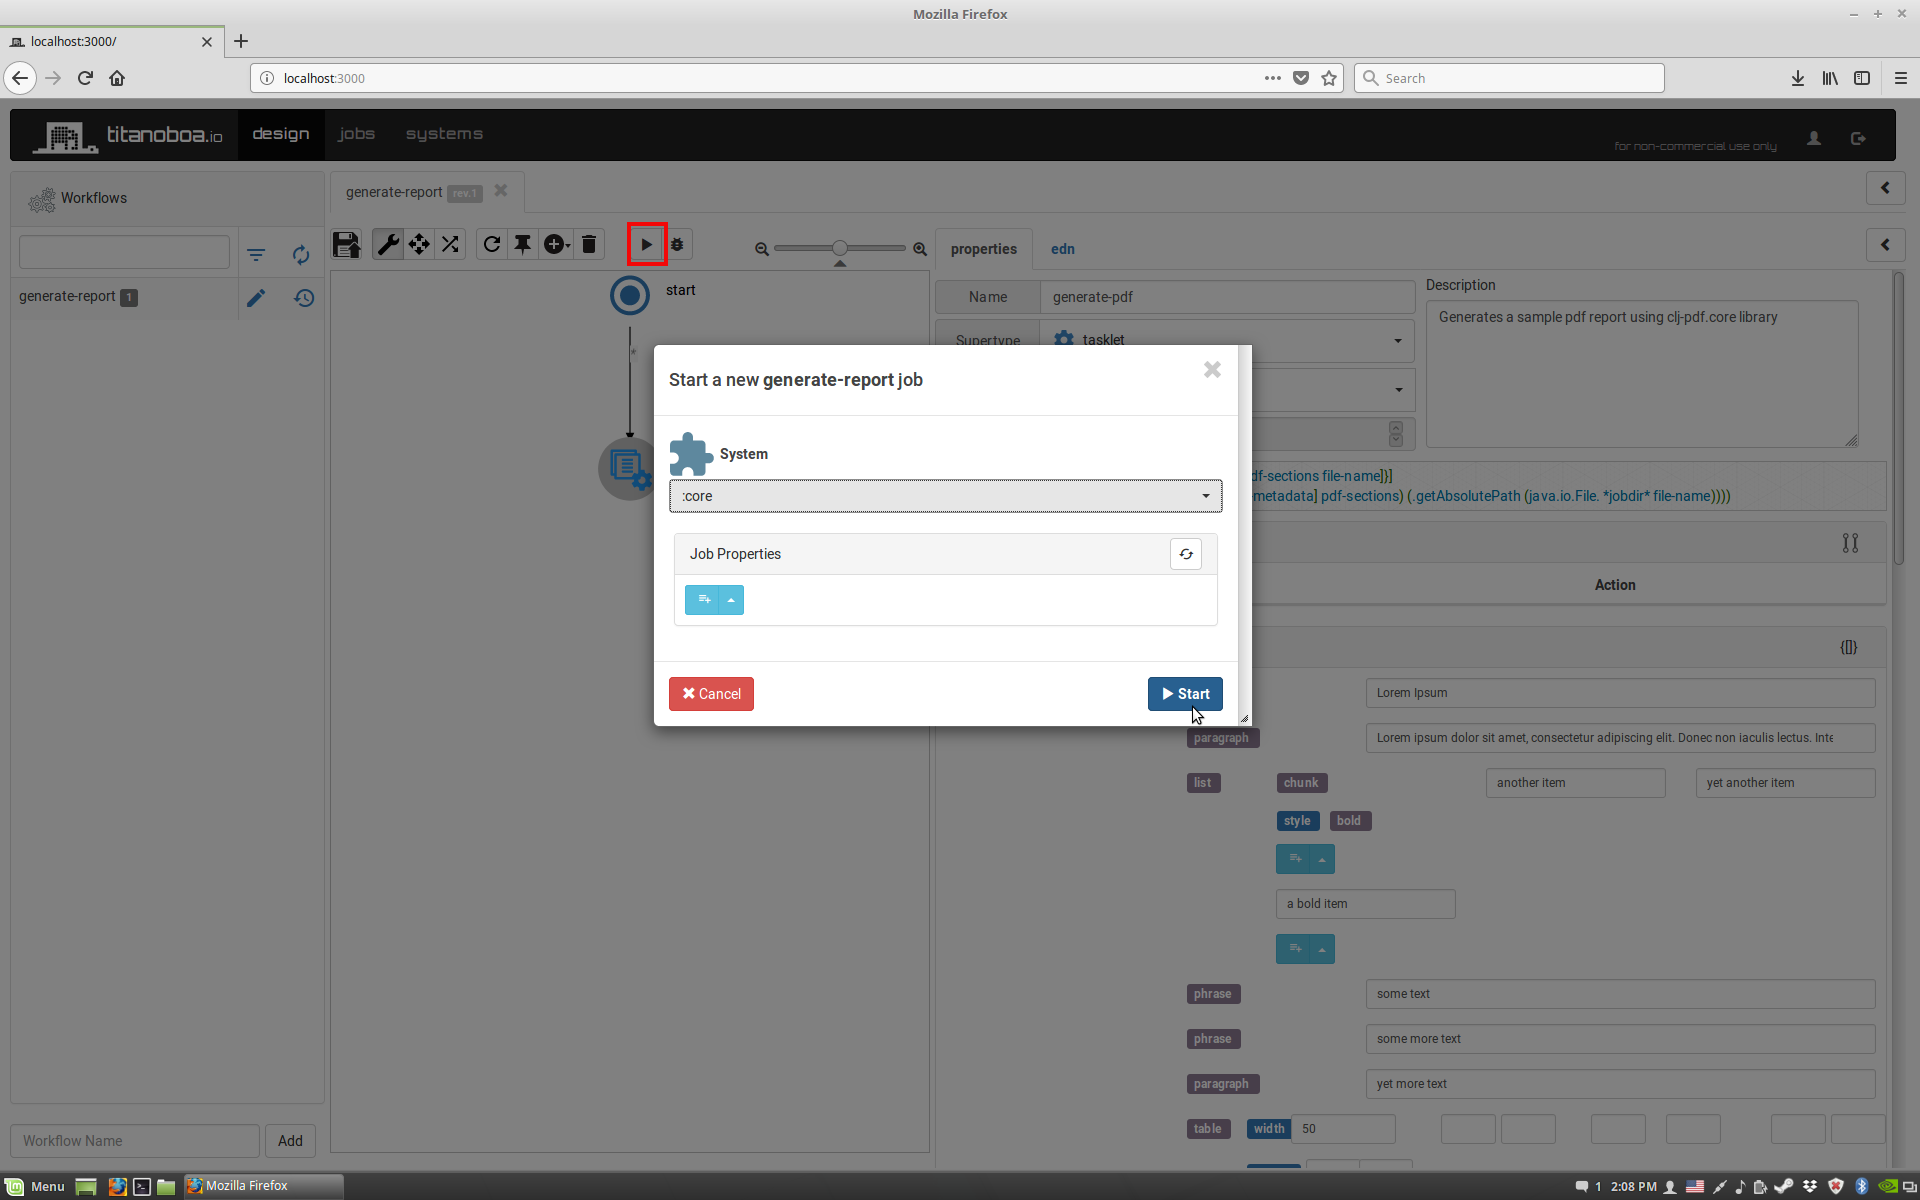
- Running the workflow stub - testing the first step You can now try to run this one-step-workflow by clicking the "run" button. A dialog window opens in which you can further add/change job properties (currently there are none) and pick a core system that will run the job.
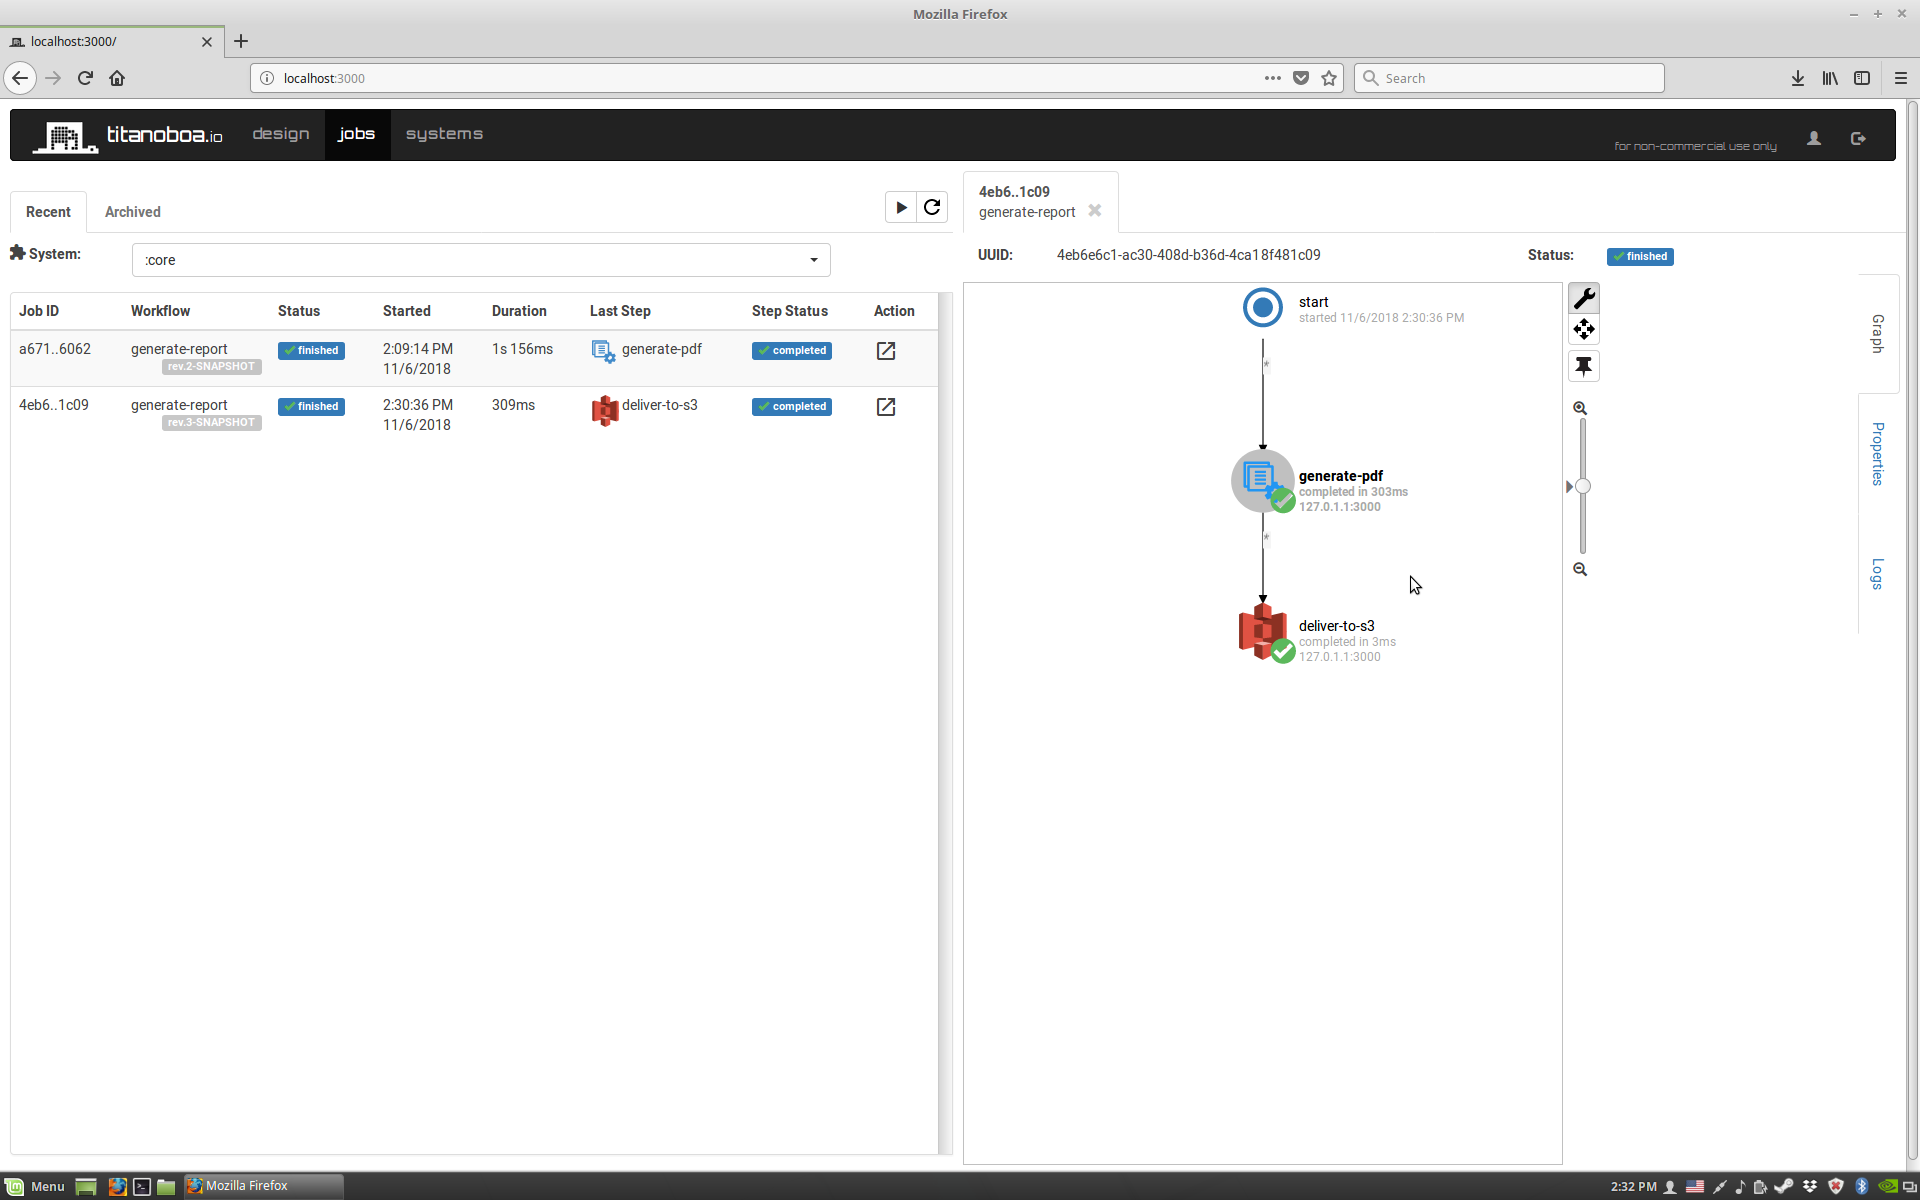
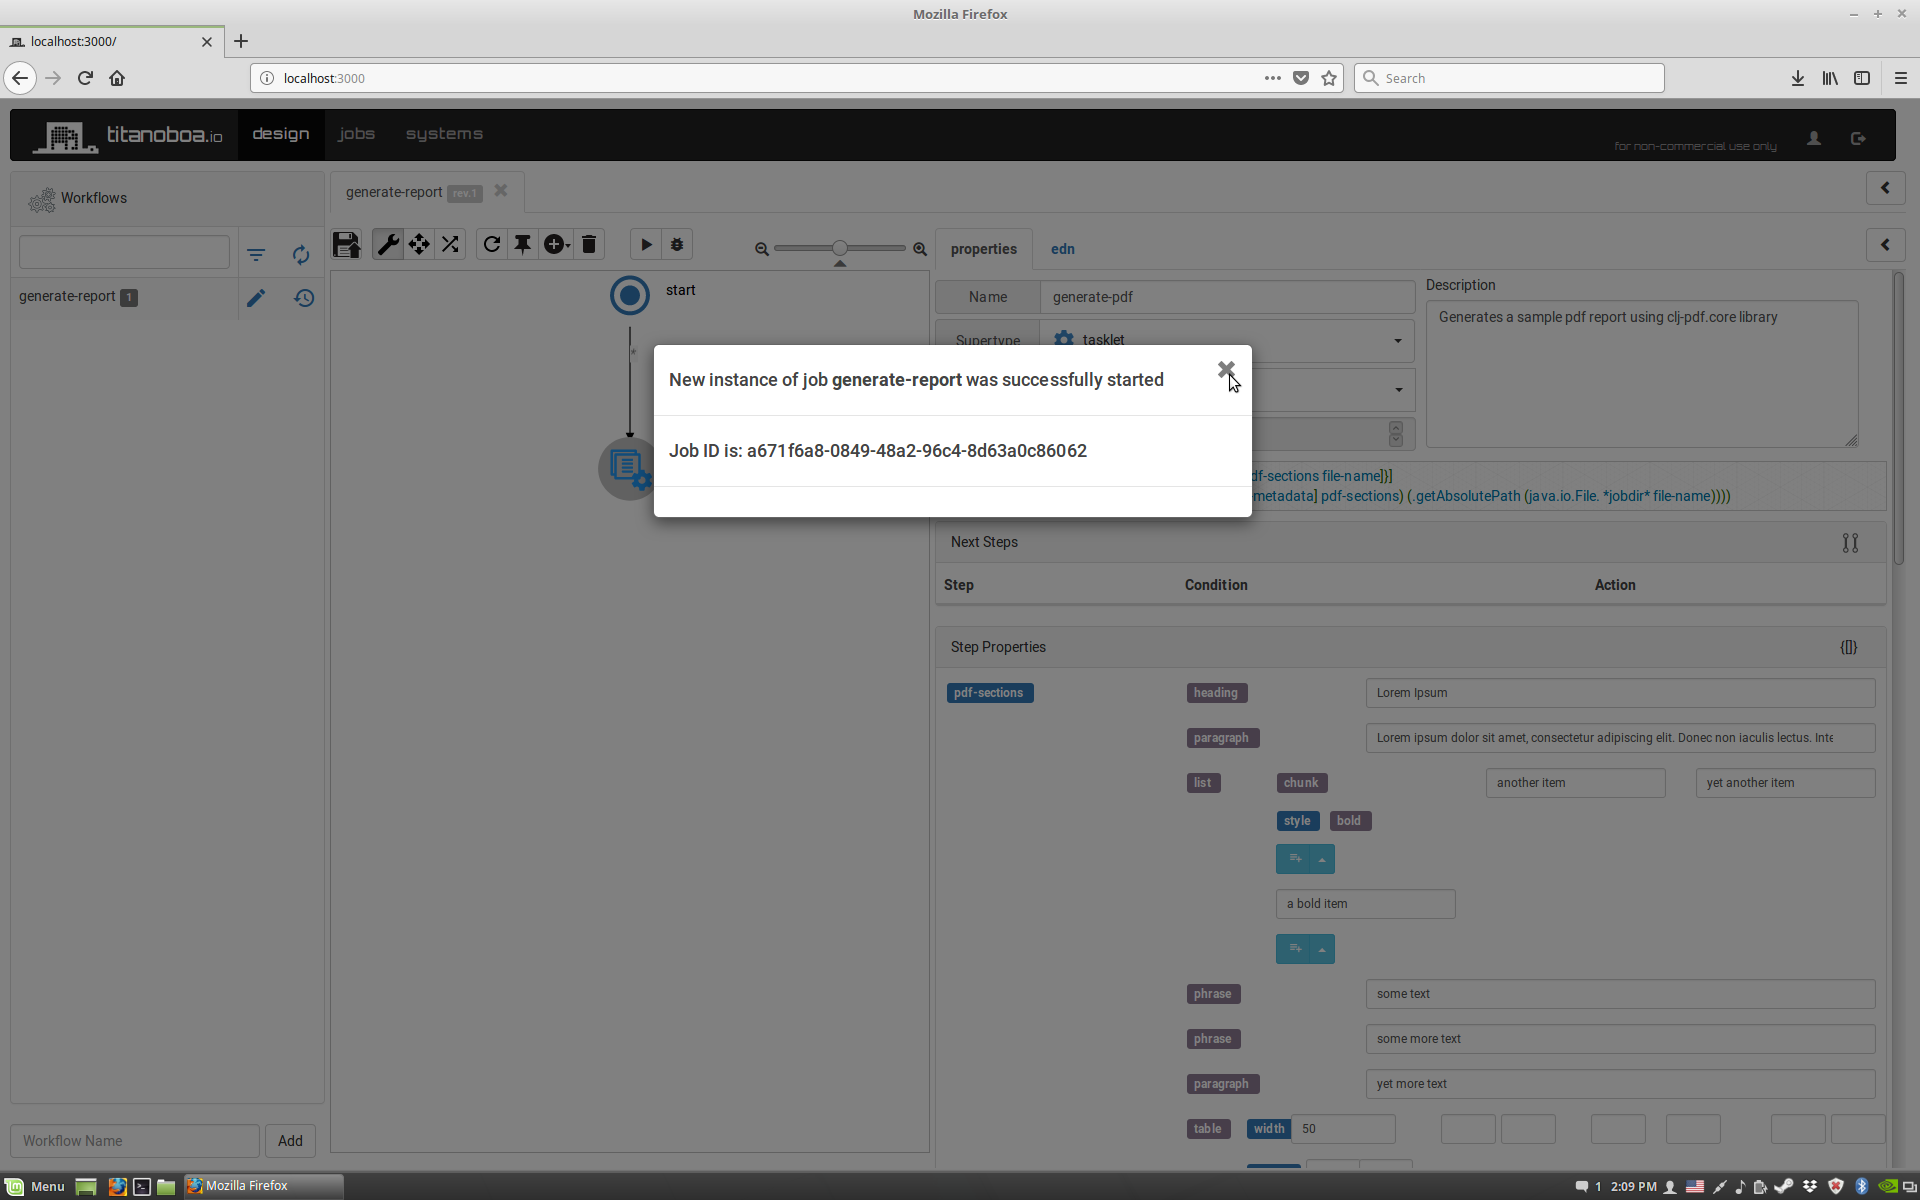
Once you start it, the new job's id will pop up:
You can then switch into the jobs tab (on the top navigation bar) and see that the job was executed:
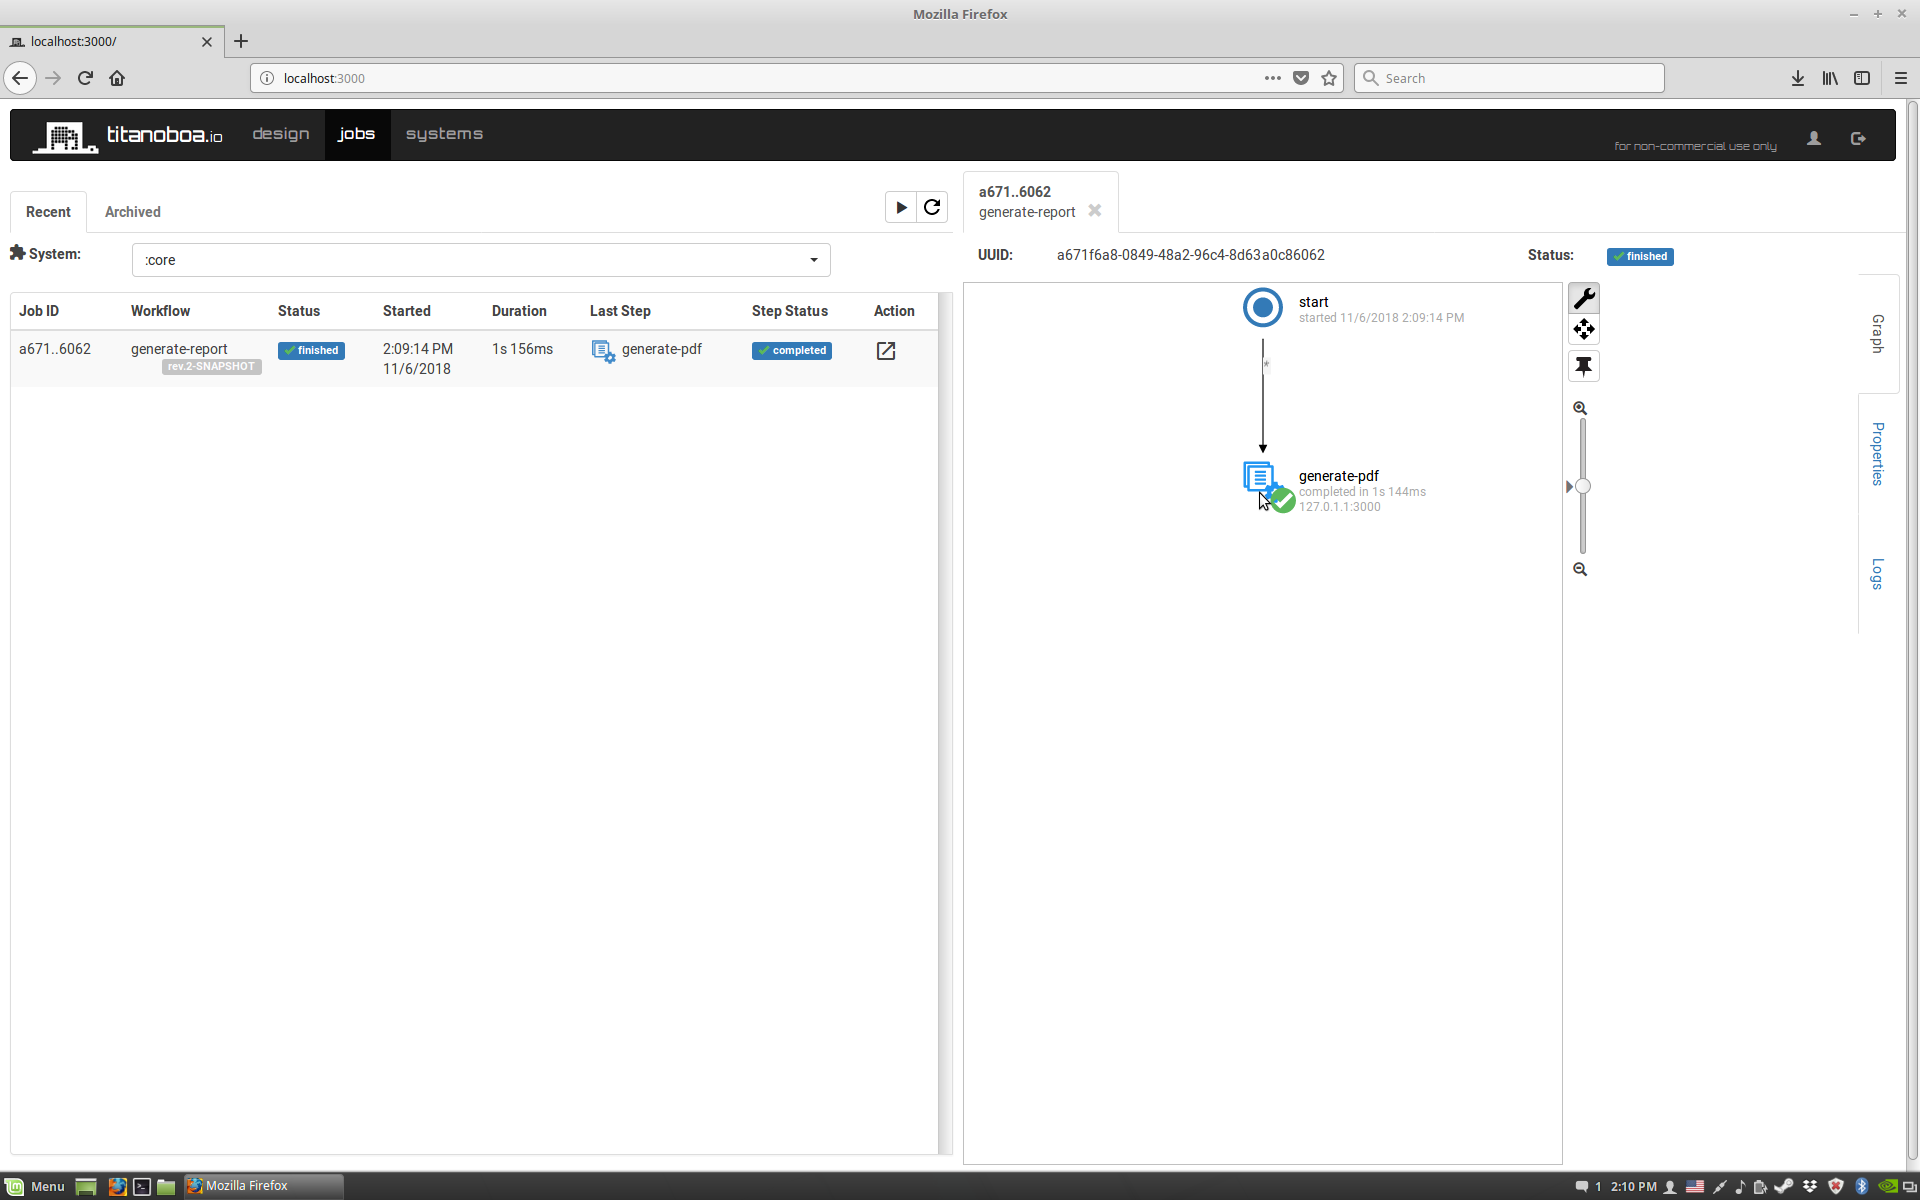
There's not much to see yet - apart from the fact that the job ran successfully. But if you'd go into the job folder (likely located in your titanoboa's folder), you would see a new pdf file being generated in the given job's folder.
- Adding S3 upload
Click on the "Add" button and enter a name for the new job: e.g. "upload-to-s3".
Then switch to the step connecting mode (highlighted) and connect the first step with the second:
You can also see how the connecting works here.
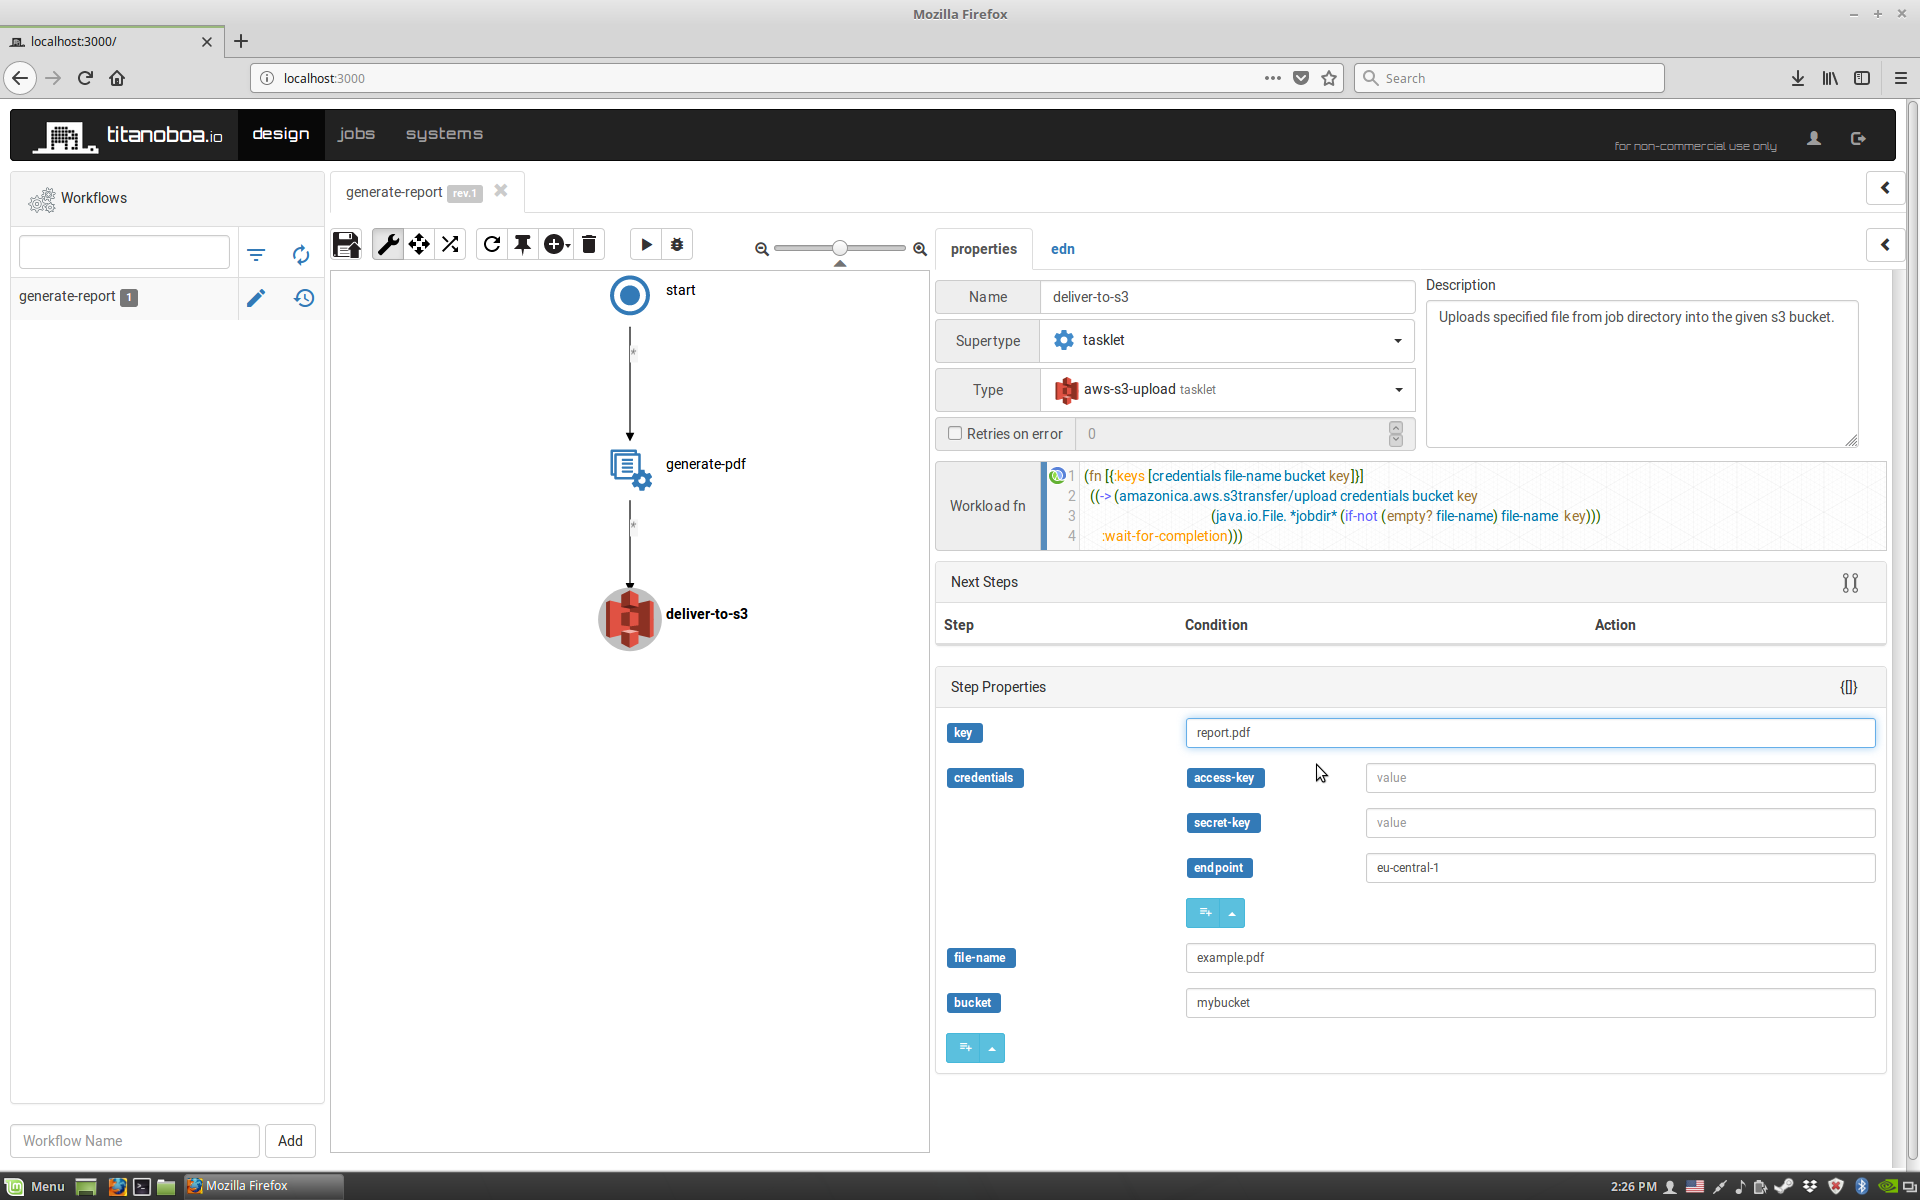
Switch back to properties editing mode and click on the new step, then change its type to "aws-s3-upload" and choose to merge everything pre-defined:
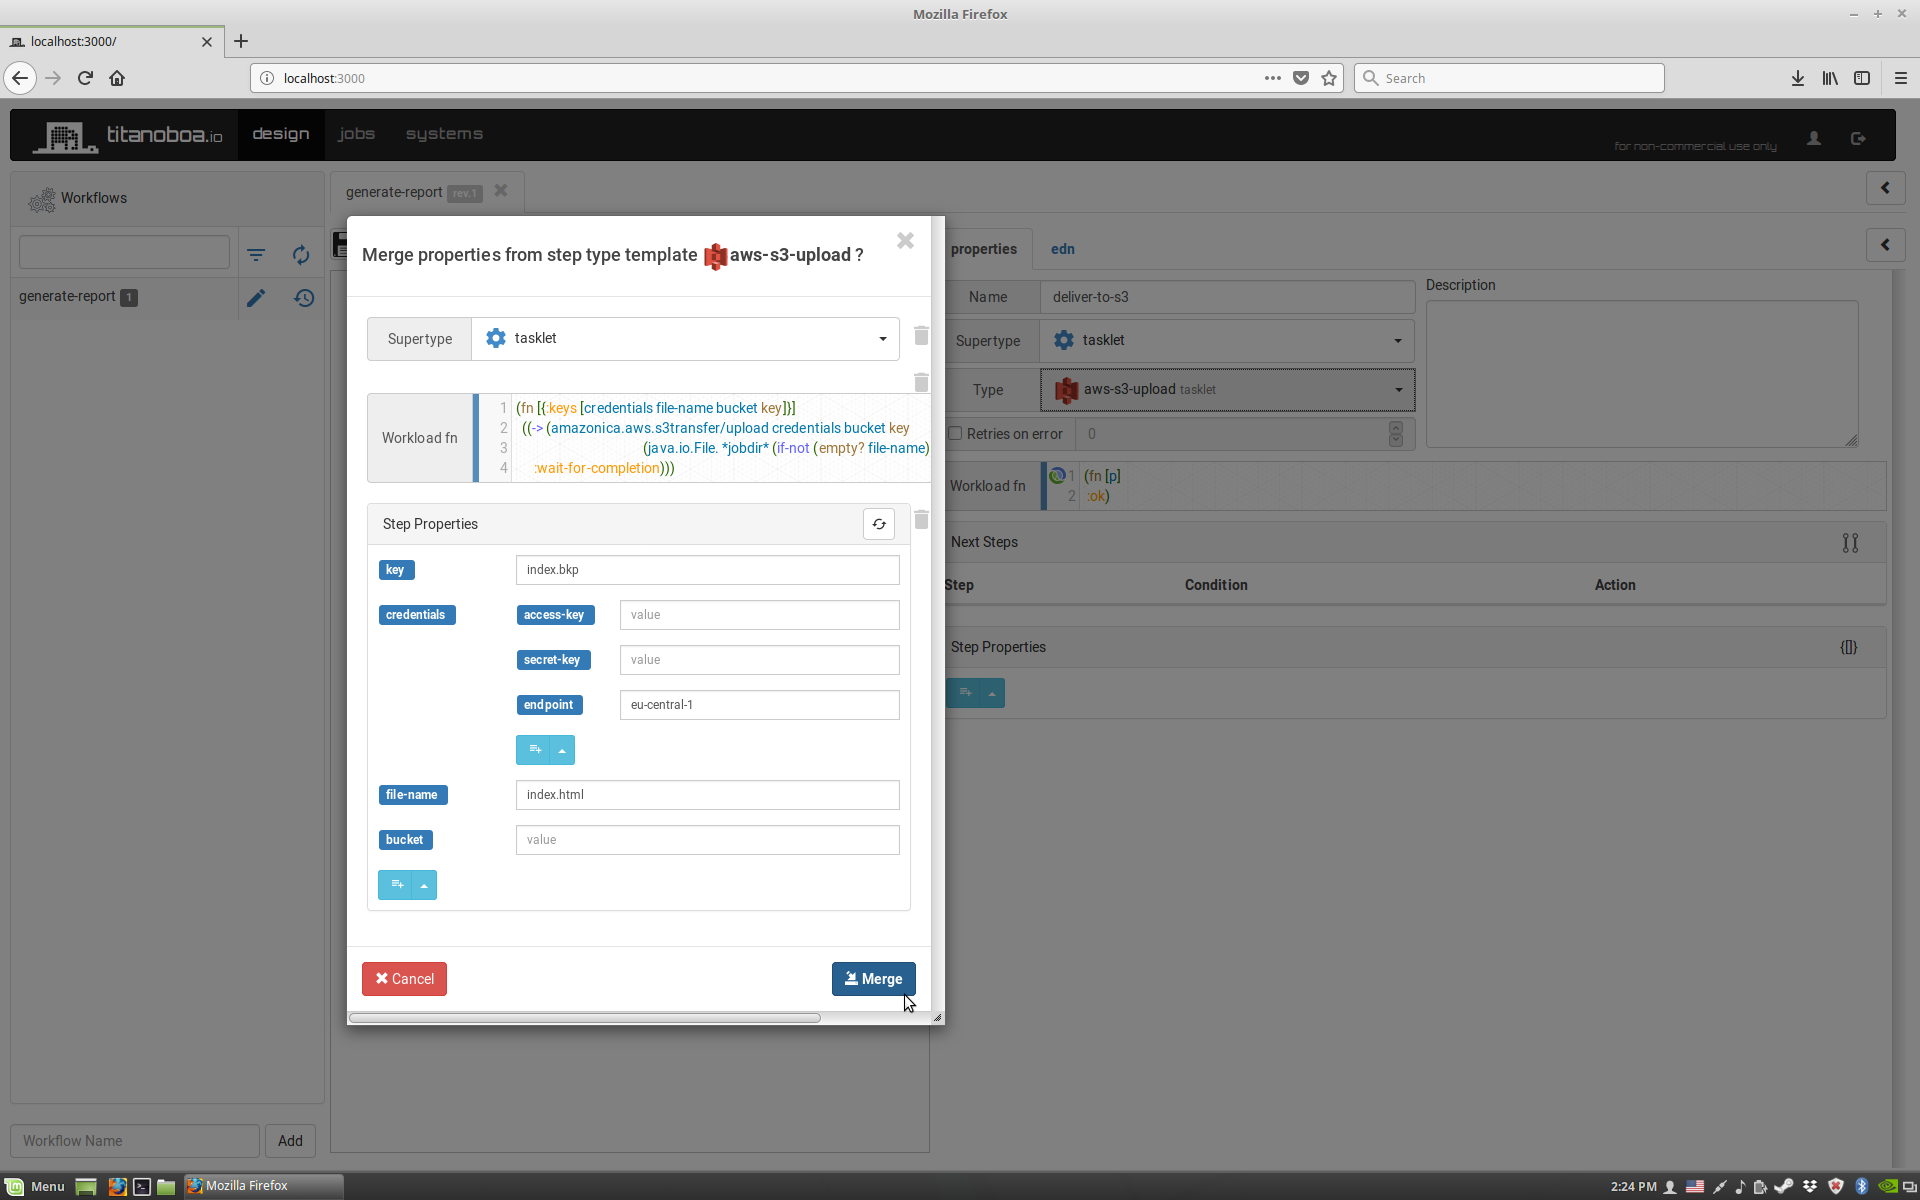
Update properties to match your S3 properties and credentials. Also the file name should match the name of pdf file we are generating (example.pdf).
You can then run the job again and check its status in jobs tab:
The pdf report should be now in your S3 bucket: