Getting Started with the EM Starter Kit
- Supported Hardware
- Supported Peripheral Modules
- Setting Up the ARC EM Starter Kit
- Compatibility Matrix for embARC Examples
The ARC EM Starter Kit is an FPGA-based solution for rapid software development, code porting, software debugging, and profiling, preloaded with images for the ARC EM Family of processors. It can be extended using Digilent® Peripheral Modules (Pmods™).
EMSK 1.1, 2.2 and 2.3 are supported.
For information on how to determine your EM Starter Kit version, see Setting Up the ARC EM Starter Kit.
The embARC Software includes drivers for the following Pmods for use with the embARC examples.
| PMOD Module Image | Description |
|---|---|
 |
Digilent® PmodWiFi - 802.11g WiFi Interface Adds IEEE 802.11G Wi-Fi communication support for embedded applications. |
 |
Digilent PmodRF2 - IEEE 802.15.4 RF Transceiver Adds RF support for applications at data rates of 250kbps (IEEE 802.15) or 625 kbps (Turbo mode). |
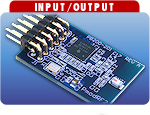
 |
PmodTMP - Thermometer/thermostat Provides temperature measurements and standalone thermostat capability from -55º C to +125º C. |
Note: Some Digilent distributors may still ship the older PmodWifi 802.11b module, which is not supported with embARC software (no driver provided). To receive the supported 802.11g module, be sure to order your Pmods from digilentinc.com.
Connect the PmodWiFi, PmodRF2, and PmodTMP2 modules to the EMSK as shown:
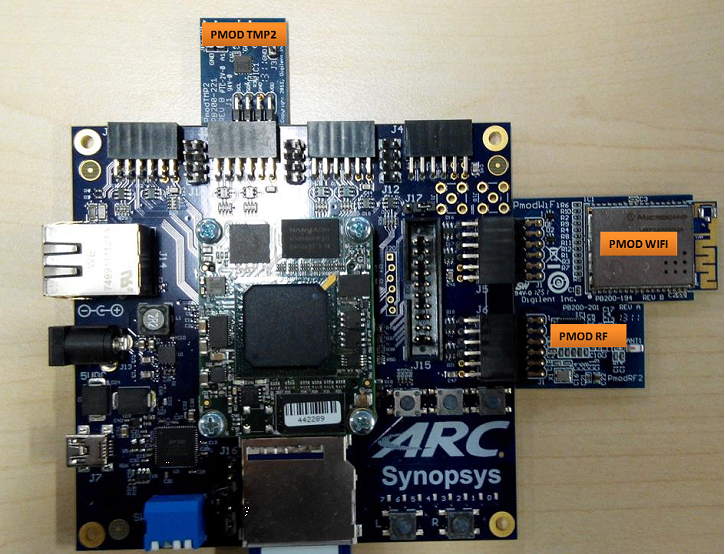
Pmod Connections
The EMSK has a bank of DIP switches labeled SW1 that you use for selecting a configuration.
To select ARC EM7D for EM Starter Kit 2.1 systems, set bit 2 to the ON position (down), and the others to OFF (up), as shown:
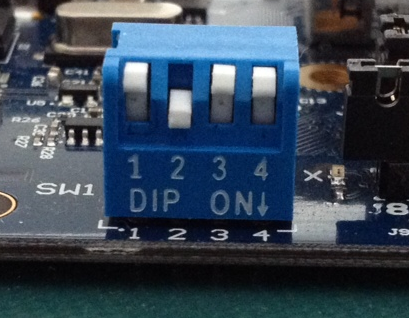
DIP Switch Settings for ARC EM7D
For exact DIP switch settings for various ARC EM Starter Kit versions, refer to EM Starter Kit section in provided embARC documentation. For complete ARC EM Starter Kit information, see the EM Starter Kit User's Guide provided with the ARC EM Starter Kit.
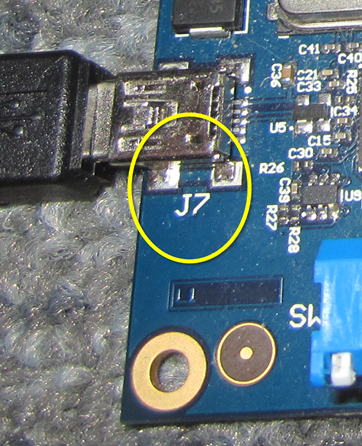
- Connect the USB cable to connector J7 on the EMSK and to a spare USB port on your host.
- If using the Ashling Opella-XD for ARC Debug Probe, connect it to the J15 connector.
- Connect the power supply to the board and to the power outlet.
- Install the Digilent Adept software from Digilent Adept 2 Website.
You can use any terminal emulation program to view UART output from the EMSK. The USB connection provides both the debug channel and RS232 transport. The PC chooses an available COM port when the USB cable is connected.
This section provides instructions for the PuTTY application; an open-source alternative is Tera Term.
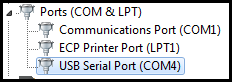
- Open the Windows Control Panel and select Device Manager.
- Expand Ports (COM and LPT) in the list and select USB Serial Port (COM x).
- Note the COM port number.
For example, in the following image, the EMSK is using COM4.
- If it is not already installed, download PuTTY from http://www.putty.org/.
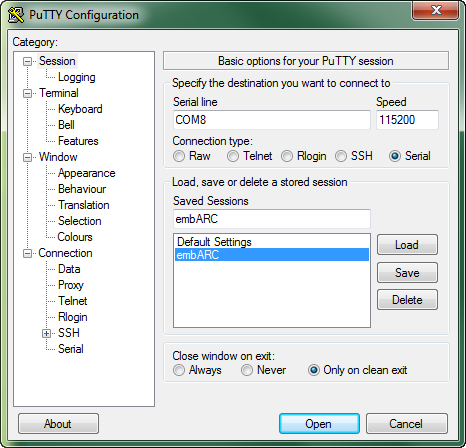
- Launch PuTTY. The PuTTY Configuration window appears.
- Select Serial under Connection type and enter the appropriate COM port string under Serial line.
- Enter
115200under Speed. - You can optionally save your settings so they can be easily retrieved every time PuTTY is launched.
- Click Open to open the console.
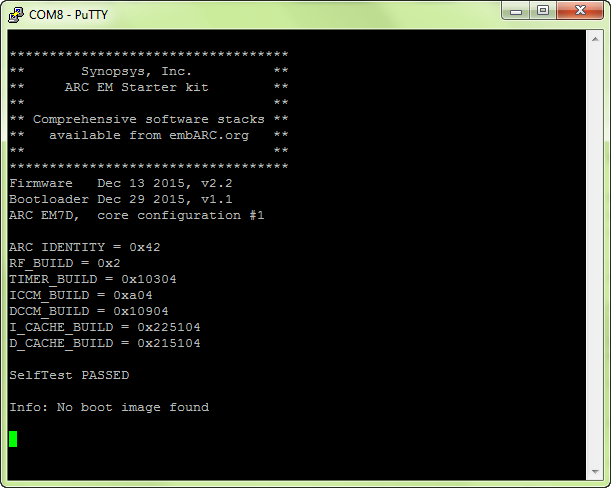
- Press the middle ("R"eset) button above the "ARC" label on the EMSK board to reset the board and run the self-test.
- Confirm that you can see the header and self-test message printed to the console.
Please see the examples applicable to EMSK in embARC Compatibility Matrix.