Getting Started with the HS Development Kit
- Supported Hardware
- Supported Peripheral Modules
- Setting Up the ARC HS Development Kit
- Compatibility Matrix for embARC Examples
The ARC HS Development Kit (HSDK) features an SoC from Synopsys featuring a quad-core ARC HS Processor (HS38x4) and integrated support for a rich set of peripherals including Ethernet, WiFi, Bluetooth, USB, I2C, SPI and UART. It is supported with tools and software necessary for Linux, RTOS and bare-metal applications development. Linux distributions can be built for the platform using standard build systems (buildroot, Yocto/OE, OpenWrt) while RTOS & bare metal applications can be developed using the embARC Open Software Platform (OSP). I/O functionality can be extended using Digilent® Peripheral Modules (Pmods™), as well as Arduino Shields and mikrobus modules.
The embARC OSP software includes drivers for the following Pmods for use with the embARC examples.
| PMOD Module Image | Description |
|---|---|
 |
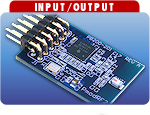
Digilent® PmodWiFi - 802.11g WiFi Interface Adds IEEE 802.11G Wi-Fi communication support for embedded applications. |
 |
Digilent PmodRF2 - IEEE 802.15.4 RF Transceiver Adds RF support for applications at data rates of 250kbps (IEEE 802.15) or 625 kbps (Turbo mode). |
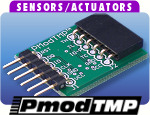 |
PmodTMP - Thermometer/thermostat Provides temperature measurements and standalone thermostat capability from -55º C to +125º C. |
Note: Some Digilent distributors may still ship the older PmodWifi 802.11b module, which is not supported with embARC software (no driver provided). To receive the supported 802.11g module, be sure to order your Pmods from digilentinc.com.
The below figures show the placement of various components on HSDK.
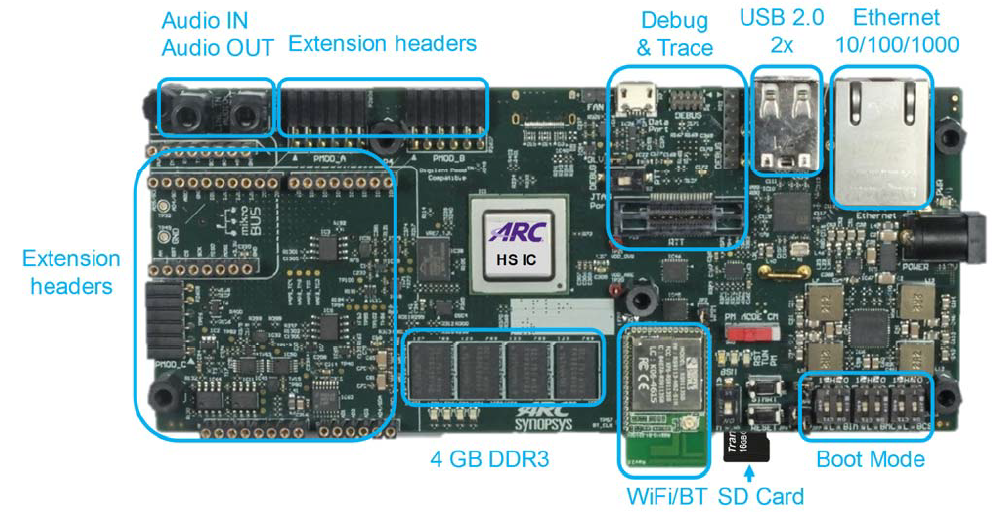
ARC HSDK components - Top

ARC HSDK components - Bottom
Connect the PmodWiFi and PmodRF2 as shown below.
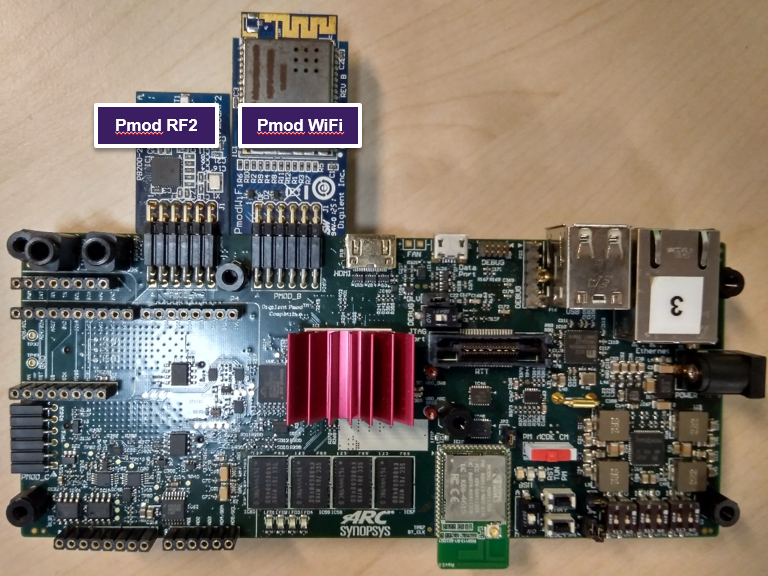
ARC HSDK Pmod Connections
The HSDK boot switches are shown below. There are multiple configurations, such as boot mirror, boot image location, boot start mode, core selection and multi-core mode. For example, the configurations in the following picture are boot image location: 0x1 (internal ROM), boot start mode: generate cpu_start autonomously after reset, core selection: 0x0 (HS38X4_0), and multi-core mode: 0x0 (signal-core). For complete HSDK information, see the HS Development Kit User's Guide provided with the HSDK.
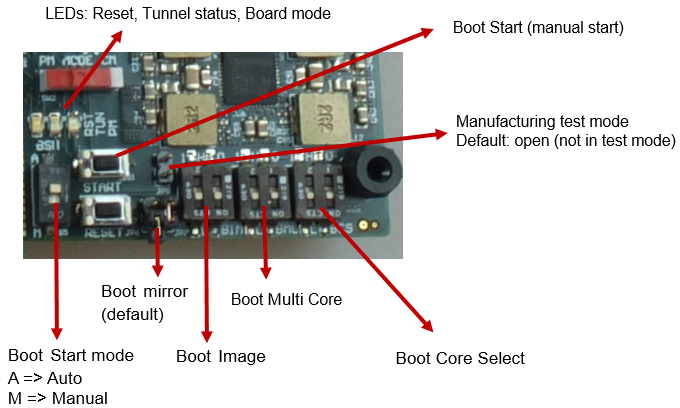
ARC HSDK DIP Switch Settings
- Connect USB cable to the HSDK mini-USB connector and to the USB port on your development host. If using the Ashling Opella-XD for ARC Debug Probe or Digilent JTAG-HS2 Probe, connect it to the right connector.
- Connect the power supply to the board and to the power outlet.
- Install the Digilent Adept software from Digilent Adept 2 Website.
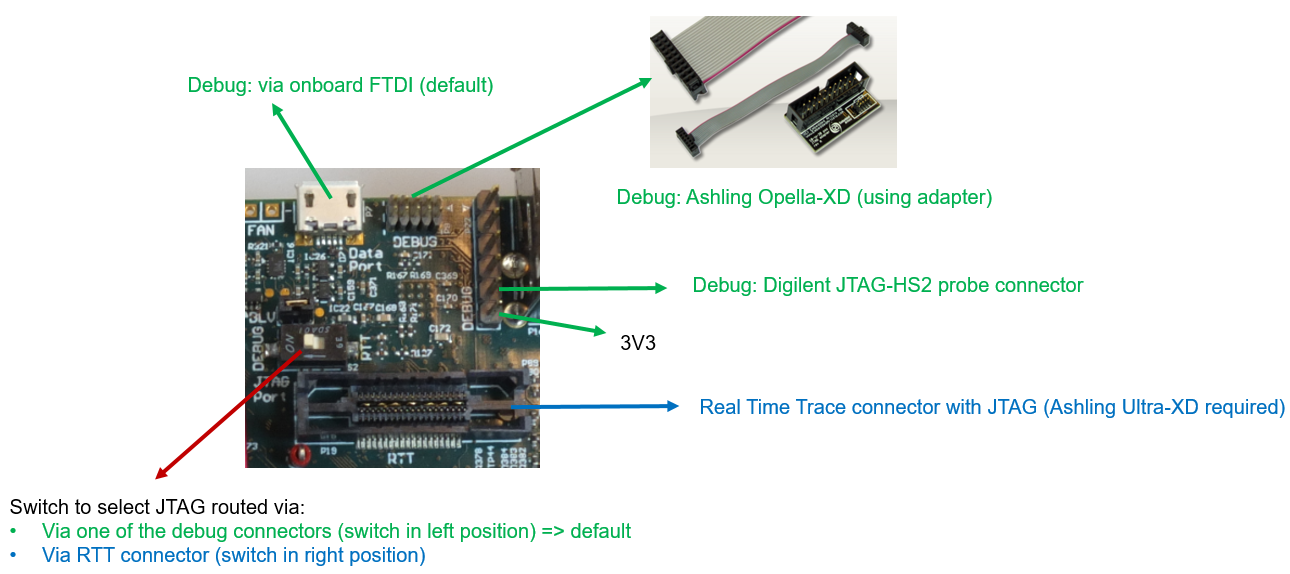
ARC HSDK Debug Interface
You can use any terminal emulation program to view UART output from the EMSK. The USB connection provides both the debug channel and RS232 transport. The PC chooses an available COM port when the USB cable is connected.
This section provides instructions for Tera Term. An alternative is PuTTY.
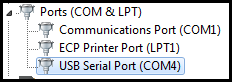
- Open the Windows Control Panel and select Device Manager.
- Expand Ports (COM and LPT) in the list and select USB Serial Port (COM x).
- Note the COM port number.
For example, in the following image, the HSDK is using COM4.
- If it is not already installed, download Tera Term.
- Launch Tera Term. Select Serial in Setup. Choose the appropriate COM port string in Port and
115200in Baud rate. Click OK to set the port configuration. - Enter
115200under Speed. - You can optionally save your settings so they can be easily retrieved.
- Select New connection in File and choose the appropriate COM in Serial.

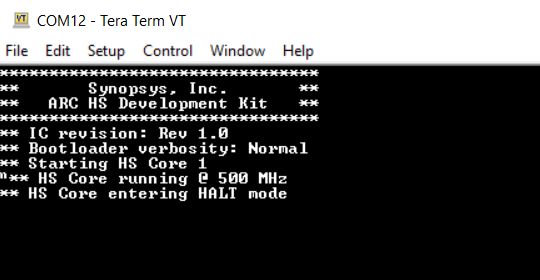
- Press the "RESET" button on the HSDK board to reset the board.
- Confirm that you can see the header and self-test message printed to the console.
Please see the examples applicable to HSDK in embARC Compatibility Matrix.